Procreate's brush engine is a powerful tool for digital artists, offering an expansive range of possibilities for creative expression. While the default brushes provide a solid foundation, understanding and manipulating their underlying properties can unlock a new level of artistic control and push your creativity into uncharted territories. This tutorial delves into the core settings that govern brush behavior, empowering you to tailor existing brushes or craft entirely new ones to perfectly suit your artistic vision. Whether you’re aiming for intricate detail, expressive textures, or unique blending effects, mastering these brush properties will transform your Procreate workflow.
The Foundation of Brush Editing: The Brush Studio
The heart of Procreate brush customization lies within the Brush Studio. Accessible by tapping on any brush in the Brush Library and then selecting "Edit," this is where all the intricate settings that define a brush's character reside. Navigating the Brush Studio involves understanding the various category icons presented on the left-hand side. Each category offers a gateway to a specific set of parameters that influence how your brush interacts with the canvas. Before embarking on any modifications, it is a highly recommended practice to create a backup of your chosen brush. This can be done by opening the Brush Panel, swiping left on the brush thumbnail, and selecting "Duplicate." This simple step ensures that you can always revert to the original settings if your experiments lead to unexpected or undesirable results.
Sculpting the Stroke: Size Limits and Properties
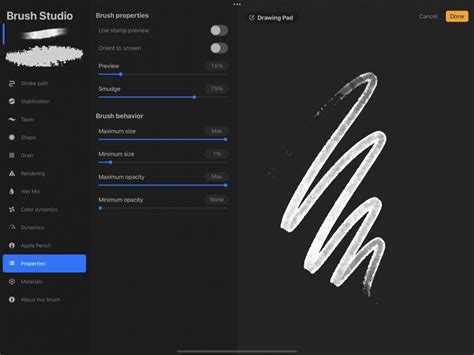
One of the most fundamental aspects of a brush's behavior is its size. The ability to control the minimum and maximum size a brush can attain is crucial for a variety of artistic applications. For instance, when painting a background texture, the perceived grain of the texture can change dramatically with scale. Similarly, a liner brush might need to be adjusted to produce finer, more detailed lines.
To access these settings, navigate to the "Properties" tab within the Brush Studio. Here, you will find "Size Limits," which allow you to define the range within which your brush’s size can be adjusted using the slider on the left side of your Procreate interface. Increasing the maximum size allows for broader strokes, ideal for filling large areas, while decreasing the minimum size enables the creation of incredibly fine details. Remember, if you find yourself dissatisfied with the changes made to a brush's size limits, your duplicated backup will be invaluable for restoring the original behavior.
Achieving Smoothness: The Power of StreamLine
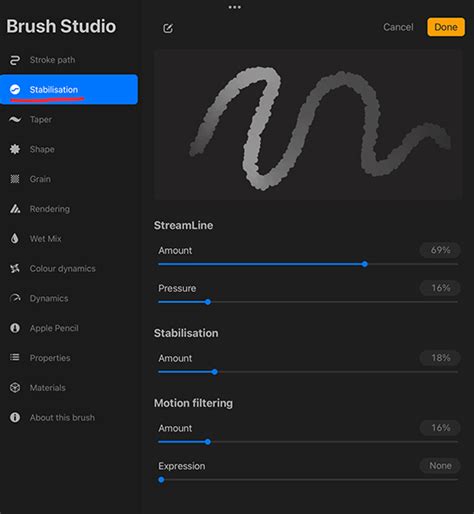
Precision drawing and the creation of clean, flowing lines often require mitigating the natural wobble that can occur with hand-drawn strokes. This is where the "StreamLine" settings come into play. Found within the "Stabilization" menu in the Brush Studio, StreamLine actively corrects curves and reduces jitter, resulting in smoother, more deliberate strokes.
The intensity of this correction is controlled by a slider. Increasing the StreamLine value will result in a more pronounced smoothing effect, making your lines appear more fluid and polished. Conversely, reducing StreamLine offers less correction, allowing for more of your natural hand movement to be expressed in the stroke. For those who prefer a more organic, less controlled feel, StreamLine can even be removed entirely. This feature is particularly beneficial for technical illustration, calligraphy, or any situation where crisp, unwavering lines are paramount.
Defining the Canvas: Shape and Grain Sources
The "Shape" and "Grain" settings are the building blocks that define the visual character of your brush. The Shape acts as the "container" for the Grain, determining the fundamental form or tip of your brush. Think of it as the physical tip of a pen or the aperture of a stamp. The Grain, on the other hand, provides the texture that is stamped repeatedly within that shape.
You can access and edit both Shape and Grain images under their respective tabs in the Brush Studio. When creating or editing these images, it's important to understand how Procreate interprets grayscale values: 100% black will render as transparent, while 100% white will be completely opaque. This principle allows for the creation of complex textures and intricate brush tip designs. For example, a soft, round brush tip might be achieved with a simple white circle on a black background for the Shape, while a rough, textured effect could be created by using a scanned paper texture as the Grain. If you've experimented with a new shape or grain and aren't happy with the result, and you've forgotten to create a backup, the "Reset Brush" option can restore the brush to its default state.
Responding to Touch: Pressure Curve and Apple Pencil
The way a brush responds to varying levels of pressure is a critical factor in creating dynamic and expressive artwork. The "Pressure Curve" allows you to meticulously control this responsiveness, influencing properties like opacity, size, and flow based on how hard you press with your Apple Pencil.
You can edit these settings on an individual brush basis or adjust the global Apple Pencil behavior within Procreate's preferences. For fine-tuning, using a sketching brush that already exhibits noticeable opacity changes with pressure, such as the RSCO Standard Pencil #4 from the Standard Pencil Pack or Procreate's built-in "Technical Pencil," is highly recommended.
To access the Pressure Curve settings, open the Actions Panel (the wrench icon) and navigate to the "Preferences" tab. Tap on "Pressure & Smoothing" to reveal the pressure graph. By making light and progressively darker strokes on your canvas, you can feel how the current curve affects your brush. If you find yourself needing to press very hard to achieve visible strokes, you'll want to increase the starting point of the curve, giving it a sharper upward angle. This makes the brush more sensitive to lighter pressure. Conversely, a gentler slope will require more pressure for maximum effect.
Understanding The Pressure Curve In Procreate
Dynamic Strokes: Tilt and Angle Sensitivity
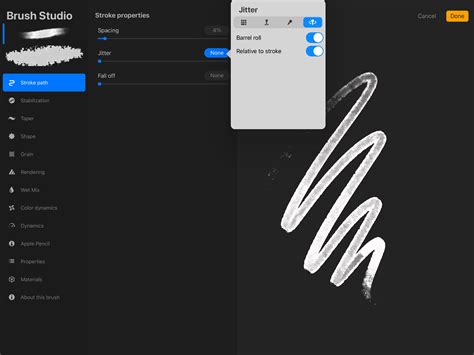
Procreate's Apple Pencil integration extends to tilt and angle, offering further avenues for dynamic brush behavior. Within the "Apple Pencil" tab in the Brush Studio, you'll find settings for "Tilt." The "Angle" slider determines at what point the tilt of your Apple Pencil begins to influence the brush stroke.
Beyond angle, you can also modify "Opacity" settings for Pencil Tilt. If this value is set to "None," changing the tilt will not affect the brush's opacity. The "Gradation" setting creates a fade from the point where your pencil touches the screen to the base of the stroke, mimicking the way ink might spread. "Bleed" affects the detail and diffusion of the stroke, while "Size" controls the brush size when the pencil is tilted. Experimenting with the "Size Compression" toggle can also yield interesting results, compressing the brush size as you tilt.
The Art of the Fade: Brush Taper
"Brush Taper" refers to the gradual reduction in brush size at the beginning or end of a stroke, creating a natural tapering effect. These settings are located under the "Taper" tab in the Brush Studio and offer two distinct control sets: "Pressure Taper" (for Apple Pencil use) and "Touch Taper" (for finger use).
Under Pressure Taper, you'll typically find two sliders flanking a central line. The first slider controls the amount of taper applied at the start of a stroke, and the second controls the taper at the end. To observe these changes, a certain percentage must be allocated to the "Size" slider, which dictates the overall magnitude of the taper. The "Opacity" slider influences how the opacity changes within the tapered areas, while the "Tip" slider affects the shape of the tapered endings. Setting "Tip" to "Sharp" (all the way to the left) will result in a very pointed, delicate end to your stroke. When "Tip Animation" is disabled, the taper is applied as you lift your pencil from the canvas. While taper settings may not be suitable for every brush, they can significantly enhance realism and add a refined touch to strokes in the right context.
Blending and Mixing: The Wet Mix Tab
Unlike standard brushes that lay down new color, "Blend" brushes are designed to interact with and manipulate existing colors on the canvas. While the Smudge Tool offers a similar function, it often lacks the nuanced control and variety that a dedicated blend brush provides.
The "Wet Mix" tab in the Brush Studio is where you'll find the settings for these powerful tools. A blender brush essentially mixes and drags colors rather than depositing its own. The "Dilution" slider is a primary control, dictating the amount of paint that is mixed. For creating your own blending brushes, setting Dilution to maximum is often the desired approach. The "Charge" value influences the amount of paint the brush picks up, while "Attack" is specifically designed for the Apple Pencil, affecting how the brush responds to initial contact. The "Pull" slider works in conjunction with Dilution, influencing how effectively colors are dragged and blended. Experimentation is key here; playing with these sliders will reveal a wide spectrum of blending behaviors, from subtle color shifts to dramatic paint-mixing effects.
Expanding Your Creative Palette
The journey into Procreate brush customization is an ongoing exploration. As Procreate continues to evolve and enhance its Brush Studio, the possibilities for creating and editing brushes become virtually limitless. Experimentation is your greatest ally. Try increasing the StreamLine for smoother lines, amplifying the Wet Mix for richer blending, and adjusting the Pressure Curve to perfectly match your drawing style. Utilize Brush Taper and Tilt to add subtle nuances and realism to your strokes.
The aesthetic of mid-century art, often characterized by its simple yet charming look, can be achieved through careful brushwork and an understanding of Procreate's tools. Furthermore, mastering fundamental Procreate techniques such as clipping masks, layer masks, and alpha lock, in conjunction with custom brushes, will further elevate your digital artwork. By understanding and applying these brush properties, you can move beyond simply using brushes to actively shaping them, transforming them into extensions of your artistic intent.