Vector graphics are digital designs that stay sharp at any size. Unlike raster images, which are made up of pixels that lose quality when scaled, vector images are composed of geometric shapes, lines, and curves defined by mathematical equations. This fundamental difference makes vectors ideal for elements that require resizing, such as logos, icons, and illustrations that need to maintain crispness across various applications and media. While Adobe Illustrator is the industry standard for creating and manipulating vector art, Photoshop, primarily a raster-based program, offers several methods and workarounds to achieve vector-like results and export them in scalable formats.
Understanding the Nuances of Vector vs. Raster
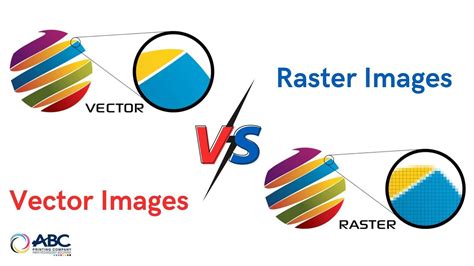
To effectively work with vectors in Photoshop, it's crucial to grasp the core distinction between vector and raster formats. Raster images, also known as bitmap images, are composed of a fixed number of pixels. When you zoom in or enlarge a raster image, these pixels become visible, leading to a blurry or pixelated appearance. Digital photographs and detailed paintings are prime examples of raster graphics.
Vector images, conversely, are built upon mathematical formulas that describe points, lines, and curves. This mathematical foundation allows them to be scaled infinitely without any loss of quality. Whether you shrink a vector logo to the size of a business card or enlarge it for a billboard, its edges will always remain sharp and clean. This scalability is why vectors are the preferred choice for branding elements and any graphic that needs to adapt to different contexts.
The edges of a vector image, whether created in Illustrator or simulated in Photoshop, can be delineated by a path. A path is essentially a line defined by anchor points, which dictate the shape and flow of the vector.
Vectorizing Images within Photoshop: A Step-by-Step Approach
While Photoshop doesn't natively create true vector files in the same way Illustrator does, it provides powerful tools to convert existing raster images into a vector-like format, primarily for export as SVG (Scalable Vector Graphics) or EPS (Encapsulated PostScript). This process involves simplifying the raster image into defined shapes that can then be treated as vectors.
Before embarking on the vectorization process, it's essential to prepare your image. For optimal results, ensure your image is set to a high resolution, ideally 300 pixels per inch. This can be achieved by going to "Image" > "Image Size" (Ctrl + Alt + I or Cmd + Alt + I on Mac) and adjusting the resolution.
Step 1: Isolating the Subject
The first critical step in vectorizing an image in Photoshop is to isolate the element you wish to convert from its background. This ensures that only the desired subject is transformed into a vector.
- Using Selection Tools: Employ appropriate selection tools to carefully select the part of the image you want to vectorize. For rectangular areas, the Rectangular Marquee tool is suitable. If you need to select all pixels of a specific color, the Magic Wand tool is effective. More complex selections can be made using the Lasso tools or the Pen tool for precise control.
- Creating a New Layer: Once your selection is made, copy it and paste it onto a new layer. This isolates the subject and makes further manipulation easier. You can achieve this by pressing Ctrl+J (Cmd+J on Mac) to duplicate the selected area onto a new layer.
Step 2: Simplifying the Image to Monochromatic Tones
To convert a raster image into a vector, you must simplify its color palette. In the context of vectorization within Photoshop, this often means reducing the image to a limited number of solid colors, typically a foreground and a background color. This is a foundational step because each shape that constitutes your new vector image can only be one solid color.
- Threshold Adjustment: To achieve this simplification, add a Threshold adjustment layer. Navigate to "Layer" > "New Adjustment Layer" > "Threshold." This layer converts your image into a black and white representation, where pixels are either completely black or completely white based on a set threshold value. Adjust the slider to find a balance that clearly defines the contours of your subject while retaining essential details. The goal is to have key details present without making the image overly complex.

Step 3: Defining Paths for Vector Conversion
With the image simplified, the next crucial phase is to convert the pixel-based selections into vector paths. These paths will define the outlines of your vector shapes.
- Creating a Work Path: After applying the Threshold adjustment, you can create a work path from your selection. One method involves going to the Paths panel, ensuring your selection is active, and then right-clicking to choose "Make Work Path." A tolerance value determines how closely the path adheres to the contours of the selection. Alternatively, you can create a selection from your layer by holding down Ctrl (Cmd on Mac) and clicking on the layer thumbnail in the Layers panel. Then, right-click within the selection and choose "Make Work Path."
- Vector Mask Creation: Another approach involves creating a vector mask. With your isolated subject on its own layer, ensure you have a selection of the subject. Then, in the Layers panel, click the "Add Vector Mask" icon. This converts the pixel-based mask into a vector shape.
Step 4: Converting Paths to Shapes
Once you have defined paths, you can convert them into vector shapes within Photoshop. This is where the raster image truly begins to transform into editable vector elements.
- Solid Color Fill Layers: With your work path active, you can create a new fill layer. Navigate to "Layer" > "New Fill Layer" > "Solid Color." This new layer will adopt the shape of your work path and can be filled with any color. This effectively creates a solid color vector shape based on your path. This new layer defines the shape of the vector on top of the Threshold layer.
- Shape Layers: Alternatively, you can directly create shape layers using the Pen Tool or Shape Tools. If you have a path, you can right-click on it and select "Make Shape" to convert it into a shape layer.
Saving and Exporting Vector-Like Files from Photoshop
While Photoshop is primarily a raster editor, it allows you to export your vector-like creations in formats that retain scalability. The most common format for web use is SVG, and for print or more complex vector workflows, EPS is an option.
Exporting as SVG
SVG (Scalable Vector Graphics) is a popular XML-based vector image format for the web. Photoshop can export native Photoshop vector shapes (created with the Pen or Shape tools) as SVG files.
- The Export As Process: Select the layer(s) containing your vector shapes. Right-click on the layer, select "Export As," and then choose "SVG" from the file type dropdown menu. Ensure that "Convert to Outline" or similar options are checked if available to ensure proper vector export.
- Limitations: It's important to note that Photoshop cannot export a proper SVG from images that have been placed or pasted as Vector Smart Objects. For true SVG creation and export, Adobe Illustrator's "Save As SVG" or "Export As SVG" functions are generally more robust.
Saving as Photoshop PDF
You can also save your work in PDF format, which can preserve vector information.
- Save As PDF: Go to "File" > "Save As." In the "Save as type" dropdown menu, select "Photoshop PDF." This method works with various image types, including PSD, JPG, PNG, and TIFF.
Saving as EPS (Encapsulated PostScript)
EPS is a legacy vector format that is still used in some professional print workflows.
- Save As EPS: Navigate to "File" > "Save As." In the "Save as type" menu, select "Photoshop EPS file format."
Alternatives and Considerations
While the methods described above allow you to simulate vector creation and export in Photoshop, it's essential to acknowledge the program's inherent limitations.
Adobe Illustrator: The Dedicated Vector Tool
For comprehensive vector creation and manipulation, Adobe Illustrator remains the superior choice. Its tools are specifically designed for vector art, offering a more intuitive and powerful workflow for creating intricate logos, illustrations, and complex vector designs. Features like Image Trace in Illustrator can automatically convert raster images into editable vector paths with greater precision than Photoshop's methods.
Photoshop Actions for Vectorization
For repetitive vectorization tasks, especially for simpler images like icons or logos, Photoshop Actions can be a valuable time-saver. These pre-recorded sequences of commands can automate the process of converting images to vectors, often using similar techniques to the manual steps outlined above. Various third-party actions are available that can instantly transform images into vector art or even cartoonify them.
Understanding Photoshop Express and iPad Versions
It's worth noting that some versions of Photoshop have limitations regarding vectorization. Photoshop Express and Photoshop on the iPad do not currently offer the functionality to vectorize images.
The Benefits of Vectorizing Images
The ability to create or simulate vector graphics in Photoshop offers several advantages for designers and artists:
- Scalability: As emphasized, the primary benefit is the ability to scale graphics infinitely without losing quality, ensuring consistent visual appearance across all platforms and sizes.
- Editability: Vector shapes created in Photoshop remain editable as long as they are in PSD format and utilize shape layers. This allows for easy adjustments to color, form, and position.
- Smaller File Sizes: Vector files are often significantly smaller than their raster counterparts, especially for graphics with solid colors and clean lines, making them ideal for web performance.
- Crisp Edges: Vectors produce sharp, clean edges, which are crucial for professional-looking logos, icons, and typography.
While Photoshop is fundamentally a raster-based program, its tools and features, when understood and applied correctly, can enable users to produce and export scalable vector graphics. By mastering these techniques, artists and designers can expand their creative possibilities and ensure their work maintains its integrity regardless of its final application.