Blending a subject into a new background is often the trickiest part of compositing. The process can be time-consuming, requiring meticulous adjustments to color, lighting, and shadows to achieve a natural and believable result. However, Adobe Photoshop's new Harmonize feature, currently available in Photoshop Beta, is poised to revolutionize this aspect of digital art, making it surprisingly easy to achieve seamless integration. This powerful, one-click AI feature automatically matches a layer's color, tone, and lighting to its surrounding background, significantly speeding up the compositing workflow and enhancing the natural appearance of your creations.
The Core Functionality of Harmonize
At its heart, the Harmonize tool is designed to solve a fundamental challenge in photo manipulation: making disparate elements look like they belong together. When you place a new object or subject into an existing image, it rarely matches the original scene's lighting conditions, color temperature, or shadow direction. Harmonize addresses this directly. By analyzing the target background layer, it intelligently adjusts the selected subject layer to mimic these critical visual cues. This means that whether you're adding a product to a lifestyle shot, a person to a landscape, or an architectural element to a scene, Harmonize works to ensure the new addition feels organically part of the environment.
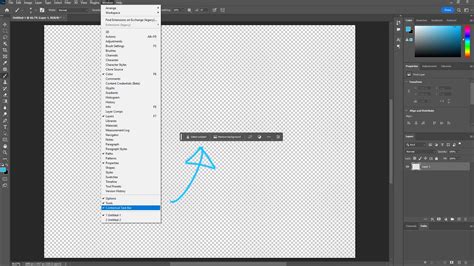
The process is remarkably straightforward. Once you have your subject layer ready and positioned within your composition, you simply select that layer. Then, accessing Harmonize, typically found in the Contextual Task Bar (which can be opened via Window > Contextual Task Bar), initiates the magic. Photoshop's AI gets to work, analyzing the underlying background and applying corresponding adjustments to your selected layer.
Practical Applications and Workflow
The utility of the Harmonize tool is vast, spanning numerous compositing scenarios. For instance, consider the task of adding a pair of headphones to a kitchen counter. Traditionally, this would involve careful selection of the headphones, followed by intricate adjustments using curves, levels, color balance, and potentially even manual shadow creation. With Harmonize, the workflow is dramatically simplified.
- Prepare Your Layers: Start by placing your subject (the headphones) on its own layer above the background (the kitchen counter).
- Select the Subject Layer: Ensure the headphones layer is actively selected.
- Access Harmonize: Click the Harmonize button, usually present in the Contextual Task Bar.
- Review Variations: Photoshop will automatically generate several variations of your composite, offering different interpretations of how the subject can blend. You can then choose the variation that best suits your needs.
This streamlined approach applies equally to more complex subjects, such as portraits. If you're changing the lighting on a portrait, you just need to mask the person and then click Harmonize. The tool will then attempt to match the lighting of the masked subject to the background.
Another compelling example provided in user experiences involves incorporating an Ottoman picture into a main image. The workflow typically follows these steps:
- Import and Scale: Drag and drop the Ottoman image into your composition and scale it down to an appropriate size using the contextual taskbar.
- Remove Background: With the Ottoman layer selected, click the "Remove Background" button in the Contextual Task Bar to eliminate any unwanted background, such as a white studio backdrop.
- Apply Harmonize: Click the Harmonize button. Photoshop will naturally blend the Ottoman into the scene, matching the lighting and shadows seamlessly. You'll be presented with three variations.
- Further Integration: The power doesn't stop there. You can then drag and drop another image, such as framed artwork, onto the scene and position it on a wall.
- Harmonize Again: With the artwork layer selected, click Harmonize again. This allows you to blend the artwork into the wall, again matching the existing visual properties of the scene.

Addressing Limitations and Enhancing Results
While Harmonize is a powerful tool, it's important to acknowledge its current limitations and understand how to work around them for optimal results. One notable limitation is that the current Harmonize tool creates images up to only 1024x1024 pixels. This can be problematic on larger canvases, as the resulting image might appear soft or blurred when scaled up, detracting from a professional finish.
To combat this resolution limitation and maintain sharpness, a smart trick involves using the Crop Tool strategically:
- Tight Crop: First, use the Crop Tool to crop tightly around your subject. This isolates the area Harmonize will process, potentially allowing for a more focused and higher-quality initial harmonization on a smaller scale.
- Apply Harmonize: Click Harmonize as usual.
- Reveal All: Afterward, go to Image > Reveal All. This action restores the full canvas, effectively undoing the tight crop and revealing the original canvas size with your now-harmonized subject.
This method ensures that the Harmonize effect is applied effectively without sacrificing the overall resolution of your final image.
Furthermore, Harmonize is most powerful when it's not used in isolation. It's a fantastic starting point, but to truly elevate your composites, combining it with traditional Photoshop tools and techniques is key. For example, after applying Harmonize, you might still need to:
- Refine Selections and Masks: Ensure precise edges and avoid halo effects.
- Adjust Color Balance and Curves: Make subtle tweaks to perfectly match tones.
- Add Contact Shadows and Reflections: These are crucial for grounding the subject in the scene and are often generated by Harmonize, but may require manual refinement.
- Use the Camera Raw Filter: This filter offers a comprehensive suite of tools for global and local adjustments, color grading, and sharpening that can significantly enhance the final look of your composite.
Photoshop’s NEW Harmonize: Blend ANYTHING in 1-Click!
The Future of Compositing with AI
The introduction of the Harmonize tool signifies a growing trend in photo editing software: the integration of Artificial Intelligence to automate complex and time-consuming tasks. This "one-click AI feature" is a testament to how AI is transforming creative workflows, making sophisticated techniques accessible to a broader range of users.
Jesús Ramirez, a digital graphics expert and founder of the Photoshop Training Channel, highlights this potential. As a prominent educator in the Photoshop community, his insights often reflect the practical impact of new features. The Harmonize tool, by its very nature, aims to democratize high-quality compositing. Whether you're a Photoshop beginner or a seasoned pro, understanding how to leverage this tool can significantly improve your efficiency and the naturalness of your digital creations.
The ability to generate multiple variations of a composite allows for rapid iteration and exploration of different creative directions. This is invaluable in a professional setting where time is often a critical factor. Instead of spending hours on manual adjustments, artists can quickly assess several Harmonized outcomes and then focus their efforts on the most promising options, refining them with traditional methods.
Beyond Harmonize: Essential Compositing Skills
While Harmonize is an exciting addition, it's crucial to remember that it's a tool within a larger ecosystem. Mastering fundamental Photoshop skills remains paramount. Courses focusing on "Selections and Masking Mastery" are essential, as they provide the bedrock upon which advanced features like Harmonize can be most effectively utilized. Such courses typically offer:
- Step-by-step lessons covering various selection and masking techniques.
- Structured modules that build knowledge progressively.
- Downloadable practice files to reinforce learning.
- Custom Photoshop brushes designed to aid in intricate masking tasks.
These foundational skills ensure that when Harmonize provides a good starting point, you have the expertise to refine it to perfection. For instance, the ability to accurately mask a subject is critical for Harmonize to analyze the correct areas and for any subsequent manual adjustments to be applied precisely.
Exploring Other Photoshop Features
The continuous evolution of Photoshop means that new tools and features are regularly introduced, often pushing the boundaries of what's possible. While Harmonize focuses on color and lighting matching, other features cater to different aspects of image creation and manipulation. For example, exploring effects like the "Glitch Text Effect" or "Neon Text Effect" can help users master fundamental techniques such as RGB channels, smart objects, and layer positioning. These explorations, even if seemingly unrelated to Harmonize, build a broader understanding of Photoshop's capabilities and how different tools can be combined.
Similarly, the ability to generate various texture maps (Normal, Roughness, Ambient Occlusion, Height maps) directly within Photoshop, with support for high-resolution and non-square textures, demonstrates the software's expanding role in complex 3D texturing workflows. These advanced features, while not directly related to Harmonize, showcase the depth and breadth of Photoshop's creative potential.
Conclusion: A Powerful Addition to the Compositor's Toolkit
Adobe Photoshop's Harmonize tool is a significant advancement for anyone involved in photo compositing. By automating the complex task of matching color, tone, and lighting, it dramatically speeds up workflows and enhances the naturalness of blended elements. While it has limitations, particularly regarding output resolution, clever workarounds and the integration with traditional Photoshop techniques ensure that professional-quality results are achievable. As AI continues to be integrated into creative software, tools like Harmonize will undoubtedly become indispensable, empowering both beginners and seasoned professionals to create more compelling and believable composites with greater ease and efficiency. Embracing this tool, understanding its nuances, and combining it with a solid foundation in Photoshop's core functionalities will undoubtedly elevate your digital artistry.