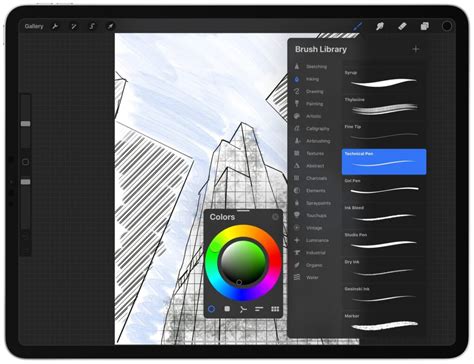
Procreate, the acclaimed digital art application, offers a suite of powerful tools designed to enhance precision and streamline the creative process for artists of all levels. Among these, Drawing Assist and Symmetry stand out as particularly transformative features, enabling the creation of perfectly straight lines, symmetrical designs, and intricate geometric patterns with remarkable ease. This guide delves into the functionalities of Drawing Assist and Symmetry, providing a step-by-step approach to unlocking their potential and elevating your digital artwork.
Understanding the Foundation: The Drawing Guide
Before diving into Drawing Assist, it's crucial to understand its prerequisite: the Drawing Guide. The Drawing Guide is essentially a visual overlay of lines or a grid that serves as a foundational structure for your artwork. It provides a reference point, helping artists maintain alignment, proportion, and perspective.
To access and activate the Drawing Guide, navigate to the Actions menu (the wrench icon) and then select "Canvas." Within the Canvas settings, you will find the "Drawing Guide" toggle. Turning this on will immediately overlay a default grid onto your canvas.
The power of the Drawing Guide lies in its customizability. Once activated, you can further refine its appearance and structure by tapping on "Edit Drawing Guide." This sub-menu offers a wealth of options to tailor the guide to your specific project. Here, you can adjust the grid's size, altering the spacing between lines to accommodate detailed work or broader strokes. The color of the grid can also be modified, allowing you to choose a hue that offers optimal contrast against your artwork without being distracting. Furthermore, the opacity of the grid can be adjusted, making it a subtle guide or a more prominent visual aid.
The "Edit Drawing Guide" section also presents various grid types. While exploring these different grid configurations is a subject for deeper exploration, understanding that options like isometric, perspective, and uniform grids exist broadens the scope of what the Drawing Guide can facilitate. Each grid type is designed to assist with different artistic challenges, from rendering 3D objects to creating complex repeating patterns.
Unlocking Straight Lines: The Magic of Drawing Assist
Drawing Assist is the feature that truly transforms how you draw lines within Procreate, particularly when working with the Drawing Guide. Its core function is to ensure that any line you draw is perfectly straight, adhering to the underlying structure provided by the Drawing Guide.
To enable Drawing Assist, you first need to have the Drawing Guide active on your canvas. Once the Drawing Guide is turned on, you can then activate Drawing Assist for a specific layer. To do this, navigate to the Layers panel (the stacked squares icon), tap on the layer you wish to apply Drawing Assist to, and then tap on it again to reveal layer options. Here, you will find the "Drawing Assist" toggle.

It's important to note a key dependency: Drawing Assist will only become available if the Drawing Guide has been turned on at least once on that canvas. Even if you subsequently turn the Drawing Guide off, Drawing Assist will remain functional for that layer. However, if you have never activated the Drawing Guide, the Drawing Assist option will be greyed out and unavailable. This ensures that the tool is used with a clear intent and a foundational understanding of its reliance on a visual guide.
When Drawing Assist is active, as you draw a line with any brush, Procreate intelligently interprets your stroke and forces it to align with the closest grid line or a straight path determined by the guide. This snapping behavior is incredibly useful for creating clean architectural elements, precise geometric shapes, or any artwork that demands absolute linearity. You'll observe your strokes snapping to the grid, helping you maintain exact distances and angles, significantly reducing the time and effort typically required for manual line correction.
Embracing Mirroring: The Power of Symmetry
Beyond straight lines, Procreate offers another powerful tool for creating precise and complex designs: Symmetry. This feature allows you to mirror your strokes across an axis, enabling the creation of perfectly balanced and intricate patterns with a fraction of the effort.
To access Symmetry, go to the Actions menu (wrench icon) and select "Canvas." Within the Canvas settings, you will find the "Symmetry" option. Tapping on this will reveal several symmetry types: Vertical, Horizontal, Quadrant, and Radial.
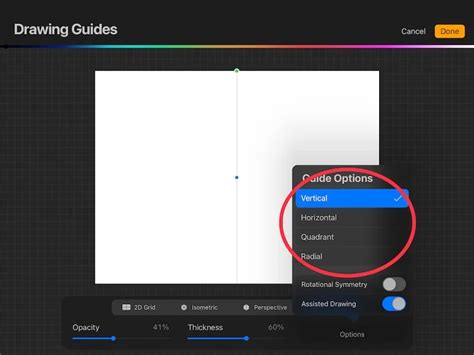
- Vertical Symmetry: Mirrors your strokes from left to right across a central vertical axis. This is ideal for creating portraits, symmetrical logos, or balanced character designs.
- Horizontal Symmetry: Mirrors your strokes from top to bottom across a central horizontal axis. This can be useful for creating landscapes, symmetrical patterns, or designs that require top-down balance.
- Quadrant Symmetry: Divides your canvas into four equal quadrants and mirrors your strokes across both a vertical and horizontal axis simultaneously. This is excellent for creating intricate circular patterns, mandalas, or designs with four-way rotational balance.
- Radial Symmetry: Mirrors your strokes around a central point, creating a spinning or starburst effect. This is perfect for generating complex floral designs, star patterns, or any artwork that emanates from a central core.
Once you select a symmetry type, a guiding line or axis will appear on your canvas. As you begin to draw, Procreate will automatically replicate your strokes on the mirrored side(s) of the canvas according to the chosen symmetry. This means you only need to draw one part of your design, and Procreate handles the rest, ensuring perfect alignment and balance.
The beauty of Procreate's Symmetry tool is its seamless integration with Drawing Assist and other brushes. You can use any brush, and your strokes will be mirrored accurately. This combination allows for the rapid creation of highly detailed and complex symmetrical artwork that would be painstakingly difficult to achieve freehand.
Combining Tools for Ultimate Precision
The true power of Procreate's precision tools is unlocked when you combine Drawing Assist and Symmetry. For instance, if you are creating a geometric pattern that requires both straight lines and symmetrical mirroring, you can enable both features.
Begin by setting up your Drawing Guide and enabling Drawing Assist on your layer. Then, activate the desired Symmetry option. Now, as you draw a line, it will not only be straight, following the grid, but it will also be mirrored across the selected axis. This allows for the creation of incredibly complex and precise geometric forms with unparalleled efficiency.
For example, imagine drawing a symmetrical mandala. You could use a radial symmetry setting and Drawing Assist to create perfectly straight spokes radiating from the center, each one a mirror image of the others. This would result in a flawless and intricate design in a fraction of the time it would take to draw each spoke individually and manually ensure its accuracy and symmetry.
Beyond the Basics: Customization and Workflow
The flexibility of Procreate's drawing tools extends to how you integrate them into your workflow. While Drawing Assist and Symmetry are invaluable for precise work, there are times when you'll want to revert to freehand drawing. For example, when applying color or adding organic details, having the snapping and mirroring features active can be counterproductive.
To achieve freeform coloring within a layer that has Drawing Assist enabled, you simply need to turn off the "Drawing Assist" toggle for that specific layer. This allows you to use the Color Picker and Brush Tool for more organic fills and detailed shading without being constrained by the grid. You can switch between layers with Drawing Assist on and off as needed, allowing for a fluid workflow that balances precision with creative freedom.
Experimentation is key to mastering these tools. Try different brush types with Drawing Assist and Symmetry to see how they interact. Explore the various grid types and symmetry options to discover new possibilities for your artistic projects. Procreate's intuitive interface and powerful features are designed to empower your creativity, and understanding Drawing Assist and Symmetry is a significant step towards unleashing the full potential of your digital art. Whether you're sketching architectural designs, crafting intricate geometric patterns, or developing unique character concepts, these tools will serve as your digital allies, guiding you toward greater precision, balance, and artistic expression.