Watermarking your photographs is a crucial step for photographers, artists, and businesses alike. It serves as a vital tool for protecting your work from unauthorized use, promoting your brand identity, and establishing clear copyright ownership. This guide delves into the multifaceted process of creating and applying watermarks within Adobe Photoshop, offering detailed insights and actionable steps for both beginners and experienced users. We will explore various techniques, from simple text-based marks to intricate logo integration, and leverage powerful Adobe Creative Cloud features for seamless workflow management.
The Foundation: Creating Your Watermark File
Before you can apply a watermark, you need to create the watermark itself. This process begins with setting up a dedicated document in Photoshop, designed to house your watermark element for easy reuse.
Starting with the Canvas:Begin by creating a new document. A good starting point is a canvas size of 1920x1080 pixels, which provides ample space for detailed work. For a more precise and professional approach to creating a watermark file, especially if you intend to use a signature or handwritten script, utilize a graphics tablet and a pen tool. This combination allows for the most natural and fluid strokes, resulting in a more authentic appearance.
Choosing Your Watermark Element:Your watermark can take many forms. It can be a simple text-based mark, an existing logo, or even your unique handwritten signature.
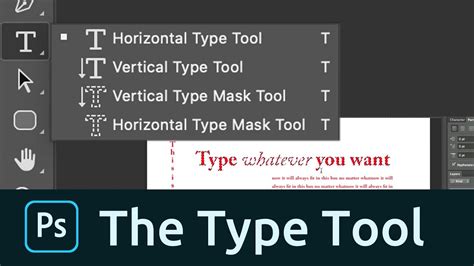
- Text Watermarks: To create a text watermark, activate the Type tool by clicking on the 'T' icon. Type out your name, business name, or copyright information. When selecting a font, consider the message you want to convey. For instance, the font Bodoni can evoke a high-end interior design aesthetic, while the Choc font might lend itself to a more contemporary Brooklyn design studio style. Choose a heavy font, such as Impact, and a large size so it spans a significant portion of your document.
- Signature Watermarks: For a signature watermark, activate the Brush tool. Set the brush hardness to 0% for a soft, blended edge. Choose white as your color, and adjust the brush size to a thickness that is not overly prominent.
Color Considerations:While watermarks are often white to ensure visibility on a variety of photographic backgrounds, you are not limited to this color. If your brand identity incorporates a specific color, such as gold, feel free to use it. To invert a black watermark to white, you can use the keyboard shortcut Command + I on a Mac or Control + I on a PC.
Adding Existing Shapes and Logos:If you wish to incorporate existing shapes into your text or signature watermark, Photoshop offers a convenient solution. Navigate to Window › Shapes and select from a diverse range of pre-designed elements, including trees, wild animals, and more. This allows for the creation of unique and visually interesting watermarks that go beyond simple text.
Enhancing Your Watermark with Layer Styles
To give your watermark a professional and polished look, Photoshop's Layer Styles offer a powerful set of tools. These effects can add depth and visual interest without altering the original watermark pixels.
Applying Drop Shadow and Bevel & Emboss:Once your copyright symbol and text are positioned correctly on your watermark canvas, you can apply layer styles. Choose Layer > Layer Style > Drop Shadow or click the 'fx' button at the bottom of the Layers panel and select Drop Shadow to apply the default effect. Subsequently, click the Bevel and Emboss option from the list of styles on the left to apply its default settings.
Copying Layer Styles:To maintain consistency, you can easily copy these applied effects to other layers. Hold down the Option (Mac) or Alt (PC) key and drag the 'fx' symbol from the layer with the applied styles to the target layer.
Adjusting Fill Opacity:A key technique for creating subtle yet effective watermarks is by manipulating layer opacity. For each layer containing your watermark elements, reduce the layer's Fill opacity to 0%. This action will fade out the fill color of the layer while preserving the applied layer styles, such as the drop shadow and bevel, making the watermark less obtrusive yet still visible.
Saving and Organizing Your Watermark
Efficiently managing your watermarks is crucial for a streamlined workflow. Adobe Creative Cloud Libraries offer an excellent solution for storing and accessing your watermarks across different projects and devices.
Creating a Dedicated Watermark File:To create a dedicated watermark file, go to File > New. In the new document settings, specify a Width and Height of 4 inches, a Resolution of 200 ppi, and ensure the background is set to Transparent. Name this file something descriptive, such as "WatermarkSG.psd".
Saving to Creative Cloud Libraries:After creating your watermark, it's time to save it to your Creative Cloud Library for easy access. Open the Libraries panel by going to Window > Libraries. If you haven't already, click "Create New Library" at the top of the panel and give it a name. With your watermark file still open, click the '+' icon at the bottom of the Libraries panel and choose "Graphic" from the pop-up list. This adds your watermark to the selected library. You can now close the watermark file.
Applying Your Watermark to Photographs
With your watermark created and saved, the next step is to apply it to your photographs. Photoshop provides several methods, with the use of Libraries offering a particularly efficient approach.
Using the Libraries Panel:Open the photograph you wish to watermark in Photoshop. Then, access your Libraries panel (Window > Libraries) and locate the watermark file you previously saved. Drag and drop the watermark image directly onto your photo document.
Smart Object Integration:When you drag a watermark from the Libraries panel onto your document, Photoshop imports it as a Smart Object. This is a significant advantage as it links the watermark object to its original Creative Cloud file. This means any future updates made to the original watermark in its library will reflect across all instances where it's used, ensuring consistency.
Adjusting Size and Placement:Once the watermark is on your photo, use the Move tool (keyboard shortcut 'V') to position it precisely. You can also resize the watermark to fit your desired aesthetic.
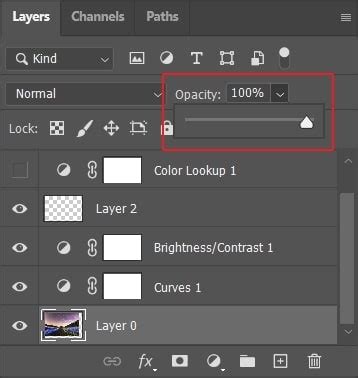
Stylizing for Better Integration:To ensure your watermark doesn't detract from the main image, you can stylize it. A common practice is to reduce its opacity. Double-click in the space to the right of the watermark layer in the Layers panel to bring up the Layer Style menu. From here, you can adjust the Opacity slider. A common setting is around 50%, but this can be adjusted to suit your needs. You can also add subtle layer styles, such as a drop shadow, to help the watermark blend more harmoniously with the photograph. To add a layer style, go to Layer > Layer Style and choose the desired style.
Finalizing the Image:Once you are satisfied with the placement, size, and appearance of your watermark, you can flatten the image to combine all layers into a single one. Go to Layer > Flatten Image. Finally, save your watermarked photograph.
Automating Watermarking with Actions
For photographers who process large volumes of images, manually applying watermarks can be time-consuming. Photoshop's Actions feature allows you to record a series of steps and play them back on multiple files, significantly speeding up your workflow.
Creating a New Action Set:First, open the Actions panel (Window > Actions). From the panel menu, choose "New Set" and name it something like "Watermarks." Click OK.
Recording Your Watermark Action:With your new set created, choose "New Action" from the panel menu. Name the action, for example, "Apply SG Watermark," and ensure "Record" is selected. Click OK to begin recording.
Steps to Record:
- Place Watermark: Go to File > Place and select your saved watermark file (e.g., "WatermarkSG.psd").
- Transform: Choose Edit > Free Transform. Scale the watermark to fit appropriately across your image. A common scaling factor might be around 200%, but this will depend on your watermark size and image dimensions. Press Enter/Return to confirm the transformation.
- Stop Recording: Once you've completed the transformation, stop recording by clicking the square "Stop" button in the Actions panel.
Applying the Action:Now, to apply this watermark to another image, simply open that image, select your "Apply SG Watermark" action in the Actions panel, and click the "Play" button. Photoshop will automatically perform all the recorded steps.
Watermarking in Adobe Lightroom
While Photoshop offers deep control, Adobe Lightroom provides a more streamlined approach to adding watermarks, especially for batch processing. Both Lightroom Classic and the mobile versions offer this functionality.
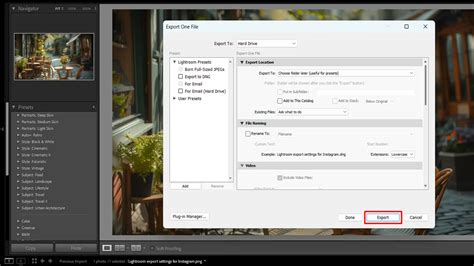
Lightroom Classic:In Lightroom Classic, watermarks are applied during the export process. When you go to File > Export, look for the "Watermarking" section. You can choose to include a text watermark or a graphic watermark (using a previously created PNG or JPG file).
- Text Watermark Options: You can type your text directly and customize its font, style, alignment, color, and even add a drop shadow. The "Fit" option will size the watermark to span the width of the photo.
- Graphic Watermark Options: For graphic watermarks, you can import your saved watermark file.
- Saving Presets: After configuring your watermark, you can save these settings as a preset by clicking "Save Current Settings As New Preset" in the Watermark Editor. This allows you to quickly apply the same watermark settings in the future.
Lightroom Mobile:On iOS and Android devices, adding a watermark is equally straightforward. Simply turn on the "Include Watermark" option that appears in the Export As screen (iOS) or in the Export Settings (Android). You can then choose between text or graphic watermarks and customize their appearance.
Considerations for Effective Watermarking
Beyond the technical steps, consider the strategic placement and design of your watermark to maximize its effectiveness and aesthetic appeal.
Placement:Consider where your watermark will be least intrusive yet most visible. Placing it in a corner is common, but it can also be placed in the center or across the image, depending on your desired level of protection and visual impact. For a more subtle approach, consider placing it over a less detailed area of the photograph.
Opacity and Visibility:The goal of a watermark is often to deter unauthorized use without significantly detracting from the viewer's experience of the photograph. Experiment with opacity levels to find a balance that protects your image while maintaining its visual integrity. Lowering the opacity, as described in the Photoshop section, is a highly effective method for achieving this.
Branding Consistency:Ensure your watermark aligns with your overall brand identity. If you have a specific color palette or logo, incorporate these elements into your watermark design for a cohesive brand presentation.
Evolving Your Watermark Strategy
As your brand or photographic style evolves, so too might your watermark needs.
Rebranding:If you decide to rebrand, for example, by updating from a wordmark to a circular logo, your watermark strategy will need to adapt. By saving your watermarks in Creative Cloud Libraries or as reusable presets in Lightroom, updating your watermark becomes a simpler process. You can easily replace the old watermark with the new one across your existing and future images.
The Power of Libraries:The Creative Cloud Libraries feature is invaluable for managing watermark consistency. By storing your watermark as a linked asset, you ensure that any updates made to the original watermark file are automatically reflected in all documents where it's used. This is particularly useful if you manage multiple watermarks for different purposes or clients.
How To Add a Watermark In Photoshop
By mastering these techniques, you can effectively protect your photographic work, enhance your brand presence, and maintain a professional and consistent visual identity across all your images. Whether you prefer the detailed control of Photoshop or the efficient batch processing of Lightroom, Adobe's suite of tools provides a comprehensive solution for all your watermarking needs.