Creating authentic-looking dirt, aged, and worn textures is a crucial skill for digital artists, whether they are working on 3D models, graphic designs, or photographic enhancements. This tutorial delves into the process, breaking down the complex layering of real-world grime and wear into manageable digital steps. We will explore how to simulate these effects in Photoshop, offering a detailed, step-by-step guide that caters to both novice and experienced users.
Understanding the Layers of Reality
Before diving into digital techniques, it's essential to understand how surfaces accumulate dirt and wear in the real world. This layered approach provides a foundational understanding for creating believable digital textures.
- The Object Itself: The innermost layer is the base material of the object. For example, a cockpit might be made of aluminum, which has its own inherent color and properties.
- The Paint Layer: This is the primary surface color. Black, for instance, is not a pure absence of color but a mixture of all colors. Zooming into a black material reveals a complex interplay of pigments.
- Fingerprint Fat: Every touch leaves a residue of natural oils and sweat from fingerprints. These oily patches create a surface that can attract and hold other particles.
- Dirt Adhering to Fingerprints: The fat from fingerprints acts as an adhesive, causing initial layers of dirt and smudges to stick in specific areas.
- General Dirt and Debris: This encompasses a broader range of contaminants like dust, coffee stains, and residue from cleaning attempts. These accumulate more broadly across the surface.
- Scratches: These can appear not only in the paint layer but also within the accumulated dirt layers, indicating wear and tear from physical interaction.
- Worn Areas (Missing Paint): This is akin to layer zero, representing areas where the original paint has chipped away, revealing the underlying material or primer. This is the most significant indicator of age and use.
- "Clean" Zones: Conversely, areas that are rarely touched will remain relatively free of fingerprints, dirt, and scratches, offering a contrast to the worn sections.
Achieving Realistic Textures in Photoshop
To replicate these real-world phenomena digitally, we can use a combination of base textures, brushes, and layer manipulation in Photoshop. The process often begins with a basic baked texture from a 3D model, which then serves as a canvas for further refinement.
Initial Base and Fake Coloring
A good starting point is often a UV-wrapped texture from a 3D model, which provides a foundational color and material. To enhance this, we can simulate an underlying "all" coloring, representing the base material's inherent hue before the main paint is applied.
- Add a Base Color Layer: Create a new layer and fill it with black.
- Introduce Noise: Apply a noise filter to this layer. This simulates the subtle irregularities and micro-textures inherent in any material.
- Adjust Opacity: Reduce the opacity of this noise layer to around 15%. This ensures the effect is subtle, providing depth without dominating the final texture.
Simulating the Paint Layer
The main paint color is then applied, but with a crucial adjustment for realism.
- Create a Paint Layer: Add another new layer and fill it with black.
- Set Opacity: Reduce the opacity of this layer to match the desired base color. For instance, an opacity of 89% might achieve a specific shade of black. This technique allows for a more nuanced and less absolute color than a simple fill.
Building Dirt Layers
Dirt accumulation is a multi-stage process, starting with larger, more prominent marks and progressing to finer details.
Large Dirt Patches:
- Brush Selection: Utilize a variety of dirt and dust brushes, both small and large.
- Application: Apply these brushes with a light hand, focusing on areas where dirt would naturally gather. Randomly paint and then erase sections to avoid a uniform pattern.
- Opacity Control: Crucially, reduce the opacity of this layer to around 3%. The goal is a barely perceptible layer that suggests underlying grime, not an obvious painted-on effect.
Smaller Dirt Accumulations:
- Subtle Application: Add smaller "puffs" or smudges of dirt randomly across the surface.
- Avoid Homogeneity: Be mindful not to overdo this layer, as it can easily lead to areas where all dirt layers merge, creating an overly uniform and artificial appearance.
- Opacity: Maintain a similar low opacity to the previous dirt layer, around 3%, for a subtle effect.
Darkening Dirt:
- Color Choice: Introduce middle-sized dirt patches using black or dark brown colors.
- Purpose: This layer adds depth and non-uniformity, breaking up the lighter dirt tones and making the texture more believable.
- Opacity: A higher opacity, around 50%, can be used here to create more pronounced shadow and grime effects.
Edge Dust Accumulation:
- Strategic Placement: Dust tends to settle in hard-to-reach areas, such as near inner corners, crevices, and around switches or buttons, where surfaces are not frequently wiped clean.
- "Island" Effect: These dust accumulations can appear as islands of grime.
- Color and Opacity: Use a slightly yellowish-white color to simulate natural dust composed of sand and airborne particles. Apply with a low opacity, around 7%.
Dust and Scratch Removal Using History Brush
Simulating Scratches and Wear
Scratches and worn paint are key indicators of age and use, adding significant realism.
Scratches in Dirt:
- Realistic Placement: Instead of scratching the paint layer directly, which can look artificial, create scratches within the dirt layers.
- Method: Use a black layer and reduce its opacity to about 20%. This darkens and subtly disrupts the dirt, mimicking scratches from keys, clothing, or other abrasive elements. Erasing from the dirt layer is an option but offers less fine-tuning control later.
Fingerprint Residue and Clean Areas:
- Faking Cleanliness: Larger, flat surfaces that are frequently touched will naturally have less accumulated dirt and fewer scratches.
- Simulating Absence: To represent these cleaner areas, add a black layer with an opacity of around 35%. This layer will be used to mask out or reduce the intensity of underlying dirt and scratch layers in specific zones, creating the illusion of relative cleanliness.
Optional: Simulating Rust and Primer
For metal parts, especially those not made of pure aluminum, rust or underlying primer can add another layer of realism.
- Base Paint/Primer: If the object is not pure aluminum, it might have a base layer of primer, often brown. When the top paint wears off, this primer can become visible and faded.
- Rust Effect: For non-aluminum parts, rust can form underneath the paint.
- Application: Create a new layer with a dark brown-orange mix. Paint this around the edges and in areas where the paint is expected to wear away.
- Opacity: Use an opacity of about 25-30% to ensure this effect is subtle and integrated with the other layers.
Depicting Worn Paint
Simulating worn paint requires a delicate touch to maintain flexibility for future edits.
- Dedicated Worn Layer: Create a separate layer specifically for worn paint. This is crucial for non-destructive editing.
- Application: Paint on the edges and areas where paint would naturally wear away, such as under switches or where hands would frequently rest. Mimic the natural cracking and wearing of paint.
- Selection and Deletion: To preserve underlying shadows and baked texture details, create a selection from the worn paint layer (Ctrl/Cmd + click on the layer thumbnail). Switch to a black paint color and hit delete. This method ensures that the wear is integrated with the existing texture's depth.
- Enhancing Believability: For added realism, apply inner shadow and outer glow effects to the black worn layer. This can create a subtle sharpening effect, faking the thickness of the paint and making the wear appear more like a natural paint degradation rather than a simple texture error.
Refining Labels and Text
Even seemingly simple elements like labels and text require careful treatment to appear realistic.
- Realistic White: Pure white is rarely seen in nature. Labels often appear as slightly off-white, with a subtle grey or yellow tint.
- Color Adjustments: Add a slight yellow hue (or red if in the Southern Hemisphere, based on some color perception studies) to the white to make it appear more natural.
- Perceived White: Some studies suggest that in the Northern Hemisphere, white appears more real with a hint of blue, while in the Southern Hemisphere, a reddish tint is perceived as more natural white.
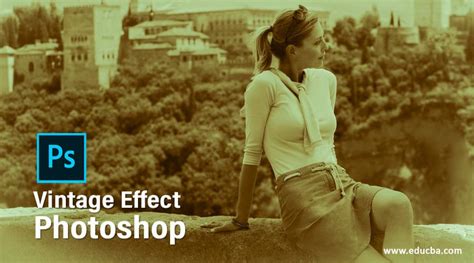
Advanced Techniques for Aged and Vintage Looks
Beyond simulating specific wear patterns, broader techniques can be employed to give images and videos a general aged or vintage aesthetic. This often involves using filters and blending modes to mimic the characteristics of old film and photographic processes.
Adding Dust and Grain Overlays in Photoshop
A common method for achieving a vintage look is by adding dust and grain overlays. This process can be simplified using filters and blending modes.
- Start with an Image: Open the image you wish to modify in Photoshop.
- Solid Color Fill Layer: Add a new "Solid Color" adjustment layer from the Layers panel.
- Black Fill: In the Color Picker, set the color to black (#000000).
- Rasterize Layer: Right-click on the Solid Color fill layer's thumbnail and select "Rasterize Layer." This is necessary to apply filters.
- Add Noise Filter:
- Ensure white is set as your Foreground color.
- Go to
Filter > Noise > Add Noise. - Set the
Amountto 100%, chooseGaussianfor Distribution, and check theMonochromaticbox. This creates a base layer of digital "grain."
- Apply Sketch Filter:
- Go to
Filter > Filter Gallery > Sketch > Torn Edges. - Use values like
Image Balance: 15,Smoothness: 12, andContrast: 23. This filter simulates the imperfections and rough edges of aged materials.
- Go to
- Second Noise Layer:
- With white still as the Foreground color, apply the
Add Noisefilter again. - This time, set the
Amountto a lower value, around 10%, keepingGaussianandMonochromaticchecked. This adds a finer layer of grain.
- With white still as the Foreground color, apply the
- Blending Mode: Change the Blending Mode of this dust layer to
Linear Dodge (Add). This effectively makes the black areas disappear, leaving only the white specks of "dust." - Creating Scratches:
- Duplicate the dust layer (Ctrl/Cmd + J). This new layer will be used for scratches.
- Motion Blur: Go to
Filter > Blur > Motion Blur. SetAngleto 0º andDistanceto 2000 Pixels. This elongates the noise specks into streaks. - Distort Filter: Go to
Filter > Distort > Wave. Experiment with theNumber of Generators,Wavelength, andAmplitudesettings. AHorizontal Scaleof 1% andVertical Scaleof 100% can create wavy scratch lines. Click "Randomize" until you achieve a desired pattern. - Blending Mode and Opacity: Change the Blending Mode of the scratch layer to
Screen. Reduce theOpacityto around 30% to blend the scratches subtly with the image.
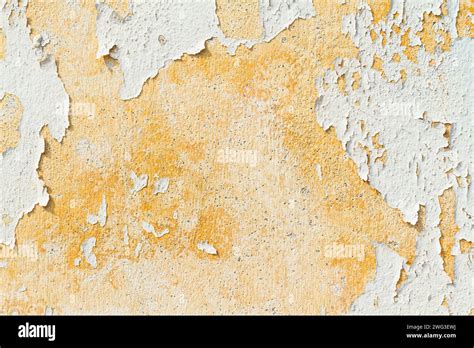
- Yellowish Weathered Look:
- Add a new
Solid Coloradjustment layer on top of all other layers. - Choose a pale yellow color (e.g., #ffecc3).
- Change this layer's Blending Mode to
Multiply. This tints the entire image with a warm, aged hue.
- Add a new
Types of Dust and Scratch Overlays
Dust and scratch overlays are versatile tools used to impart a vintage, worn-out, or cinematic feel to images and videos. They simulate the natural aging process, adding depth and authenticity.
- Film Grain Overlays: Mimic the texture of classic film stock, providing a nostalgic or stylized vintage touch.
- Film Frame and Dust Overlays: Replicate imperfections of aged film reels, including dust specks and scratch marks, ideal for authentic old-film effects.
- Grunge Overlays: Introduce rough textures, dirt, and scratches for a raw, edgy aesthetic, often used in urban or artistic projects.
- Floating Dust Particle Overlays: Create a soft, natural atmosphere, adding depth and realism to dreamy or slow-motion scenes.
- Light Leak and Film Burn Overlays: Simulate effects found in old or damaged film, adding dramatic or nostalgic mood, often used for transitions or experimental edits.
Using Video Editing Software (e.g., CapCut)
Video editing software like CapCut offers streamlined ways to apply these effects.
- Import and Layer: Import your video and a downloaded dust/scratch overlay. Place the overlay on a track above your video.
- Blending Modes: Utilize blending modes like
OverlayorScreento integrate the texture seamlessly. - Adjustments: Fine-tune opacity, color, and position to match the overlay with your footage.
- Effects Library: Many editors offer built-in effects for dust, grain, and scratches that can be applied directly.
Sources for Textures and Overlays
Numerous platforms offer free and premium resources for dust and scratch textures:
- Unblast: Provides high-quality free and premium textures, including dust and scratches overlays.
- Videezy: A great source for free video overlays, including dust and scratch effects, often royalty-free for commercial use.
- Adobe Stock: Offers professional-grade overlays, integrated with Adobe software for easy editing.
- Motion Array: A subscription service with a vast library of video effects, including dust and scratch overlays.
- Textures.com (formerly CGTextures): A large library of high-resolution textures.
- Envato Elements: Offers a subscription-based service with millions of creative assets, including textures, photos, videos, and 3D objects.
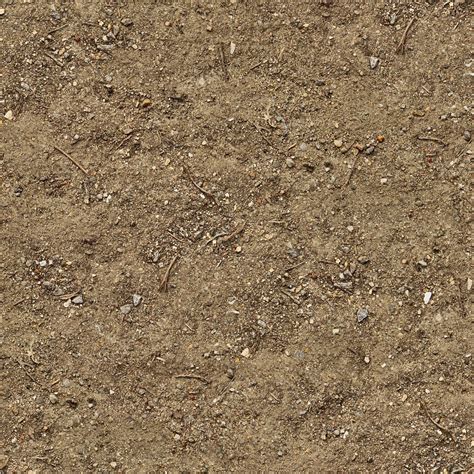
Creating Seamless Dirt Textures in Photoshop
For more specific applications, such as creating seamless dirt textures for 3D models or backgrounds, Photoshop offers powerful tools.
- Open Texture: Start with a high-resolution dirt texture image.
- Offset Filter: Go to
Filter > Other > Offset. This filter allows you to wrap the image edges to the center, revealing any seams. Adjust the sliders to move the left/right and upper/lower edges towards the center. - Fixing Seams: Use tools like the Lasso Tool to draw around problematic seam areas. Drag the selection to a more visually pleasing part of the image to blend the edges.
- Patch Tool: The Patch Tool is invaluable for seamlessly blending areas and removing noticeable repetition. Use it to sample clean areas and paint over repeating patterns. Avoid working directly on the wrapped edges.
- Contrast Adjustment: Sometimes, the contrast within the texture can create noticeable repeating patterns. Adjust contrast or use the Patch Tool to break up these repetitive elements.
Benefits of Using Dust and Scratches Overlays
Incorporating these overlays into your work offers several advantages:
- Vintage Effect: Transforms digital footage into the look of old film, perfect for historical content, music videos, and retro-themed projects.
- Adds Texture: Introduces depth and character, preventing visuals from appearing too flat or artificial.
- Enhances Mood: Creates an aged, mysterious, or dramatic atmosphere, suitable for storytelling, horror, or cinematic scenes.
- Organic Feel: Mimics the natural wear of old film reels, providing a realistic and authentic touch to modern footage.
- Retro Style: Instantly gives videos a classic, old-movie aesthetic, ideal for social media, commercials, and fashion campaigns.
Creative Applications
Dust and scratches textures can be applied in numerous ways:
- Vintage Film Edits: Making modern footage resemble classic film reels for travel videos, nostalgic storytelling, or social media.
- Retro Music Videos: Creating a warm, old-school aesthetic for indie, jazz, or lo-fi genres.
- Old Documentary Effects: Making new footage look like it was filmed decades ago for historical documentaries or archive-style videos.
- Horror and Thriller Scenes: Adding an eerie, unsettling atmosphere with a rough, worn-out texture for found-footage films or suspenseful scenes.
- Grunge-Style Animations: Enhancing dark, rebellious, or alternative themes with a raw, textured, and edgy visual effect.
Conclusion
Mastering the creation of dirt, aged, and worn textures involves understanding real-world layering and employing digital tools effectively. Whether through intricate Photoshop layer manipulation, the application of specialized filters, or the use of pre-made overlays, these techniques empower artists to imbue their work with a sense of history, realism, and character. By carefully observing how surfaces degrade and accumulate grime, and by leveraging the advanced capabilities of software like Photoshop and video editors, digital creators can achieve highly convincing and visually compelling results.