Procreate has rapidly become a cornerstone application for digital artists, offering a powerful yet intuitive platform for creation on the iPad. Its versatility spans a wide array of artistic disciplines, from intricate illustrations and dynamic animations to elegant lettering and vibrant paintings. For those new to the digital art realm or looking to expand their skillset within Procreate, a wealth of tutorials exist, each offering unique insights and techniques. Navigating this vast landscape can be daunting, but understanding the core functionalities and exploring specific artistic applications can unlock a world of creative potential.
Unveiling the Fundamentals: Getting Started with Procreate
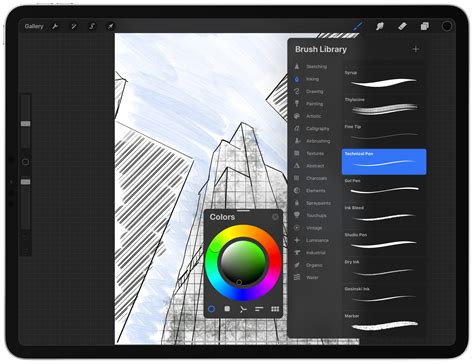
For newcomers to Procreate, the journey often begins with understanding the foundational elements of the app. While the official handbook provides an exhaustive overview, it can be overwhelming. Fortunately, numerous video tutorials are designed to simplify this learning curve. These resources effectively break down the basic tools and functions, ensuring that artists can quickly get up to speed. The Procreate channel itself is a valuable resource, showcasing the creative community and highlighting how artists leverage the app's capabilities. Videos are often perfectly paced for beginners, allowing them to follow along seamlessly and build confidence with each step.
A crucial aspect of digital art creation is mastering the tools available. The Beginners Series, for instance, is an excellent starting point, offering a practical and easy-to-follow guide to the fundamentals. This series empowers users by teaching essential skills for discovering the basics of digital art and unlocking their creative potential. It typically covers core elements such as brushes, colors, gestures, and more. A typical four-part series might begin with "The Fundamentals," guiding users through Procreate's basic tools like the brush, color selection, and gestures. The subsequent parts, such as "Painting Tools," would then delve deeper into colors, brushes, layers, and effects, often demonstrated through creating a specific artwork like a night scene. Finally, "Editing Tools" would build upon these skills, showcasing how to utilize Procreate's editing features to refine and enhance artwork.
Procreate Basics Made EASY for Complete Beginners
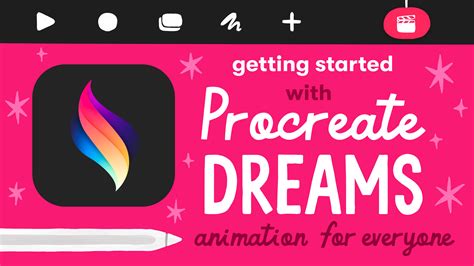
Bringing Art to Life: Animation in Procreate Dreams
Procreate Dreams introduces advanced animation capabilities, expanding the creative possibilities for digital artists. While early releases may have seen feature changes, the core methods of animation remain accessible through dedicated tutorials. Artists like Lisa Bardot break down three primary animation techniques: frame-by-frame animation, keyframe animation, and performance animation. For those starting from scratch, Alex's "Animation for Anyone" class offers a comprehensive walkthrough of bringing characters to life in Procreate Dreams. He even provides a downloadable file of his own character, allowing users to practice with a pre-made asset. Alex, recognized as an accomplished director and animator, ensures a thorough learning experience.
Brooke Glaser offers an energetic 17-minute tutorial, demonstrating the dynamic nature of animation within Procreate Dreams. Animation can initially seem intimidating, but these tutorials aim to demystify the process. Learning about features like Onion Skins and Animation Assist is crucial for understanding how to animate lettering effectively, even with a short word as a demonstration. Lisa Bardot of Bardot Brush, an illustrator known for her digital art tutorials and premium Procreate brushes, emphasizes that animation in Procreate Dreams is more accessible than many might assume. With five distinct animation options available through the Animation Assist feature, each tutorial provides a progressive learning path, catering to artists as they grow in confidence and skill.
The Art of Shading and Lighting: Adding Depth and Realism
Shading and lighting are fundamental concepts that can dramatically enhance the dimensionality and realism of digital artwork. Tutorials focusing on these aspects are invaluable for artists aiming to move beyond flat, one-dimensional pieces. Dave Reed, a digital illustrator and designer, shares insights into adding subtle shading to make characters stand out, offering tips on adjusting layer opacity to achieve various shading effects.
For a more fundamental understanding of shading, Ian Ruhfass, also known as Luma Llama, provides tutorials that cover the essential concepts of choosing colors and applying light and shadows. This foundational knowledge is crucial for creating work that possesses depth and visual impact. The way lighting is conveyed can completely alter a piece's aesthetic. Once a light source direction is established, applying effects like the Bloom effect can make artwork appear to glow, creating a luminous and eye-catching quality. Dave Reed reiterates this, demonstrating how simple effects can transform a piece.
Procreate Basics Made EASY for Complete Beginners
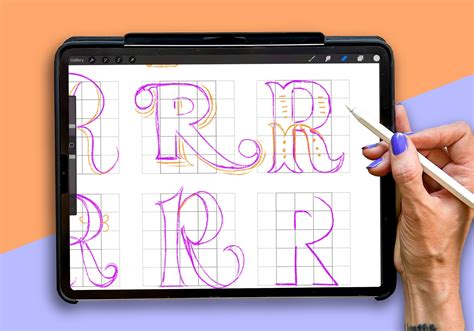
Mastering Lettering and Calligraphy in Procreate
Procreate is a powerful tool for lettering artists and calligraphers, offering unparalleled flexibility and creative control. Suzy Grace, a calligrapher and lettering artist, demonstrates how to create modern calligraphy and hand lettering using features like the Streamline tool and the Text tool. She also highlights the benefits of digital lettering, such as the ease of making selections from artwork for modification.
The composition of lettering is critical for visual communication. Will Paterson, a designer specializing in brand identity, lettering, and logo design, uses Procreate's Drawing Guides to help beginners quickly translate their ideas onto the canvas and create effective lettering compositions. Ian Barnard, another lettering artist and digital product designer, explores adding dimension to lettering, showcasing three distinct methods using tools like Perspective Guides and Alpha Lock. He also offers a tutorial on drawing isometric letters, an intermediate technique that pushes creative boundaries.
Shoutbam Creative Studio provides tutorials on creating a realistic emboss and deboss effect on letters, utilizing layers, Alpha Lock, and specific font styles. They also offer a captivating candy ink lettering effect using Liquify settings, incorporating highlights, depth, motion, and Gaussian blur for dramatic drop shadows. For those looking to add flair, the sisters Jillian and Jordan of Loveleigh Loops offer guidance on incorporating flourishes into calligraphy, whether using their pre-made stamp brushes or applying established principles to create their own.
Exploring Brushes and Customization in Procreate
While Procreate comes with an impressive library of brushes, the ability to create custom brushes unlocks a new level of artistic expression. Flo of Art With Flo guides users through the process of making five different brushes in Procreate, utilizing the Brush Studio Settings. This allows for the creation of specialized brushes for hair, stamps, patterns, and more, with the ability to test them within the app during the creation process.
Beyond custom brushes, understanding Procreate's built-in tools can significantly enhance artistic workflows. Hector Montalvo of The Doodle Works channel emphasizes the often-underrated versatility of the selection tool. He demonstrates how its various settings can be leveraged for more than just basic selections, making it a powerful asset for digital illustration. Hector also provides step-by-step illustration tutorials to help users become comfortable with Procreate.
Advanced Techniques and Creative Effects
As artists become more comfortable with Procreate's core functionalities, they can explore more advanced techniques and creative effects. Abigail Bixler of The Creative Bix showcases how to draw flowers, incorporating blend modes and texture for added depth. Genevieve of Genevieve's Design Studio explores how to achieve specific artistic styles, detailing the exact brushes to use within the program. Ashwini of Print Me Some Color offers a watercolor tutorial that mimics traditional media, allowing for the creation of beautiful digital paintings without the mess.
Creating unique visual effects is another area where Procreate excels. Leo, also known as Ghost Paper, demonstrates how to achieve a neon effect using the Bloom effect to give lines a glowing appearance, akin to a neon sign. He also provides valuable insights into using blend modes, explaining when and how to apply the over 15 available modes to achieve desired artistic outcomes.
Procreate Basics Made EASY for Complete Beginners
Layer Masks, Blend Modes, and Compositional Elements
Layer Masks are a powerful non-destructive editing tool in Procreate, allowing for flexible edits and accelerated workflows. Hector Montalvo explains how and when to use specific layer masks to add color, details, and more to artwork. Leo further elaborates on the utility of blend modes, using his own work as a practical example of their application. Understanding blend modes is crucial for achieving sophisticated color mixing and combinations, alongside other tools like Selections and Adjustments.
Incorporating multiple elements into a composition can add instant flair. Karin Newport's "iPad Lettering" tutorials often explore techniques for adding such elements, including the use of Layer Masks. Lucas Peinador, a concept artist and illustrator, demonstrates how to create three different lighting scenarios using the same drawing, transforming a daytime scene into a nighttime one with key adjustments.
Exploring 3D Modeling and Textured Effects
Procreate's capabilities extend into 3D modeling, offering a new dimension for digital artists. TatyWorks provides tutorials on 3D modeling within Procreate, including a free 3D model and an explanation of how layers function differently in 3D versus 2D projects. Taty also delves into creating 3D text effects, incorporating shading and shadows, and utilizing the Symmetry Guide and Liquify for dynamic backgrounds with noise texture.
For a tactile and visually striking effect, a Cut Paper tutorial can make artwork appear as if it were crafted from physical paper layers, enhanced by the strategic placement of shadows. Laurie Russell Design offers an easy-to-follow tutorial for creating a realistic emboss and deboss effect on text, providing Procreate tips throughout the process.
Advanced Illustration and Character Design
Drawing natural-looking and fun characters can be a challenge, but Procreate offers tools and techniques to simplify the process. Pierre Kleinhouse creates tutorials focused on character drawing and illustration, outlining methods for adding shadows, highlights, and texture to bring characters to life. Kaycem, a professional character designer, shares essential principles of proportions and guidelines for drawing consistent characters, particularly younger ones, in his "Shape Design Techniques."
Creating seamless patterns is another popular application of Procreate. Teela Cunningham of Every Tuesday discusses the trial-and-error process involved in creating successful and seamless patterns, identifying empty spots to fill with additional illustrations and elements.
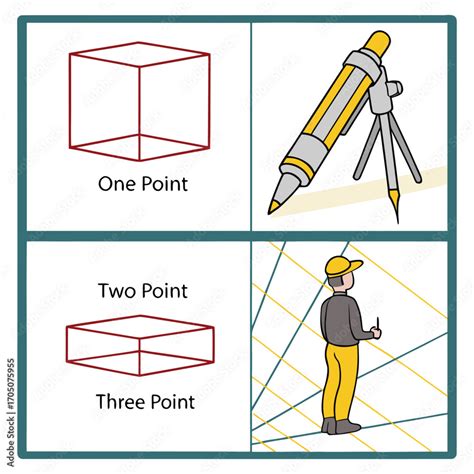
Perspective and Spatial Reasoning
Understanding perspective is vital for creating believable scenes and environments. A tutorial on one-point or two-point perspective, potentially with a free download for a framework, can provide artists with a solid foundation for drawing their own scenes. Lisa Bardot's tutorials, for example, can guide users through creating 3D lettering using tools like Perspective Guides, adding depth and dimension to typography.
Technical Considerations: Avoiding Pixelation
Even experienced digital artists can encounter technical issues. BeeJayDel addresses the common question, "Why Are My Lines Pixelated in Procreate?" by offering two essential tips to avoid blurry edges. As Procreate is a raster-based program, understanding Canvas and Interpolation settings is crucial for maintaining high-quality linework and preventing the headache of low-resolution art.
Procreate Pocket: Mobile Artistry
For artists on the go, Procreate Pocket offers a streamlined version of the powerful Procreate app for iPhone. Tutorials tailored for Procreate Pocket, such as those from Make it Mobile, focus on graphic design on mobile apps. These resources are ideal for artists who are comfortable with their abilities and seek a challenge on a smaller screen.
Conclusion: A Continual Journey of Discovery
Procreate is a dynamic and ever-evolving platform that empowers artists of all levels. The extensive library of tutorials, covering everything from fundamental tools and animation to advanced shading, lettering, and 3D modeling, ensures that there is always something new to learn. Whether you are a beginner looking to grasp the basics or a seasoned professional seeking to push your creative boundaries, Procreate offers the tools and resources to bring your artistic visions to life. The collaborative spirit of the Procreate community, evident in the shared tutorials and exclusive brush sets, further enriches the learning experience, making digital art creation an accessible and rewarding endeavor.