Understanding and manipulating aspect ratios is a fundamental skill for any photographer or digital artist working with images. Whether you're preparing photos for print, web, or a specific design project, knowing how to adjust the aspect ratio in Photoshop ensures your images look their best and fit precisely where you intend them to. This guide will demystify the concept of aspect ratio and provide practical, step-by-step instructions for mastering its application within Adobe Photoshop.
What is Aspect Ratio?
At its core, aspect ratio is the proportional relationship between an image's width and its height. It's a measurement of a photograph's width to height, expressed as a ratio, such as 3:2 or 16:9. This ratio dictates the overall shape of the image, but it's crucial to note that the aspect ratio of an image refers to its dimensional ratio but not the actual resolution or total pixels the image contains. Different cameras shoot in different aspect ratios, so whether you’re using a digital camera, a 35mm film camera, or an iPhone, they can all vary. For instance, the aspect ratio for 35mm cameras, film or digital DSLR’s, is 3:2. This means that the long side is 1.5 times as long as the short side. This aspect ratio will produce 4″ by 6″ prints.

Why Aspect Ratio Matters: Avoiding Unintended Cropping
The importance of understanding aspect ratio becomes particularly evident when preparing images for print. Many individuals have experienced the frustration of ordering a print in a common size, like 8×10, only to find that a vital part of their perfectly composed image has been cropped away. This often happens because the camera's native aspect ratio doesn't match the desired print's aspect ratio.
Consider an image shot with a 3:2 aspect ratio (common for 4×6 prints). If you then try to print this image as an 8×10, which has a 5:4 ratio, you'll encounter a mismatch. The 4×6 image's long side is 1.5 times as long as the short side, while an 8×10 print size has a 5:4 ratio, meaning the long side is only 1.25 times as long as the short side. This makes the 8×10 "fatter" or wider relative to its height compared to the 3:2 ratio. No matter how much you go up in size, the 3:2 ratio (4×6 size) is going to always stay narrower than the 5:4 ratio image (8×10).
To make an image with a 3:2 aspect ratio fit an 8×10 print, you'll need to crop part of the photo off. For an example, going from a 3:2 ratio (4×6) to an 8×10 size (which is a 5:4 ratio), you’ll need to crop off two inches. This is why it’s so important to understand this concept - so your final product is printed just the way you intended, and not with part of Susie’s arm missing. If you don’t crop your images before sending them to print, the printer will often choose for you just how your image is cropped, and you may end up with vital parts of your image chopped off or white borders on two sides of the photo to make up the difference.
Working with Aspect Ratios in Photoshop: A Step-by-Step Tutorial
Photoshop offers robust tools to manage aspect ratios, ensuring your images are perfectly framed for any purpose.
Step 1: Launch Photoshop and Open Your ImageStart by launching Photoshop on your computer. Navigate to the “File” menu, select “Open,” and choose the image you wish to edit.
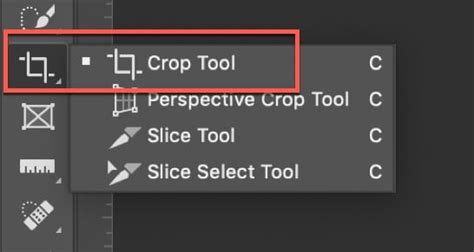
Step 2: Access the Crop ToolLocate the toolbar on the left side of your screen. The Crop Tool icon looks like two intersecting right angles. You can also access it by pressing “C” on your keyboard.
Step 3: Understanding Crop Boundary and Aspect Ratio SettingsWhen you activate the Crop Tool, a crop boundary will appear on your image. The aspect ratio is the relationship between the width and the height of this crop boundary. In the options bar at the top of your Photoshop window, you'll find settings for the Crop Tool. This is where you define your desired aspect ratio.
Photoshop also offers preset aspect ratios. Under the resize options, you’ll see Standard sizes which highlight the most commonly used aspect ratio options. You can select from a variety of preset options within the dropdown menu, such as “4×6,” “5×7,” or “16×9.” For custom ratios, simply type the desired width and height values directly into the designated fields.
Step 4: Manipulating the Crop BoundaryOnce you’ve set the aspect ratio, a crop box will appear on your image. You can then drag the crop handles to adjust the crop area. If you want to be able to move this boundary on the fly as you're creating it, you can press and hold the space bar and drag the boundary around. Then, when you want to set it down again, release the space bar, at which point you are once again scaling the crop boundary.
Step 5: Maintaining Aspect Ratio While CroppingLet's say you make the crop boundary thinner, and you now want to maintain whatever aspect ratio this is. Again, that's the relationship between the width and the height. In that case, as you drag a handle, you would press the Shift key. This will constrain the proportions as you resize. Alternatively, you can hold Alt/Option while dragging a corner handle to expand the crop equally in all directions.
Master Photoshop’s Crop Tool: Beginner’s Guide to Perfect Cropping
Step 6: Refining the CropTake a moment to review your cropped image. Ensure that the composition within the crop boundary is exactly as you intend. If you need to make further adjustments to the position of the subject within the crop, you can continue to drag the crop handles or use the space bar trick. To further enhance your image, utilize the Rectangular Marquee Tool to select specific areas that require attention before applying the crop.
Step 7: Undoing and Reapplying the CropIf you’re not satisfied with the crop, you can undo it. You can go to “Edit” > “Undo Crop Tool” or press Ctrl+Z (Windows) / Cmd+Z (Mac). This allows for experimentation without permanent consequences.
Step 8: Saving Your Cropped ImageOnce you’re happy with the cropped image, go to “File” and then “Save As” to save the image. This will preserve your edits. When cropping for print, it's recommended to leave the resolution field in the options bar blank unless you are specifically resizing for web or blog use. You will need to sometimes crop the image to fit the aspect ratio of a print size ordered, but the resolution should be left alone.
Beyond Cropping: Enhancing Your Images
After you've adjusted the aspect ratio of your image, you can further enhance your images and create stunning designs. Use Adobe Express or Photoshop to add photo filters, shape crops, icons, and bold typography to your image. You can even add animation to the text or images on your designs, or GIF stickers to create an eye-catching composition.
The "Shoot Wider" Philosophy
A common question among photographers is, "How do I avoid having to crop part of my image off when ordering certain sizes?" The answer is simply to shoot "wider" - leave some breathing room when you are shooting. When you do this, you’ll make sure that no part of your subject will be cut off when you have a print made that isn’t the same aspect ratio as your camera’s sensor. This is especially important with client work. When your client falls in love with an image and wants to order a 16×20 print (because they already ordered the frame for a spot on the wall and that spot just happens to fit that size print perfectly), you certainly don’t want to be stuck explaining that it can’t be ordered because you didn’t leave enough room when shooting. It may take some practice to get used to leaving extra space, especially if you prefer unusual crops and tight framing, but it can save you from significant cropping issues down the line.
Common Aspect Ratios and Their Uses
Understanding common aspect ratios can simplify your workflow. Here's a table breaking down some of the most frequently used aspect ratios and their typical applications:
| Aspect Ratio | Common Print Sizes | Typical Uses |
|---|---|---|
| 1:1 | 8x8, 12x12 | Instagram posts, square format cameras, artistic compositions |
| 3:2 | 4x6, 8x12, 12x18 | DSLRs, 35mm film, standard photo prints |
| 4:3 | 4x5.3, 8x10.7 | Smartphones, many digital cameras, older monitor resolutions |
| 16:9 | Varies (e.g., 16x9 inches) | Widescreen monitors, television, YouTube thumbnails, cinematic shots |
| 5:4 | 5x7, 10x8, 20x16 | Standard print sizes, often requiring cropping from 3:2 images |

By mastering the use of the Crop Tool and understanding the implications of different aspect ratios, you can ensure your images are always presented in their best possible light, perfectly suited for any intended use.