DaVinci Resolve, a powerhouse in the video editing landscape, offers a robust suite of tools for professionals and hobbyists alike. Among its many capabilities, the generation and management of subtitles are crucial for enhancing accessibility and viewer engagement. While manual subtitle creation is an option, the advent of automated solutions, particularly through scripts and third-party integrations, has revolutionized this aspect of post-production. This article delves into the world of auto subtitles within DaVinci Resolve, exploring free scripts, integrated features, and AI-powered tools that streamline the process from transcription to final export.
The Rise of Free Auto Subtitle Scripts
For users of the free version of DaVinci Resolve, the integration of advanced features can sometimes be a challenge. However, creative developers have stepped in to fill this gap. A notable example is the free auto subtitles script developed by Tom Morone. This powerful tool, designed to work seamlessly within DaVinci Resolve, offers a significant advantage by automating the tedious process of transcribing audio and generating corresponding subtitles.
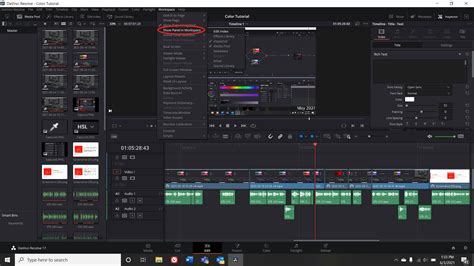
The script connects to sophisticated AI programs, specifically OpenAI's 'Whisper' for transcription and 'Stable TS' for time-stamping, ensuring a high degree of accuracy. Crucially, this entire process runs locally on the user's computer, offering a secure and efficient workflow. Tom Morone's commitment to the DaVinci Resolve community is evident in his detailed video tutorials, which explain the tool's functionality and updates, and the project's open-source nature, hosted on GitHub. This allows for community contributions and ensures the script's continued development.
The Auto Subtitles script is not just about generating text; it's about customization. Users can configure various settings, including the maximum number of words or characters per subtitle, which helps in pacing and readability. Furthermore, options for censoring specific words provide an essential layer of control over the subtitle content, making it adaptable for different audiences and content guidelines. The script offers different transcription models, allowing users to balance the speed of generation against the desired accuracy. This flexibility is paramount for diverse video projects.
A significant feature for enhancing transcription accuracy is the 'English only' mode. While the tool supports multiple languages, this mode is specifically optimized for English, yielding more precise results. The generated subtitles are delivered as Text Plus presets, which can be directly placed on a video track within DaVinci Resolve. This integration means that users can leverage custom pre-animated titles or incorporate titles from other packs, adding a professional and visually engaging element to their subtitles. For Windows users, an automatic setup option is available, simplifying the installation process through a PowerShell script, making this powerful tool accessible to a broader user base.
Integrating Auto Subtitles into Your DaVinci Resolve Workflow
Beyond free scripts, DaVinci Resolve itself offers evolving subtitle generation capabilities, particularly in its paid Studio version. The introduction of built-in speech-to-text technology in DaVinci Resolve Studio 18.5 has been a game-changer, allowing users to generate subtitles directly from their video's audio without needing external applications.
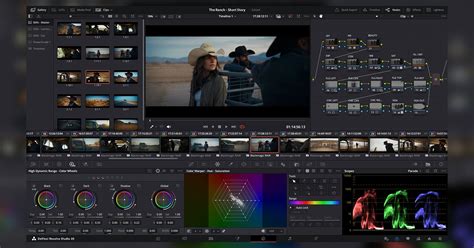
The process within DaVinci Resolve Studio is designed for efficiency. After ensuring clear audio quality, users can navigate to the "Timeline" menu and select "Create Subtitles from Audio." This prompts a settings window where one can choose the language (or let DaVinci auto-detect) and select a style preset, such as those mimicking Netflix-style captions. Once initiated, DaVinci analyzes the audio, transcribes it into text, and breaks it down into subtitle blocks directly on the timeline.
Following the automatic generation, a critical step involves reviewing and editing the captions. The generated subtitles appear in a dedicated Subtitles panel and on the timeline. Users can easily edit the text for accuracy, correct any misheard words, and adjust the timing by dragging the subtitle blocks left or right on the timeline to perfectly sync with the audio. Customization of the subtitle's appearance is also straightforward. By selecting a subtitle block and navigating to the Track panel in the Inspector, users can modify the font, size, color, and position, ensuring the captions align with their video's aesthetic and branding. For ongoing projects, saving these customized styles as presets further streamlines the workflow.
When it comes to exporting, DaVinci Resolve provides flexibility. In the Deliver tab, users can choose to "Burn into video," which hardcodes the subtitles directly into the video file, making them permanently visible. Alternatively, they can "Export as SRT or VTT," generating a separate subtitle file that can be uploaded to platforms like YouTube or Vimeo, which support closed captions.
Leveraging Third-Party Tools for Enhanced Subtitling
For users of the free version of DaVinci Resolve, or those seeking even more advanced features, third-party tools and extensions offer powerful solutions. One such example is the Simon Says extension, which integrates seamlessly with DaVinci Resolve, providing automatic subtitles and a wide array of closed captioning features.
How to Receive Timeline/Sequence Transcript Markers in Blackmagic DaVinci Resolve with Simon Says
With Simon Says, users can add captions and subtitles to footage natively within DaVinci Resolve in over 100 languages. The workflow typically involves exporting a timeline from Resolve, uploading it to the Simon Says app for transcription, and then exporting the generated SRT subtitle file back into DaVinci Resolve. This method is particularly beneficial for custom translations or when AI transcription needs a human touch for ultimate accuracy.
Another approach involves using dedicated AI subtitle generators like Subtitlewhisper or Checksub. These platforms allow users to upload their video files, have the audio automatically transcribed, and then refine the subtitles using an online editor. The generated subtitle files, often in SRT or VTT format, can then be imported into DaVinci Resolve. These tools often boast advanced speech recognition technology, simplifying the process and significantly reducing the time spent on manual transcription. They also offer customization options for subtitle appearance, ensuring consistency with project branding.
The process with these external AI tools typically involves:
- Uploading Video: Uploading the video file to the AI platform.
- Automatic Transcription: The AI analyzes the audio and generates a transcript.
- Editing and Refinement: Reviewing and correcting the transcript, adjusting timing, and customizing the appearance.
- Exporting Subtitles: Downloading the subtitles in a compatible format (e.g., SRT).
- Importing into DaVinci Resolve: Importing the SRT file into DaVinci Resolve and placing it on the timeline.
This method provides a robust alternative for free version users, offering the power of AI-driven transcription without the cost of DaVinci Resolve Studio.
Importing and Exporting Subtitle Files in DaVinci Resolve
DaVinci Resolve's versatility extends to its ability to handle pre-made subtitle files. This is particularly useful when collaborating with others or when subtitles have been created using external software. The software supports popular formats such as SRT (SubRip Text), VTT (WebVTT), and TXT.
To import a subtitle file, users navigate to the "Media Pool," right-click, and select "Import Subtitles." The imported file then appears as a new element in the Media Pool, which can be dragged onto the timeline above the video track. DaVinci Resolve automatically aligns the subtitles based on the timing information embedded within the file.
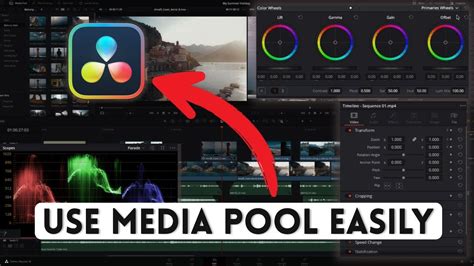
Once imported, these subtitles can be customized in the Inspector panel, allowing for adjustments to font, size, color, and positioning. This ensures that imported subtitles can be styled to match the project's overall look and feel.
Exporting subtitles is equally straightforward. In the "Deliver" tab, alongside rendering the video, users can choose to export subtitles either by burning them into the video or as a separate SRT or VTT file. This allows for maximum flexibility in how the final video is distributed and utilized across different platforms.
Tips for Efficient Subtitling in DaVinci Resolve
To further enhance the subtitling process within DaVinci Resolve, several tips and tricks can be employed:
- Keyboard Shortcuts: Mastering keyboard shortcuts can significantly speed up manual subtitling. For instance,
Shift+Cmd+L(on Mac) orShift+Ctrl+L(on Windows) can add a new subtitle track, whileCmd+Arrow keys(orCtrl+Arrow keys) allow for quick navigation between subtitle blocks. - Cinema Mode: Engaging "Cinema Mode" can help focus on the subtitles' timing and accuracy by minimizing interface clutter.
- Inspector Panel for Batch Edits: The Inspector panel is invaluable for making simultaneous alterations to multiple subtitle clips, saving considerable time.
- Save Track Styles as Presets: After fine-tuning the appearance of subtitles, saving the style as a preset ensures consistency and quick application to future projects.
- Efficient Timeline Navigation: Using keys like 'G' to snap to the beginning of subtitle clips and 'H' to jump to their end can improve timeline management.
By combining the power of free auto subtitle scripts, the integrated features of DaVinci Resolve Studio, and the efficiency of third-party AI tools, video editors can create accessible and engaging content with unprecedented ease and speed. Whether you're a seasoned professional or just starting, DaVinci Resolve offers a comprehensive ecosystem for mastering the art of subtitling.