DaVinci Resolve, a powerhouse in the realm of professional video editing, offers a comprehensive toolkit designed to bring your creative visions to the screen without friction. For those venturing into video editing, a fundamental skill to master is the ability to split clips, a process that can significantly enhance your post-production workflow, improve efficiency, and ultimately lead to a more polished final product. This capability is crucial whether you are trimming footage, creating dynamic split-screen effects, or isolating audio for intricate sound design. This guide will delve into the various methods of splitting clips and separating audio within DaVinci Resolve, catering to both beginners and seasoned editors looking to refine their techniques.
Understanding Clip Splitting in DaVinci Resolve
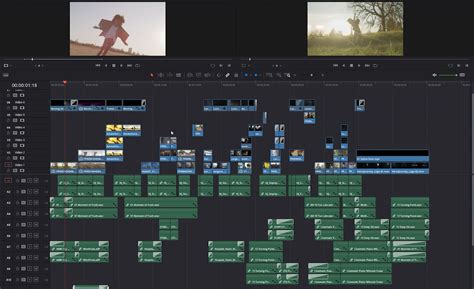
Clip splitting is a core technique in video editing that enables you to divide a single video clip into two or more distinct segments. This is an invaluable skill when you need to excise unwanted portions of a clip, insert other video elements or still images between existing footage, or prepare clips for more complex editing sequences. DaVinci Resolve, renowned for its professional-grade features, provides several intuitive ways to achieve this. By effectively splitting clips, you gain the precision needed to remove superfluous content and craft a more refined and impactful final video. Whether you are just beginning your editing journey or are an experienced professional, grasping how to split clips in DaVinci Resolve is an essential skill that will be utilized frequently, streamlining your editing process.
The Art of Splitting a Single Clip
To split a single clip within DaVinci Resolve, the initial step involves selecting the specific clip on your timeline by clicking on it. Subsequently, you will position the playhead precisely at the juncture where you intend to divide the clip. For granular control, you can employ the arrow keys to advance or rewind the playhead frame by frame, or utilize the zoom function to meticulously examine the frame you wish to split.
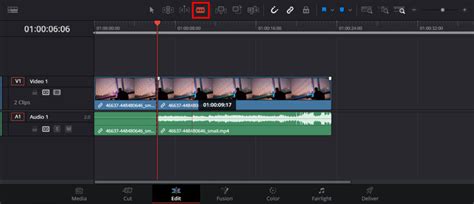
Once the playhead is accurately positioned, you can employ the Blade Tool to sever the clip into two independent segments. This tool is accessible by clicking its corresponding icon in the toolbar or by utilizing the keyboard shortcut Ctrl+B (or Cmd+B on macOS). An alternative method involves right-clicking directly on the clip and selecting "Blade" from the contextual menu that appears.
With the Blade Tool activated, a simple click on the clip at your desired split point will execute the cut. If you need to make a second cut to isolate a specific section, you can then use the cursor keys or the zoom function to move the playhead to the desired location for the second cut and repeat the process. You will now have two distinct clips, which can be independently edited and manipulated as required.
For swift splitting at specific points, DaVinci Resolve offers specialized shortcuts. You can split a clip precisely at its in-point using Ctrl+Alt+B (or Cmd+Opt+B on macOS), or at its out-point with Ctrl+Shift+B (or Cmd+Shift+B on macOS). These shortcuts are particularly useful for rapidly segmenting clips without the need for manual playhead adjustments.
Splitting Multiple Clips Simultaneously
In certain editing scenarios, you might find it necessary to split multiple clips at once. This is common when working with a lengthy sequence where you need to divide all clips at a specific point to insert another element or apply a consistent effect across several segments. Fortunately, splitting multiple clips in DaVinci Resolve is a straightforward procedure.
Begin by selecting all the clips you intend to split. This can be achieved by clicking and dragging a selection box over the clips on the timeline or by holding down the Shift key while clicking on individual clips to select them collectively.
Once your clips are selected, you can leverage the Blade Edit Mode to split them all concurrently. To activate this mode, click the Blade Tool icon in the toolbar or press the B key on your keyboard. With the Blade Tool active, simply click on the timeline at the point where you wish to make the cuts; this action will simultaneously split all selected clips at that precise location.
Alternatively, if you need to split all selected clips at the exact same point in time, you can utilize the "split at playhead" command. Position the playhead at your desired cut point on the timeline and press Ctrl+B (on Windows) or Cmd+B (on macOS). This command will execute the split across all selected clips at the playhead's current position.
Rejoining Split Clips in DaVinci Resolve
The process of rejoining split clips in DaVinci Resolve is as simple as splitting them, requiring just a few clicks to create a seamless transition between two previously divided segments. After splitting a clip, you can easily merge it back into a single entity. To do this, select the two clips you wish to join by clicking and dragging over them on the timeline.
Next, right-click on one of the selected clips and choose the "Join Clip" option from the context menu. A quicker method is to use the keyboard shortcut Ctrl + J (on Windows) or Cmd + J (on Mac). This action will effectively merge the two selected clips into one continuous clip.
Should you need to further refine the newly joined clip, you can utilize the Blade Tool or any other editing tools available in DaVinci Resolve to make any necessary adjustments. Furthermore, you have the flexibility to apply audio or video effects to the rejoined clip as desired, ensuring a cohesive final output.
Separating Audio from Video Clips
Splitting audio from a video clip is a highly beneficial technique when you need to make distinct adjustments to the audio track independently of the video. DaVinci Resolve offers multiple methods to achieve this separation.
The primary method involves selecting the video clip from which you wish to detach the audio, either on the timeline or within the Media Pool. Then, right-click on the clip and choose "Detach Audio" from the drop-down menu. This action will generate a new, independent audio clip in the Media Pool, now separate from its original video counterpart.
Another effective approach utilizes the Blade Edit Mode. Select the clip on the timeline and activate Blade Edit Mode by clicking the icon on the toolbar or using the shortcut key B. Move the playhead to the precise point where you want to split the audio and press the shortcut key Ctrl + B to split the clip. This action will divide both the video and the audio into two distinct clips.
Once the audio has been separated from the video, you can then proceed to make detailed adjustments to the audio track within the Fairlight page. This dedicated audio post-production environment within DaVinci Resolve provides a wealth of tools and special effects to enhance audio quality, mix levels, and refine sound design. When you have completed your audio edits, you can rejoin the audio and video clips by simply dragging them together on the timeline or by employing the "Join Clips" command from the right-click menu, ensuring that your audio and video remain synchronized.
DaVinci Resolve's Fairlight Page for COMPLETE NOOBS!
Mastering these techniques for splitting clips and managing audio in DaVinci Resolve will undoubtedly elevate your editing efficiency and empower you to create more sophisticated and professional-looking projects. Whether you are working with version 17 or the latest iteration of DaVinci Resolve, these fundamental skills are essential for a robust editing workflow.