Photopea, a powerful and accessible web-based image editor, offers a robust set of tools for creative manipulation, and at its core lies the versatile Brush Tool. This tutorial delves into the intricacies of using brushes in Photopea, from fundamental settings to advanced customization, empowering users to transform their images with depth and dimension. Whether you're a beginner looking to add simple touches or an experienced designer seeking intricate effects, understanding the Brush Tool is paramount.
The Foundation: Selecting and Understanding the Brush Tool
The journey into brushwork in Photopea begins with selecting the Brush Tool itself. This can be achieved by simply hitting the shortcut key 'B' on your keyboard. Once activated, a crucial top bar will appear, presenting a range of immediate brush options. Before diving into painting, it's essential to familiarize yourself with these settings, as they are the building blocks for achieving your desired artistic outcome.
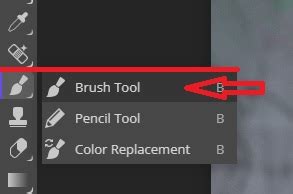
The primary function of the Brush Tool is to paint on your canvas. You can achieve this by clicking and dragging the mouse in a freeform manner, allowing for organic strokes. For more precise applications, the Shift key can be employed to draw perfectly straight lines, a fundamental technique for creating geometric elements or clean borders.
Essential Brush Settings: Size, Opacity, and Blending Modes
Among the most fundamental settings for any brush is its size. This directly controls the thickness of the line or stroke you are applying. Adjusting the brush size is a straightforward process, allowing you to adapt your tool to the scale and detail required for your project.
Equally important is opacity. This setting dictates how prominently the brush stroke will appear on the image. A higher opacity results in a more solid and opaque application of color, while a lower opacity creates a more translucent effect, allowing the underlying image to show through. This is invaluable for subtle shading, soft blending, and building up color gradually.
The way your brush strokes interact with the existing image is governed by blending modes. Photopea offers a wide array of blending modes, each affecting the color and tonal interactions differently. Understanding these modes, such as Multiply, Screen, Overlay, and others, is key to achieving sophisticated layering and color effects. Experimenting with different blending modes can lead to unexpected and beautiful results, transforming a simple brush stroke into a complex textural element.
Delving Deeper: Brush Properties and Dynamics
Beyond the basic settings, Photopea's Brush Panel unlocks a deeper level of control over brush behavior and appearance. To access this panel, navigate to "Window" in the menu bar and select "Brush." This panel is organized into several sections, each offering specific properties to fine-tune your brush strokes.
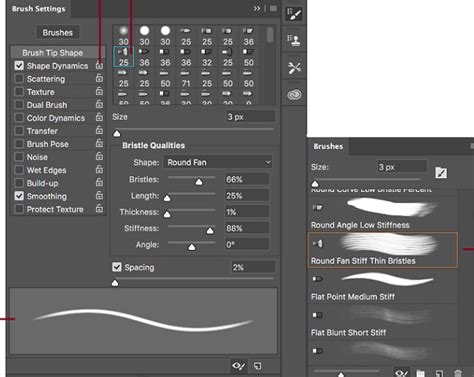
One of the critical properties is the spacing between the "shapes" or instances of the brush tip that make up a single stroke. With a Spacing of 0%, the brush tip will be applied continuously, creating a solid line. Increasing the spacing introduces gaps between these instances, which can be used to create textured or dashed lines, depending on the brush tip shape.
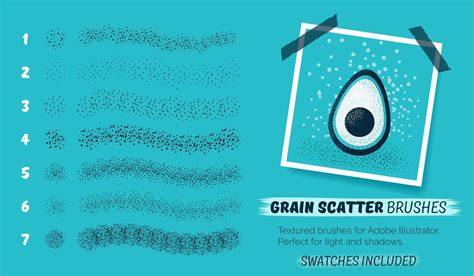
The Scatter setting introduces randomness to the placement of each brush shape within a stroke. With a Scatter of 0%, the brush tips will remain in a perfectly even line, following the path of your cursor. As you increase the Scatter value, each individual brush shape is moved to a random place near its original position. This can create a more organic, textured, or natural-looking effect, simulating elements like dust, confetti, or scattered particles.
The Jitter settings are where you can introduce significant variation and dynamism into your brush strokes. Size Jitter allows you to control how much the size of each brush tip varies within a single stroke. This means that even with a set brush size, individual instances of the brush tip can be larger or smaller, adding a sense of organic irregularity.
Color Jitter is particularly powerful for manipulating the colors of your stroke with greater precision. By controlling how random the hues are, you can create unique and interesting visual appeals. This is invaluable for achieving naturalistic color variations, such as those found in fur, foliage, or textured surfaces. The same principle applies to Flow Jitter, which influences the variation in the opacity of individual brush tip instances within a stroke, further enhancing textural complexity.
Expanding Your Toolkit: Custom Brushes
Photopea's capabilities extend far beyond its default brush presets. The ability to install and use custom brushes opens up a universe of possibilities for achieving highly specific effects. These custom brushes are often created as raster images with transparency, defining their unique shapes and textures.
To use custom brushes, you first need to find and download them to your computer. Many websites offer free and premium custom brush packs for image editing software. Once downloaded, Photopea supports loading custom brushes in the form of .ABR files, which is a common format for brush presets. These custom brushes should then become available within the Brushes panel, typically appearing at the end of the predefined brush gallery.
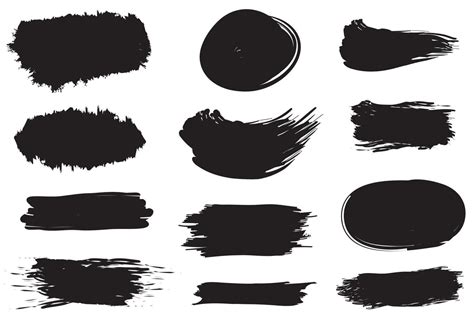
The integration of custom brushes significantly enhances Photopea's flexibility. Whether you're looking for textured brushes to mimic natural media, intricate patterns, or unique artistic elements, custom brushes allow you to tailor your toolkit to your exact creative needs.
The Power of Brush Tracks and Behavior
It's important to understand that "brush tools" in Photopea encompass a broader category than just the primary Brush Tool. Tools like the Eraser and the Smudge tool also operate on the principle of a "brush track." This means they utilize a defined shape and a specific behavior to modify the image.
A brush has a track shape, which is essentially the form it takes as it moves across the canvas. This can be a simple circle, a textured pattern made with a raster image, or a more complex custom shape. Furthermore, brushes can exhibit dynamic behavior. This means they can change their shape while you draw. For instance, a brush might narrow at the end of a stroke, or its shape might dynamically adjust based on pressure or tilt if you are using a graphics tablet.
Every brush tool typically draws a stroke by applying multiple instances of its brush shape. The Size property, as mentioned earlier, dictates the overall thickness of the line produced by these repeated applications.
Advanced Brush Dynamics and Control
Within the Brush Panel, each section offers granular control over how your brush behaves. For instance, Shape Dynamics allows for precise control over variations in size, angle, and roundness of the brush tip. This is crucial for creating organic textures, simulating natural brush strokes, or achieving specific artistic styles.
The Transfer section provides control over opacity and flow jitter. This means you can dictate how much the opacity and flow of individual brush tip instances vary, leading to more nuanced and realistic effects. For example, simulating the gradual build-up of paint or the fading of a chalk line.
Other sections within the Brush Panel might include Texture, allowing you to overlay a pattern onto your brush strokes; Dual Brush, which combines two brush tips for complex textures; Color Dynamics, offering control over hue, saturation, and brightness jitter; and Other Dynamics, which can include features like wetness, mixing, and smoothing. Each of these sections offers a layer of complexity that, when mastered, allows for incredibly sophisticated image manipulation.
Photopea Advanced Guide (2025) | The Only Advanced Guide You’ll Need
Conclusion: Unleashing Creative Potential
The Brush Tool in Photopea is far more than just a simple painting instrument. It is a gateway to a vast array of creative possibilities. By understanding and mastering its various settings, properties, and the ability to incorporate custom brushes, users can unlock new levels of artistic expression. The tool's great functionality and scalability make it an indispensable asset for both novice and professional users, offering the power to create truly amazing effects and add depth and dimension to any image. The journey of mastering Photopea's brushes is an ongoing exploration, with each new setting and technique opening up further avenues for creative discovery.