Understanding the nuances of Dots Per Inch (DPI) is a critical step for any digital artist using Procreate, directly impacting the final quality of their artwork, especially when transitioning from the digital canvas to a physical print. While the term DPI is commonly used, in the context of digital art software like Procreate, it's more accurately referred to as PPI, or Pixels Per Inch. This distinction is fundamental to grasping how digital images are constructed and how their resolution is perceived.
The Building Blocks of Digital Art: Pixels and Their Dimensions
At its core, a digital image is a mosaic of tiny squares, each representing a single pixel. These pixels are imbued with specific colors and shades, and when viewed from a typical distance, they blend seamlessly, creating the illusion of smooth gradients and continuous forms. The smaller and more numerous these pixels are within a given area, the more convincing and detailed this illusion becomes. Each digital image is defined by three interconnected properties: pixel dimensions, physical dimensions, and DPI (or PPI). Pixel dimensions dictate the total number of pixels that make up the image, expressed as width x height (e.g., 2000 x 2000 pixels). Physical dimensions refer to the actual size of the image in real-world units like inches, centimeters, or millimeters. DPI, then, specifies how many of these pixels will be contained within each inch of the physical dimension.
Navigating DPI in Procreate: Print vs. Digital Display
The question of "what DPI should you choose for your Procreate artwork?" is a common one, and the answer hinges on the intended final output of your creation. While it might seem intuitive to set a very high DPI, such as 1000 DPI, for every project, this approach is often impractical. Large files with an excessive number of pixels demand significant Random Access Memory (RAM) for smooth processing. As more layers are added to an artwork, the pixel count and, consequently, the RAM requirement, increase further. This is precisely why Procreate imposes limits on the number of layers available based on the canvas size and resolution.
For artists who intend to print their artwork, or wish to keep this option open for future possibilities, a DPI of 300 is widely considered the industry standard. This resolution ensures that the printed image appears sharp and smooth when viewed at a typical reading distance, preventing the individual pixels from becoming noticeable and creating a "pixelated" effect.
However, the optimal DPI for print is not a one-size-fits-all solution. If the artwork is intended for a large format, such as a poster that will be viewed from a considerable distance, a lower DPI, for instance, 150 or even 200, can be perfectly adequate. From afar, the human eye is less likely to discern the finer details that a higher DPI would provide, and a lower resolution can still result in a cohesive and visually pleasing image. Conversely, smaller prints, like postcards or greeting cards, will be examined at a much closer range. In these cases, a higher DPI is necessary to maintain sharpness and prevent pixelation when viewed up close.
The Irrelevance of DPI for Online Display
When an artwork is intended solely for digital display - for instance, on social media platforms, websites, or as a digital wallpaper - the concept of DPI becomes largely irrelevant. Whether you set your DPI to 1 or 1000 for an image that will only be viewed on a screen, the actual visual quality will not change. The perceived sharpness and detail of a digital image are determined by its pixel dimensions. Therefore, for online use, the primary consideration should be the desired pixel dimensions of the final image. It is often recommended to create your canvas with pixel dimensions at least twice as large as you anticipate your final online display size to be. This provides ample room for zooming in during the creative process without sacrificing detail and allows for greater flexibility when exporting for various online platforms. Artists can even opt for larger pixel dimensions to accommodate intricate details, always mindful of Procreate's layer limitations.
Debunking Misconceptions: DPI vs. Pixel Dimensions
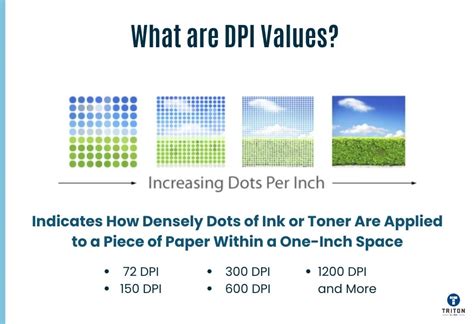
A common piece of advice found online suggests using specific pixel dimensions in conjunction with a high DPI, such as "2000 x 2000 pixels at 300 DPI," to avoid pixelation. This recommendation is often misguided. The critical factor determining image quality, especially in terms of pixelation, is the number of pixels themselves. A 2000 x 2000 pixel image at 300 DPI will have the exact same image quality as a 2000 x 2000 pixel image at 72 DPI. The DPI value, in this scenario, only dictates how large the printed output will be. A low DPI will result in a larger, potentially pixelated print, while a high DPI will yield a smaller, smoother print. The underlying pixel data remains the same.
PPI is Imaginary! PPI vs DPI vs Resolution
Adjusting DPI: Before and After Creation
Procreate offers flexibility in setting the DPI for your artwork. When creating a new canvas, you can either select from a range of preset sizes, which typically have DPI values between 132 and 400, or tap the "New Canvas" button to manually specify both the dimensions and the DPI.
If you realize after starting your artwork that the DPI needs adjustment, Procreate allows for this modification. Navigate to Actions (the wrench icon) → Canvas → Crop & Resize. Within the Crop & Resize settings, you can tap the "Settings" tab to adjust the DPI. It's crucial to understand the implications of this adjustment. Increasing the DPI on an existing artwork will proportionally decrease its physical width and height, as more pixels are being packed into each inch. Conversely, decreasing the DPI will increase the physical dimensions of the canvas.
Resampling and Quality Considerations
When you need to change the DPI of an existing canvas, particularly to increase it for print, you'll encounter the "Resample Canvas" option. Enabling this feature ensures that the changes are applied to the entire image, recalculating the pixel dimensions based on the new DPI. However, it's important to be aware that resizing a raster image, especially when increasing its resolution, always involves some degree of quality loss. When you aim to make a print smoother and larger by increasing the DPI, you are essentially asking the software to create additional pixels through interpolation - a process of estimating new pixel values based on existing ones. While this can prevent obvious pixelation, the resulting image may not possess the same sharpness as an image that was originally created at a higher resolution.
Factors Influencing DPI Choice for Print
Beyond the general guidelines, several factors should inform your DPI decision when preparing artwork for print:
- Size of the Final Print: As previously discussed, larger prints viewed from a distance can often accommodate lower DPI values than smaller prints viewed up close.
- Viewing Distance: The further away the viewer will be from the printed artwork, the less critical a very high DPI becomes. For large murals or billboards, DPI values significantly lower than 300 are common.
- Printing Material: The texture and absorbency of the printing material can influence the perceived sharpness of the final print. For instance, printing on fabric, which has a more irregular surface than smooth paper, may support a lower density of printed detail while still achieving a good result.
- Professional Printer Recommendations: If you are working with a professional printing service, it is always advisable to consult with them beforehand. They can provide specific DPI requirements and guidance based on their printing technology and the desired outcome. They may also suggest a CMYK color profile for print, which differs from the RGB profile typically used for digital displays.
DPI and Layer Limits in Procreate
The DPI of your canvas directly impacts the number of layers you can utilize within Procreate. A higher DPI means more pixels are being used to define the image, and this increased pixel count consumes more of the iPad's memory. Consequently, as the canvas resolution increases, Procreate will reduce the maximum number of layers available for that specific project to manage performance and prevent crashes. This is a crucial consideration for artists who work with many layers, as they may need to strike a balance between desired print resolution and the practical limitations of layer usage on their device. For instance, a very large canvas at a high DPI might only allow for a handful of layers, whereas a smaller canvas at a lower DPI could support dozens.
Practical Application: Setting Up Your Canvas
When embarking on a new Procreate project with printing in mind, it's best practice to establish your desired DPI and physical dimensions from the outset. This proactive approach ensures that you are working with an appropriate resolution from the beginning, minimizing the need for potentially quality-compromising adjustments later.
If you are unsure about the exact size or DPI, you can create a new canvas and later access the "Crop & Resize" settings to fine-tune these parameters. Remember that when adjusting DPI on an existing canvas, especially increasing it, the physical dimensions will shrink. This is an inherent aspect of raster image manipulation - you are essentially redistributing the existing pixels into a smaller physical space.
Ultimately, the "best" DPI for your Procreate artwork is not a fixed number but rather a strategic decision based on its intended destination. By understanding the relationship between pixels, physical dimensions, and DPI, and by considering the final output and viewing context, artists can make informed choices that ensure their digital creations translate beautifully into the physical world.