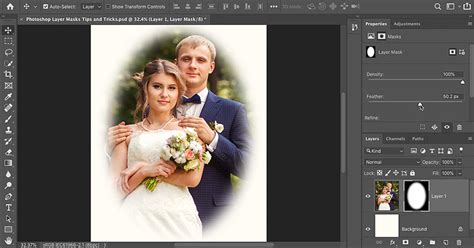
Photoshop's layer masks are an invaluable tool, offering non-destructive editing that allows for the refinement of selections and precise control over the visibility of specific areas within an image. This capability is crucial for achieving professional-looking results without permanently altering original pixel data. Among the various masking techniques available, using shapes to define these masks offers a powerful and versatile approach, particularly when working with defined boundaries or creative compositions. This tutorial delves into two primary methods for employing shape masks in Photoshop: utilizing shape layers for vector masks and leveraging clipping masks for flexible image containment.
Understanding the Fundamentals of Layer Masks
Before diving into shape-specific techniques, it's essential to grasp the core principles of layer masks. A layer mask operates on the concept of black and white to control transparency. Painting with black on a mask conceals the corresponding area of the layer, while painting with white reveals it. Shades of gray create semi-transparent effects. This fundamental understanding is key to manipulating both pixel-based and vector-based masks effectively.
To quickly toggle between black and white for painting on a mask, the shortcut key "X" is indispensable. Furthermore, the ability to duplicate masking effects is streamlined by copying a layer mask. This is achieved by holding down the Alt/Option key (Mac) or Alt key (Windows) and dragging the mask thumbnail to the desired target layer. Maintaining the connection between a layer and its mask is vital for cohesive editing. This link is managed by clicking the chain icon between the layer and its mask thumbnail in the Layers panel. When linked, moving the layer also moves its mask, and vice versa, ensuring they remain synchronized. For applying a single mask to multiple layers simultaneously, grouping those layers together (Ctrl/Cmd + G) and then applying a layer mask to the group is the most efficient method.
Method 1: Vector Masks with Shape Layers
One of the most straightforward ways to incorporate shapes into your masking workflow is by using Photoshop's vector shape tools to create a vector mask. This method is particularly effective when you need to confine a single image within a specific, scalable shape.
Imagine you have a base layer, such as an image of the ocean, and you want it to be displayed only within a defined shape. The process begins by selecting the appropriate shape tool from the Photoshop toolbar. For illustrative purposes, the Polygon Tool is an excellent choice because it allows for the creation of easily discernible shapes. While it's possible to create a path, opting for a shape layer offers greater visual clarity during the process.
When creating the shape, you'll want to assign it a fill color, such as black, and ensure there is no stroke. For the Polygon Tool, specifying the number of sides, for instance, six, will result in a hexagonal shape. This shape, once created on its own layer, can then be used as a mask for your image layer.
Applying a Shape Layer as a Mask
To apply this shape as a mask to your ocean layer, you would typically create a clipping mask. This involves ensuring the shape layer is positioned directly above the image layer in the Layers panel. Then, by creating a clipping mask, the image layer will be constrained by the boundaries of the shape layer. Any part of the image that falls outside the shape will be hidden, while the content within the shape remains visible. This method is highly beneficial as vector shapes are resolution-independent, meaning they can be scaled up or down without any loss of quality, ensuring your mask remains crisp at any size.
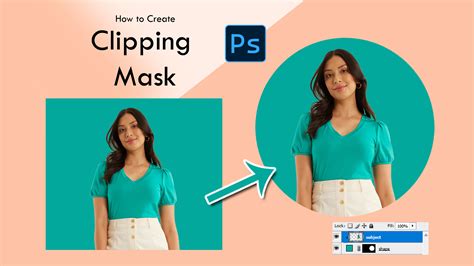
Method 2: Clipping Masks for Flexible Containment
Clipping masks offer a highly flexible and intuitive way to control the visibility of a layer by using the content of another layer as a boundary. While they share a similar end result with layer masks - controlling what is seen - their underlying mechanisms are distinct. Clipping masks are especially powerful when you need to fit images into shapes, text, or other defined elements.
Understanding Clipping Masks: Content vs. Transparency
The core principle of a clipping mask lies in the relationship between two layers: a bottom layer that acts as the mask, and a top layer that is "clipped" to it. The visibility of the top layer is dictated by the content of the bottom layer. Where the bottom layer contains actual content (be it pixels from an image, vector shapes, or text), the content on the layer above it is visible. Conversely, any area on the bottom layer that is transparent will cause the corresponding area on the top layer to be hidden.
To create a clipping mask, you need at least two layers in your document. Let's consider an example where you have an original image on a background layer. To prepare for a clipping mask, you would first unlock the background layer to make it editable. Then, you would add a new layer below this image layer. By default, new layers in Photoshop are blank and entirely transparent.
Creating and Manipulating Clipping Masks
To create a clipping mask, you first select the layer that you intend to be clipped - this is the layer that will be affected by the mask. In our example, this would be the image layer. Then, you can create the clipping mask through the Layer menu by selecting "Create Clipping Mask," or more swiftly, by holding down the Alt (Win) / Option (Mac) key and clicking on the dividing line between the two layers in the Layers panel. A small downward-pointing arrow will appear next to the clipped layer, indicating its connection to the layer below.
If, at this stage, the clipped image is hidden, it's likely because the bottom layer (the intended mask) contains no content and is therefore entirely transparent. To rectify this, you need to add content to the bottom layer. This can be done by drawing a shape, as described earlier, or by placing another image or text onto it.
For instance, if you draw a black shape on the bottom layer, the preview thumbnail for that layer will now display the shape. When you create the clipping mask, the image on the top layer will now be visible only where it overlaps with the content on the bottom layer. This allows for precise placement, as you can then use the Move Tool to reposition the image within the shape, ensuring your subject is optimally framed.
Advanced Applications of Clipping Masks
The versatility of clipping masks extends beyond simple shapes. They are ideal for:
- Fitting Images into Vector Shapes: You can import a vector shape created in another program or draw one directly in Photoshop and then use a clipping mask to fill that shape with an image.
- Placing Images Inside Text: This is a popular technique for creating visually engaging titles or graphics. You would type your text, and then place an image layer above it, creating a clipping mask. The image will then appear only within the letterforms of your text.
- Creating Custom Photo Layouts: For bloggers and designers, clipping masks are invaluable for crafting unique and professional-looking photo arrangements that stand out.
Consider a scenario where you want to place a photo inside a frame. You would have the frame on one layer and the photo on another, positioned above it. Creating a clipping mask will confine the photo to the area within the frame.
Refining Clipped Content
Once a clipping mask is established, you retain full control over the clipped content. The Move Tool allows you to reposition the image layer within the mask, ensuring the desired portion is visible. Furthermore, Photoshop's Free Transform command (Ctrl/Cmd + T) enables you to resize the clipped image. Holding the Shift key while dragging the corner handles prevents distortion, allowing you to scale the image proportionally until it fits perfectly within the mask. Pressing Enter (Win) / Return (Mac) confirms the transformation.
Clipping Mask vs Layer Mask. Same? Different? [Photoshop Tutorial]
Combining Techniques for Complex Compositions
While both shape layers used as vector masks and clipping masks offer distinct advantages, they can also be used in conjunction with other Photoshop features to achieve highly sophisticated results. For example, you might use a vector shape to define a primary mask and then employ a layer mask on top of that to further refine specific areas within the shape.
Non-Destructive Editing with Shape Masks
The inherent advantage of both methods discussed is their non-destructive nature. Using shape layers for masks or employing clipping masks ensures that your original image data remains untouched. This allows for experimentation and revisions without fear of compromising the source material. You can easily adjust the shape, reposition the image, or even change the mask entirely at any point in your workflow.
Precision and Scalability
Vector masks derived from shape layers offer unparalleled scalability. As vector graphics are defined by mathematical equations rather than pixels, they can be resized infinitely without any degradation in quality. This is a significant benefit for projects that require output at various resolutions or for designs that will be used across different media. Clipping masks, while relying on the pixel data of the mask layer, still provide a clean way to contain images within defined boundaries, and the underlying content can still be scaled non-destructively if it's a smart object.
Creative Possibilities
The ability to define masks using shapes opens up a vast realm of creative possibilities. Beyond simple geometric forms, you can import intricate custom shapes, create complex collages, or integrate images seamlessly into text-based designs. This empowers designers to move beyond standard rectangular frames and explore more dynamic and visually compelling layouts.
For those looking to delve deeper into specific applications, resources like "5 Easy Steps To Using Clipping Mask With Text In Adobe Photoshop" offer focused guidance on specialized techniques. Whether you're aiming to create custom photo layouts that appear professional and unique, or simply want to master fitting images into defined shapes, understanding these masking techniques is fundamental to unlocking Photoshop's full potential.
Practical Workflow Considerations
When deciding between a vector mask from a shape layer or a clipping mask, consider the following:
- Complexity of the Mask: For simple, single shapes that need to be scaled, a vector shape layer is often more efficient and maintains higher quality.
- Multiple Elements: If you are fitting an image into text or a more complex, non-geometric shape, a clipping mask is generally more versatile.
- Editability: Both methods are non-destructive, but vector masks offer superior scalability without quality loss.
- Workflow Integration: Clipping masks are particularly intuitive when working with pre-existing layers that you want to contain within another element.
Ultimately, mastering both shape-based vector masks and clipping masks will equip you with a comprehensive toolkit for image manipulation and creative design in Photoshop. The ability to precisely control visibility and integrate elements within defined boundaries is a cornerstone of professional digital art and graphic design.