In the realm of digital art and photo manipulation, light is a fundamental element that can dramatically alter the mood, focus, and realism of an image. Photoshop offers a vast array of tools to simulate and enhance lighting effects, but for truly unique and dynamic results, creating custom brushes is an invaluable skill. This tutorial delves into the process of crafting your own light ray and illumination brushes in Adobe Photoshop, empowering you to move beyond pre-set options and inject your artwork with personalized brilliance. Whether you aim to amplify existing light sources in photographs, introduce ethereal light ray overlays, or create entirely new luminous elements, understanding brush creation is key. We will explore the fundamental techniques to build two distinct types of light beam brushes, laying the groundwork for you to experiment and generate a multitude of variations.
The Foundation: Creating Your First Light Beam Brush
To embark on the journey of creating custom light brushes, the first step involves setting up a suitable canvas and generating the raw shapes that will form the basis of your illumination effects. This process begins with a new document and a carefully constructed gradient that, when manipulated, will yield the characteristic radial blur of light rays.
- Setting Up the Canvas: Initiate the process by creating a new document in Photoshop. For optimal flexibility, set the Width and Height to 5000 Pixels and maintain a Resolution of 72 Pixels/Inch. This large canvas size ensures that your brushes retain detail even when scaled up.
- Establishing the Background: Select the Paint Bucket Tool (G). Choose a pure black color and fill the Background layer with it. Black serves as an ideal starting point, providing strong contrast for the subsequent steps.
- Feathering the Selection: Navigate to Select > Modify > Feather Selection and set the Feather Radius to 200 pixels. This softening of the selection edges is crucial for the smooth transition of light.
- Creating the Initial Light Source: While the feathered selection is active, you will begin to render the foundational elements of your light rays. It's important to note that there are many variations of sun rays one can create in Photoshop, and this method provides a solid starting point.
- Duplicating and Blurring: To create the base of our light beam Photoshop brushes, you need to blur the initial elements. Select the layer containing your initial render (referred to as the "SUN RAYS" layer in some contexts) and press Control-J to create a duplicate. Work on the duplicated layer, let's call it "SUN RAYS 1".
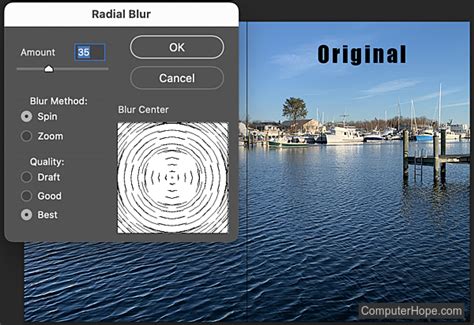
- Applying Radial Blur: Go to Filter > Blur > Radial Blur. Configure the panel with an Amount set to 99 and select the "Zoom" Blur Method. This specific combination is instrumental in generating the outward radiating effect of light beams. Press OK to apply the blur.
- Enhancing Visibility with Levels: To make the sun rays in Photoshop more visible and defined, go to Image > Adjustments > Levels. Set the Input Levels to 25 for the shadows, 0.65 for the gamma, and 205 for the highlights. This adjustment will increase the contrast and make the rays pop.
- Sharpening for Detail: To add more detail and crispness to the rays, sharpen them slightly. Navigate to Filter > Sharpen > Unsharp Mask and set the Amount value to 1% and the Radius to 180 Pixels. This subtle sharpening refines the edges of the light beams without making them appear artificial. This is the base for your first light beam brush for Photoshop.
Refining and Diversifying Light Brush Shapes
With the fundamental structure of your light rays established, the next phase involves refining these shapes and exploring techniques to create variations, including a second distinct brush type. This stage focuses on manipulating the existing blur, transforming the shapes, and preparing them for brush definition.
- Duplicating for Variation: Right-click on the "SUN RAYS" layer and select "Duplicate Layer" or press Control-J. This creates another copy to work with for a different brush variation.
- Applying Radial Blur Again: On this new duplicated layer, go to Filter > Blur > Radial Blur and set the Amount to 99, just as before.
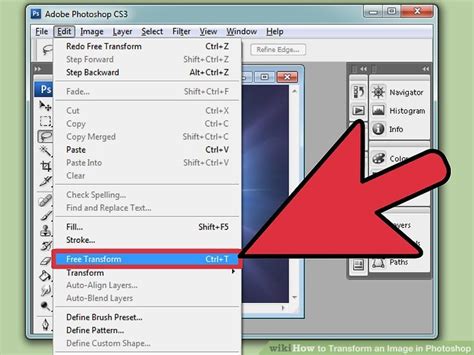
- Transforming for Narrower Rays: To make the sun rays narrower and potentially more focused, go to Edit > Free Transform. Use the transformation handles to scale the rays vertically, compressing them to achieve a more slender appearance. Press Enter to confirm the transformation.
- Creating the Actual Brushes: You've now created the visual shapes of your potential brushes. The critical step to making them actual Photoshop brushes is to define them. For the first light beam brush, you need to invert the colors. This is because Photoshop brushes are defined by transparency; what is black in your image will become opaque in the brush, and white will be transparent.
- Inverting Colors: Go to Select > All to select the entire image. Then, go to Image > Adjustments > Invert (Control-I). This will turn your black rays into white and the black background into white.
- Defining the Brush Preset: With the inverted image active, navigate to Edit > Define Brush Preset. Give your brush a descriptive name, such as "Light Beam 1," and click OK. Your first custom light ray brush is now ready to be used.
Exploring Advanced Techniques and Brush Variations
The foundation for creating light ray brushes has been laid. However, the true power of custom brush creation lies in experimentation and understanding how subtle adjustments can lead to vastly different results. To create more variations of these two basic light ray Photoshop brushes, you can employ several techniques:
- Contrast Adjustment: Increase or decrease the contrast of your blurred shapes before defining them as brushes. Higher contrast can lead to sharper, more defined rays, while lower contrast can produce softer, more diffused beams.
- Sharpening: As demonstrated with the Unsharp Mask, sharpening can add definition. Experiment with different values to achieve varying degrees of crispness in your light effects.
- Transformation: Utilize the Free Transform Tool (Control-T) extensively. Make rays wider, narrower, or even distort them slightly to simulate different types of light sources or atmospheric conditions.
- Blur Direction and Amount: While Radial Blur with Zoom is effective, consider exploring other blur filters or adjusting the amount and center point of the Radial Blur to create unique patterns and intensities of light.
- Layer Styles: When applying brushes in your artwork, layer styles such as Outer Glow, Inner Glow, or Color Overlay can significantly enhance the luminous quality of the light. For instance, applying an Outer Glow to a light ray brush layer can make it appear to emit light more intensely.
How to Create Your Own Light Ray Brushes From Scratch in Adobe Photoshop
Understanding Light Behavior for Realistic Brushes
To create truly convincing light effects, it's essential to study how light actually behaves in the real world and mimic it in your artwork. Consider these principles:
- Directionality: Light emanates from a source and travels in a particular direction. Always keep the direction of the light in mind when placing and manipulating your brushes. This ensures consistency within your scene.
- Color Temperature: Light sources have different color temperatures. Sunlight, for example, has a warm, yellowish hue, while moonlight is cooler and bluer. Avoid using a pure white color while painting the light if you aim for realism, as it rarely appears in nature. Instead, select off-white colors with a slight tint that matches the light source.
- Diffusion and Scattering: Light can be diffused by atmospheric particles like dust or fog, creating softer, more spread-out effects. It can also be scattered by surfaces, leading to secondary illumination.
- Intensity and Falloff: Light intensity diminishes with distance from the source. This "falloff" is a critical aspect of realism that can be simulated through brush opacity, color blending, and the use of adjustment layers.
By observing these natural phenomena, you can inform the creation and application of your custom brushes, leading to more believable and impactful lighting.
Beyond Basic Rays: Exploring Diverse Light Brush Applications
The techniques discussed thus far are foundational for creating light ray brushes. However, Photoshop's brush engine is incredibly versatile, allowing for the creation of a wide spectrum of light-related effects. Beyond simple rays, consider how you can generate brushes for other luminous elements.
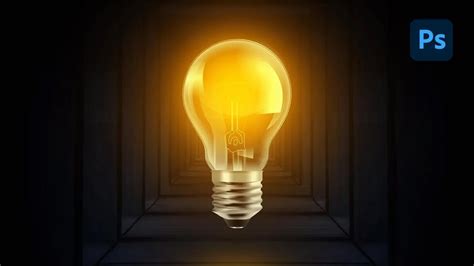
Simulating Light Bulbs and Street Lights
A common need in digital art is to create the effect of artificial light sources, such as glowing light bulbs or illuminated streetlights. While dedicated actions and brushes exist, understanding the underlying principles can help you craft your own solutions.
- Creating a Base Shape: Start with a new document and create a circular or bulbous shape. This will be the core of your light source.
- Adding a Glow: The key to making a light bulb appear "on" is to simulate the emitted glow. You can achieve this by applying layer styles or painting with soft, luminous colors.
- Using Layer Styles: A simple yet effective method involves creating a new layer, setting its color to white, and then applying an "Outer Glow" layer style. Experiment with the blend mode (often "Screen" or "Linear Dodge (Add)"), color, size, and spread of the glow to achieve the desired intensity.
- Painting with Soft Brushes: Alternatively, use a soft-edged brush with a light, emissive color (e.g., a pale yellow or orange for an incandescent bulb, or a cooler white for an LED). Paint this color around the base shape. You can then duplicate this layer, apply a blur, and set it to a blending mode like "Screen" to enhance the glow effect.
- Defining the Brush: Once you have a satisfactory glow effect on a layer, you can define this as a brush. You might create a brush that represents the core light source, or one that simulates the radiating halo. To do this, select the illuminated area, invert your selection (as white areas become transparent in brushes), and go to Edit > Define Brush Preset.
Exploring Pre-made Brush Packs and Actions
While creating your own brushes offers unparalleled customization, the market also provides a vast array of pre-made Photoshop brush sets and actions specifically designed for light effects. These can serve as excellent starting points, sources of inspiration, or quick solutions for specific needs.
- Edgy and Distorted Effects: For those seeking a more dramatic and stylized look, various brush packs offer edgy, eerie, or distorted light effects. These can instantly transform your images into unique works of art, perfect for thematic compositions.
- Fiery and Intense Glows: Some brushes are designed to produce fiery, intense, and eye-catching light rays, often with golden or reddish hues. These are ideal for adding a dramatic flair and demanding viewer attention. Many are compatible with recent Photoshop CC versions.
- Energy and Movement: Photoshop actions can be employed to create luminous GIFs or static images that convey energy and movement. By simply swiping a brush over an image, you can add dynamic lighting effects, making your visuals more engaging.
- Black Light and Neon Effects: For specialized illumination, packs like "Black Light Action + Brush Pack" allow you to simulate effects without needing actual paint. Similarly, neon light brushes can help you achieve vibrant, eye-catching neon effects without extensive manual effort, often providing a large number of brushes within a single download.
- Soft and Vintage Looks: If a more subtle and delicate aesthetic is desired, actions like the "Soft Bright Photoshop Action" can imbue images with a gentle, vintage look and feel. These often come bundled with tutorials for proper usage.
These pre-made resources, while convenient, can also be deconstructed to understand the techniques used, further informing your own brush creation process.
Practical Application: Integrating Light Brushes into Your Workflow
The ultimate goal of creating custom light brushes is to integrate them effectively into your photo manipulations and digital paintings. This involves not just applying the brush but understanding how to blend it seamlessly with your existing image.
Enhancing Existing Light Sources
When working with photographs, light rays can be used to amplify or add to the existing lighting. For instance, if a photo has a strong backlight, you can use your custom brushes to extend those rays or add a subtle glow around the light source.
- Example Scenario: Imagine a photograph of a forest with sunlight filtering through the trees. You can use your "Light Beam" brush to paint in more pronounced rays of light, enhancing the sense of depth and atmosphere. Apply the brush on a new layer set to a "Screen" or "Linear Dodge (Add)" blend mode, and adjust the brush opacity to control the intensity.
Creating New Light Sources
Custom brushes are also powerful tools for introducing entirely new light sources into a scene, whether for dramatic effect or to guide the viewer's eye.
- Example Scenario: In a dark, moody portrait, you might want to add a spotlight effect emanating from an unseen source. You could use a radial blur-based brush to create a soft, diffused circle of light on a layer set to "Screen," then refine its edges and intensity.
Tips for Realistic Application
- Consider the Environment: The way light behaves is dictated by its surroundings. Dust particles in the air will catch light, creating visible beams. Reflections will occur on surfaces. These environmental factors should inform your brush placement and settings.
- Color Harmony: Ensure the color of your added light complements the existing colors in your image. Using a color picker to sample tones from the scene can help you choose appropriate hues for your light brushes.
- Layer Blending Modes: As mentioned, blend modes like "Screen," "Linear Dodge (Add)," and "Overlay" are crucial for simulating the additive nature of light. Experiment with these to find the most convincing effect.
- Opacity and Flow: Don't be afraid to adjust the opacity and flow of your brushes. Subtle application is often more effective than an overpowering effect.
- Study Real-World Light: Revisit the principle of studying how light actually works. Observe sunlight, artificial lights, and how they interact with objects and the atmosphere. This observational practice is invaluable for creating realistic and compelling lighting effects in Photoshop.
In this tutorial, you've learned how to add light rays in Photoshop with your own set of brushes. You can use them to enhance the light in your photos or to create a new light source from scratch. The ability to create custom brushes for light effects opens up a world of creative possibilities, allowing you to imbue your digital artwork with a personalized and dynamic luminescence. I hope you'll have fun working with these brushes and continue to explore the boundless potential of light in your creations.