Life's inherent complexity often leaves us seeking ways to bring order to the chaos. This desire for organization extends to our digital and physical documents, where managing information effectively is paramount. Lists, in their various forms, serve as fundamental tools for achieving this clarity. Beyond the realm of numbered sequences, the ability to create and customize bullet points within Adobe InDesign is a crucial skill for any designer aiming for precise and aesthetically pleasing layouts. This guide will navigate you through the process of creating bulleted lists in InDesign, covering both straightforward local formatting and the more robust and efficient method of using paragraph styles.
InDesign offers two primary approaches to text formatting: local styling and the creation of variables, known as Paragraph Styles and Character Styles. While local formatting provides immediate results, the latter method, leveraging paragraph and character styles, is strongly advocated for its speed, precision, and consistency across documents. This article will explore both avenues, empowering you to choose the method that best suits your workflow and project requirements.
Creating Bulleted Lists Through Local Formatting
For those new to InDesign or working on quick, less complex documents, applying bullet points directly to text offers an immediate solution. This method allows for rapid transformation of standard text into a visually organized list.
Transforming Text into a Bulleted List
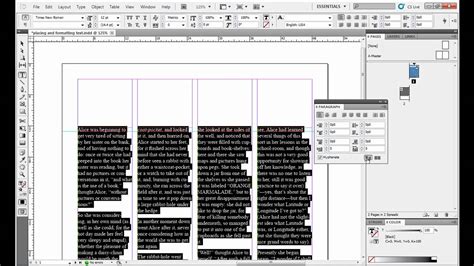
The initial step involves selecting the text you wish to format as a bulleted list. Once your text is highlighted, direct your attention to the Control bar, typically found at the top of the InDesign interface. Ensure that the paragraph symbol icon, signifying paragraph-level controls, is active. If it is not, simply click on it to engage these options. Following this, locate and click the bulleted list symbol. This action will instantly convert your selected text into a basic bulleted list.
Editing Bullet Indentation
After transforming your text into a bulleted list, you will likely need to adjust the spacing between the bullet characters and the text they precede. With the bulleted text still selected, observe the values presented in the Control bar. The first value typically dictates the text's indentation from the text box margins, measured in millimeters. The second value controls the precise distance between the bullet and the text itself. Importantly, this latter value is often negative, pulling the bullet closer to the text margin. Adjusting these values allows for fine-tuning the visual hierarchy and readability of your list.
Changing the Default Bullet Symbol
InDesign provides a default bullet character, but often, a project demands a more specific or visually distinct symbol. To change the bullet used, keep your bulleted list selected. Navigate to the paragraph tools within the top Control bar and click on the icon that displays three horizontal lines. From the subsequent options, select "Bullets and Numbering…". This will open a dedicated dialog box. Within this window, click the "Add…" button to access a wider range of characters and symbols that can be employed as bullets. For enhanced control, you can even assign a Character Style to these custom bullet icons, further refining their appearance.
How to Change Bullet Character in InDesign (Format Bulleted List)
The Power of Styles: Enhancing Bulleted List Creation
While local formatting offers a direct route to bulleted lists, the true power of InDesign lies in its styling capabilities. Paragraph and Character Styles are instrumental in achieving professional, consistent, and easily editable layouts. Neglecting these tools means missing out on significant efficiency gains and potentially compromising the visual integrity of your designs.
Why Use Styles for Bulleted Lists?
Styles are the backbone of efficient InDesign workflows. They enable you to apply consistent formatting across multiple text elements with a single click. This not only saves a considerable amount of time but also ensures that your document's layout remains cohesive and professional. When formatting bulleted lists, using styles means that any changes made to the style definition will be automatically reflected throughout your document, eliminating the tedious task of individually updating each list. This is particularly invaluable when working on long or complex documents where consistency is paramount.
Creating Bulleted Lists with Paragraph Styles
Leveraging Paragraph Styles for bulleted lists offers a sophisticated and highly manageable approach. There are two primary methods within this framework: redefining an existing style and configuring the "Bullets and Numbering" tab within the Paragraph Style options.
Using the "Redefine Style" Option
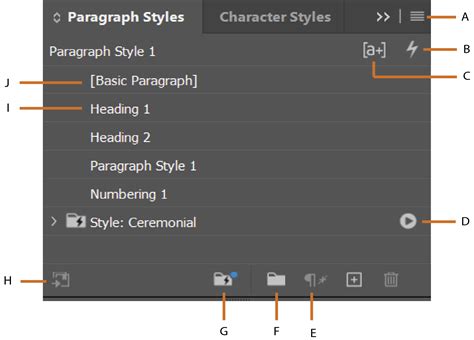
This method is particularly useful if you have already applied a Paragraph Style to your text locally and now wish to incorporate bullet point formatting into that style. First, ensure that your text is formatted as a bulleted list using the local formatting methods described earlier. Then, assign the desired Paragraph Style (e.g., "p-bulleted-text") to this list. With your cursor placed anywhere within the styled list, open the Paragraph Styles panel. Click on the options icon for that style and select "Redefine Style." From this point forward, any paragraph to which you apply the "p-bulleted-text" style will automatically include the bulleted list formatting you've established. This approach effectively saves any local formatting settings you might have applied.
Utilizing the "Bullets and Numbering" Tab
For a more integrated approach, you can define your bulleted list formatting directly within the Paragraph Style options. Open your Paragraph Style panel and create a new style or double-click an existing one to access its settings. Navigate to the "Bullets and Numbering" tab. Here, you will find all the necessary controls to create and customize your bulleted list. You can specify the list type, choose custom bullet characters, and define indentation and spacing. This method allows for the complete creation and management of your bulleted list styles from a single, centralized location.
Advanced Customization and Considerations
Beyond the basic application of bullets, InDesign offers extensive options for customization, allowing for highly tailored list designs that integrate seamlessly with your overall aesthetic.
Custom Bullet Characters and Their Styling
The flexibility to choose custom bullet characters is a significant advantage. You are not limited to the standard bullet symbol; any character available in your installed fonts can be used. This opens up possibilities for using symbols like hearts, stars, or any other glyph that complements your design theme. Furthermore, these custom bullet characters can be independently styled using Character Styles. This means you can assign a specific color, size, or even a different font to your bullets, distinct from the main text of the list.
To implement this, you would typically create a new Character Style that defines the appearance of your desired bullet. Then, when setting up your Paragraph Style for the bulleted list, you can associate this Character Style with the bullet character itself, usually within the "Bullets and Numbering" settings.
Controlling Text Flow and Alignment
A common challenge when formatting bulleted lists is ensuring that the text wraps correctly around the bullet, maintaining alignment and readability. InDesign's Paragraph Style settings provide robust controls for this. The "Indentation" settings within the "Indents and Spacing" section of the Paragraph Style options are crucial.
The "Left Indent" controls the overall indentation of the entire paragraph from the text frame's left margin. The "First Line Indent" is particularly important for bulleted lists. When set appropriately, it dictates where the first line of text begins relative to the bullet. For subsequent lines of text within a list item, their alignment is governed by the "Left Indent" and the spacing defined for the bullet.
A frequent requirement is to have the second and subsequent lines of a list item align directly with the first line of text, rather than with the bullet itself. Achieving this often involves a careful balance of the "Left Indent" and "First Line Indent" values. The default behavior might involve a tab character after the bullet, indicated by ^t in some InDesign fields. Replacing this with an "Em Space" (^m) or other spacing characters can influence how the text flows.
For instances where text wrapping needs precise control, especially with long list items, the "Keep Options" within Paragraph Styles can be utilized to prevent awkward breaks between lines or list items.
The "Indent to Here" Shortcut
In situations where you might be working with text that already has manually placed bullets, or if you need to achieve a specific alignment for wrapped text that standard indentation settings don't easily provide, InDesign offers a helpful shortcut. After inserting your cursor after the bullet and at the beginning of the line that wraps, you can press Cmd + \ (on Mac) or Ctrl + \ (on Windows). This shortcut, "Indent to Here," forces the subsequent text to align at that specific point, effectively controlling the wrap of the text. While this is a local override, understanding it can be useful for troubleshooting or achieving very specific typographic effects.
Bullet Points in Other Adobe Applications
While InDesign is the primary tool for document layout and offers built-in bullet and numbering features, it's worth noting that similar effects can be achieved in other Adobe applications like Illustrator and Photoshop, albeit with a more manual approach. These applications do not have a dedicated bulleted list feature in the same way InDesign does.
To create bullet points in Illustrator or Photoshop, you would typically type your text and then manually insert a bullet character (e.g., •) before each list item. The challenge then becomes ensuring consistent spacing and alignment, especially when text wraps. In these scenarios, you would manually adjust the spacing after the bullet and then use the "Indent to Here" shortcut or carefully place tab characters to control the text flow for wrapped lines. This manual process underscores the advantage of using InDesign for any document where structured lists are a significant component.
Conclusion
Mastering the creation of bulleted lists in InDesign is a fundamental skill that significantly enhances the organization and professional presentation of your documents. Whether you opt for the immediate application of local formatting for simpler tasks or embrace the power and efficiency of Paragraph and Character Styles for complex projects, InDesign provides the tools necessary to achieve precise and visually appealing results. By understanding how to transform text, adjust indentation, select custom bullet characters, and leverage the robust styling options, you can ensure your InDesign documents are not only organized but also aesthetically refined.