Capture One, a long-standing leader in professional RAW image processing and tethered shooting, has consistently pushed the boundaries of what's possible in digital photography workflows. Through its robust beta program, the company offers photographers a unique opportunity to get a firsthand look at upcoming features, provide crucial feedback, and ultimately shape the future of the software. This article delves into the recent advancements showcased in Capture One's beta releases, highlighting key new functionalities and improvements that promise to streamline workflows, enhance image quality, and offer greater creative control.
The Evolving Landscape of Capture One Features
Capture One's commitment to innovation is evident in its regular updates, each bringing a suite of new tools and refinements. The recent beta releases, particularly focusing on versions like 16.7.4 and earlier previews such as 16.7.0 Beta 3, have introduced significant enhancements. These updates are not merely incremental; they represent a strategic expansion of Capture One's capabilities, addressing specific user needs and anticipating future demands in the professional photography landscape.
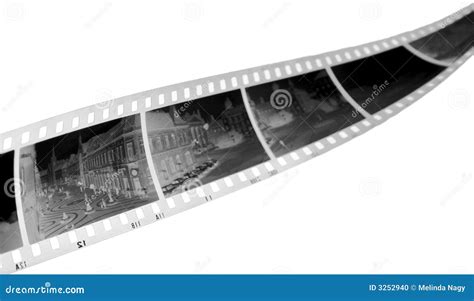
One of the most compelling additions is the introduction of Negative Film Conversion features. This suite of tools is designed to revolutionize the workflow for photographers who still work with or wish to integrate analog film into their digital process. The days of complex, multi-step conversions are being streamlined, making the transition from negative to positive image faster and more intuitive.
Mastering Negative Film Conversion
The new Negative Film Conversion features are built around a fundamentally new approach to processing film scans within Capture One. At its core is the Base Characteristics Tool Mode, which now includes a dedicated "Film Negative" processing mode. This mode switches Capture One to a specialized pipeline engineered specifically for negative scans. This isn't just a cosmetic change; it involves image inversion and a reordering of tool behavior and processing to ensure optimal tonal extraction and detail from the film medium.
Crucially, within this Film Negative Mode, the Curve is locked to Auto. This is a deliberate decision by Capture One to ensure consistent conversion results and proper tonal reconstruction. A new default curve has been implemented, designed to extract the maximum tonal detail from negatives. While the curve is auto-adjusted, the ICC Profile can still be changed, offering a degree of control over the color rendering. This Film Negative mode is applied on a per-image basis, allowing for seamless integration with standard "Photography" mode images within the same Session or Catalog. This flexibility means users can mix and match scanned film with digital captures without workflow disruptions.
To further facilitate this new workflow, Capture One has introduced a dedicated Film Negative Workspace. Accessible via Window > Workspace, this workspace includes two new tool tabs: "Scan" and "Negative." These tabs intelligently group the most relevant tools for scanning and negative conversion, creating a focused environment for these specific tasks. Complementing these is the new Convert Negative toolbar button, providing a rapid starting point for the entire inversion and tonal correction process. For those who prefer to customize their interface, these new tool tabs and the toolbar button are also available outside of the dedicated Film Negative workspace. Users can add tool tabs by accessing the vertical three-dots menu in the top-right of the Tools panel, and the Convert Negative button can be added to the toolbar by right-clicking and selecting "Customize Toolbar…"
Visually, inverted negatives are now easily identifiable. A small indicator appears in both the Viewer and Browser, making it simpler to distinguish Film Negative images from standard Photography-mode edits, preventing accidental adjustments or confusion.
Advanced Controls and Preferences for Film Negatives
Beyond the workspace and UI enhancements, dedicated Film Negative Preferences are now available within the Settings > Exposure tab. A key setting here is "Enable Target Output Levels." This feature allows users to define specific targets for the output levels of shadows and highlights. The underlying principle is to "expose as far to the right as possible without clipping highlights," a common technique in film scanning to maximize dynamic range.
The preferences also reiterate the importance of the Base Characteristics (Film Negative Mode) for a fully manual workflow. Under the Exposure settings, it's noted that Exposure adjustments occur before Levels in the Film Negative pipeline. For optimal results, the advice is to aim for well-exposed scans and to avoid adjusting Exposure after conversion.
Regarding White Balance, the recommended approach is to sample from the film base itself. This is crucial for neutralizing the characteristic orange mask present in many film negatives. Sampling from within the image content may lead to unexpected and undesirable color shifts. Cropping out the film borders is also highlighted as an essential step, ensuring that only the image area is processed.
Levels are described as central to negative conversion, used to stretch the histogram and establish proper contrast and tonal range. In Film Negative mode, the Auto Levels feature intelligently adjusts Red, Green, and Blue channels independently, optimized for RAW files.
It's important to note that certain masking tools may produce incorrect results when applied to film negatives in this mode. Subject, Background, and People masks are likely to misinterpret the entire scanned film as the subject. For these scenarios, the recommended workflow is to complete the negative conversion process, export the image as a positive TIFF, and then re-import it into Capture One for further masking and retouching using standard tools. The Match Look feature is also mentioned, allowing users to use any image as a reference, including inverted negatives, for color and tonal matching.
The Power of the Pick Neutralize Point Cursor Tool
A significant new tool introduced to enhance color correction capabilities is the Pick Neutralize Point Cursor Tool. This intuitive tool allows users to simply click on any area within an image that is intended to be a neutral color. Upon clicking, Capture One automatically creates corresponding points on the individual Red, Green, and Blue curves to perform the necessary correction, effectively neutralizing any color cast in that sampled area.
It's important to understand how this tool functions: the adjustment directly modifies the individual channel curves. Consequently, any existing edits applied to those specific curves must be reset before using the Pick Neutralize Point Cursor Tool. For the best results, users are advised to employ this tool on areas of the image that are genuinely intended to be neutral, such as a white balance card, a gray object, or even a neutral-toned background element within the scene.
Streamlining Workflow and Enhancing File Management
Beyond core image editing, Capture One continues to refine its user interface and workflow management tools. The release of version 16.7.4 includes improvements to Contact Sheets, a feature that allows photographers to generate visual indexes of their work. While specific details of the improvements in 16.7.4 are not extensively elaborated upon in the provided text, the general trend points towards greater customization and efficiency in generating these important organizational documents.
Furthermore, the introduction of the Session Builder tool in earlier beta versions (like 16.7.0 Beta 3) marks a significant update to folder management, particularly for users who rely on Capture One's Session-based workflow. For the first time in 15 years, users can create sub-folders directly within Capture One. Previously, creating sub-folders was only possible outside the application, requiring manual import and synchronization. This new workflow feature dramatically simplifies file organization for shoots, ensuring that project structures are maintained seamlessly within the Capture One ecosystem.
Advanced Masking and Retouching Capabilities
The beta version 16.7.0 Beta 3 also brought substantial advancements in masking and retouching tools, significantly enhancing the power and efficiency of post-processing tasks directly within Capture One.
A standout feature is the ability to combine masks into a single layer. This powerful functionality allows users to merge any type of mask â whether it's an automatically generated Subject, Background, or People mask, or a hand-drawn mask using the brush tool â into an existing mask, all contained within a single layer. This simplifies complex selections and makes applying targeted adjustments much more manageable. The process of blending masks is akin to assembling puzzle pieces: they can be added, subtracted, or intersected to construct one seamless group. Regardless of the number of individual masks crafted, they all coexist harmoniously as a single, clean layer. This capability extends beyond mere addition; users can subtract masks or intersect them, all within the confines of the same edit layer, offering unparalleled control.
This enhanced masking precision directly benefits retouching workflows. Tasks such as retouching a subject's eyes, teeth, and neck are now considerably easier. Capture One 16.7.0 Beta 3 includes dedicated tools for these specific areas. Similarly, retouching clothing worn by individuals in an image has been addressed with a new tool designed to automatically mask clothing across all people present in the image.
The Retouch Faces Tool: Precision and Naturalism
A particularly noteworthy addition is the Retouch Faces tool. This feature is designed to make facial retouching quick and easy by automatically detecting faces within an image. It can identify up to 20 faces, though the practical utility for extensive retouching diminishes with very large groups. The Retouch Faces feature offers five primary adjustments: Impact, Blemishes, Dark Circles, Even Skin, and Contouring.
The Blemishes option is engineered to remove imperfections while preserving essential skin texture, beauty marks, and scars, thereby achieving a more natural-looking result than simpler methods. This Blemish option includes a sliding scale that allows users to precisely control the extent of the effect. Lower settings focus on larger blemishes, while higher settings address smaller imperfections.
For smoothing skin texture, the Even Skin feature is available. This option includes two sliders: "Amount" and "Texture." The "Amount" slider reduces contrast in specific areas, and in demonstrations, it has been observed to be extremely subtle, with a barely noticeable impact. However, it's worth noting that the development team has discussed making this slider more aggressive in future releases.
The Dark Circles slider is specifically designed to reduce darkness under the eyes, again maintaining skin texture and wrinkles for a natural appearance. The Contouring option functions as an automated dodge and burn tool, helping to create more defined facial contours. It intelligently accounts for existing highlights, ensuring the effect appears natural and doesn't suggest an artificial light source was added in post-production.
Finally, the Impact slider acts as a master control, adjusting the overall effect of all the other sliders within the Retouch Faces tool.
Regarding the underlying technology, when questioned about AI usage, it was revealed that the retouching feature relies partially on AI. AI is utilized for face detection and mask creation, though these masks are not directly editable or accessible outside the retouch tool itself. The process for removing blemishes, however, is a combination of traditional image editing techniques and AI. Capture One has not specified whether this involves generative AI or machine learning.
Crucially for professionals who shoot tethered, these retouching features are designed to work seamlessly during tethered sessions. They can even be set to apply retouching effects automatically as the images are captured. This is particularly beneficial when working with subjects who may be camera-shy, as they can see a more polished version of their image almost immediately.
Broadening Camera and File Support
Capture One's commitment to supporting a wide array of photographic hardware and file formats remains a cornerstone of its appeal. The release 16.7.4 brings support for Sigma BF cameras and also extends compatibility to OM-Systems 14-bit RAWs. This continued expansion of camera support ensures that photographers using a diverse range of equipment can leverage Capture One's powerful processing engine.
In terms of file handling, Capture One supports HEIC/HEIF 8-bit files to the extent that the operating system allows. For DNG files, those originating from camera models natively supported by Capture One will utilize their native Capture One colors by default. DNG files from unsupported models will employ generic DNG Standard colors.
Other file types, such as TIF, JPG, PSD, and PNG files that are not in the RGB color space, are treated as read-only within Capture One and cannot be adjusted. Layered TIFF and PSD files are supported for viewing purposes only. There are also file size limitations: the minimum side of a supported file for viewing is 16 pixels, while for editing, it's a minimum of 512 pixels.
Performance, Compatibility, and System Requirements
With the introduction of new features and increasingly complex processing pipelines, performance and compatibility are key considerations. Capture One 16.7.4 is backward compatible with Sessions and Catalogs created in previous 16.7 releases. However, documents originating from Capture One 16.6.6 or earlier will require an upgrade to be opened in 16.7.4. Once upgraded, these documents cannot be opened in older versions unless restored from a backup.
The software also specifies a requirement for the SSE4.2 CPU instruction set. For optimal performance, especially on 4K monitors, Capture One recommends doubling the initial system specifications due to the increased computational demands. Operating under virtualization software, such as Parallels or Hackintosh, may lead to instability.
It's also important to note that some cameras offer multi-shot functionality (e.g., multiple exposures or pixel shifting). In most cases, this functionality will not be available within Capture One unless specifically noted and supported. Special or auxiliary modes are only supported if explicitly stated.
The Value of Beta Testing Capture One
Capture One's beta program is more than just a preview; it's an integral part of the software's development lifecycle. By opening up pre-release versions to the public, Capture One engages its user base in a collaborative effort to refine the software.
What is the Capture One Beta Program?
The beta program provides access to a pre-release version of Capture One, available to anyone who signs up. Participants gain the opportunity to explore upcoming features before their official launch, help identify and report critical bugs, and contribute to ensuring a smooth and reliable final release.
Why Beta Access is Limited to Certain Periods
Capture One strategically opens its beta program only during specific development phases. These beta releases are intrinsically tied to product development milestones and are a crucial part of the software's quality assurance cycle.
Using Beta Versions Safely
When testing alpha or beta versions of Capture One, it is strongly recommended to create a new, dedicated test Session or Catalog. This practice ensures that critical projects remain unaffected by any potential issues that might arise during the testing phase. It's also important to remember that once a beta program concludes, access to Sessions and Catalogs created within that beta version may become unavailable until the new official version is released. Alpha and beta releases are strictly for testing and feedback purposes and are not supported for use in production environments.
A crucial step after finishing work in Capture One Beta and closing the application is to launch it once more and then close it again. This final launch and closure helps ensure that all data is properly saved and finalized before transitioning back to a stable release.
General Improvements and Bug Fixes
Beyond the headline features, each Capture One update, including 16.7.4, incorporates a range of bug fixes and minor improvements aimed at enhancing overall stability and user experience. While specific bug details are often found in dedicated community forums (such as a topic titled "Known Bugs"), the consistent release of updates underscores Capture One's commitment to addressing issues and refining its software. PDF exports, for instance, now produce significantly smaller file sizes, making them easier to share and archive. Additionally, cover, header, and footer images in PDF exports are now persistent, eliminating the need for them to be reinserted each time.
The continuous iteration and improvement cycle, marked by frequent software updates and corresponding release notes that highlight changes and the logic behind them, is a testament to Capture One's dedication to its user base and the pursuit of photographic excellence.