Krita, a powerful open-source painting program, offers a robust environment for digital artists. While primarily developed for painting, its capabilities extend to many raster image editing tasks. Understanding how to manage your canvas size is fundamental to creating professional-quality artwork, especially when preparing for various output formats like social media or print. This guide delves into the intricacies of canvas dimensions, resolution, and related settings within Krita, ensuring your artwork scales beautifully without compromising quality.
The Fundamentals of Canvas Dimensions and Resolution
The "image size" in Krita, as in other graphics software, refers to the dimensions and resolution of your canvas. This is a crucial setting that directly impacts the file size of your Krita document. When working on a digital painting, the strokes made with the paint brush can appear pixelated up close. This is a characteristic of raster-based images, where each pixel has a defined color.
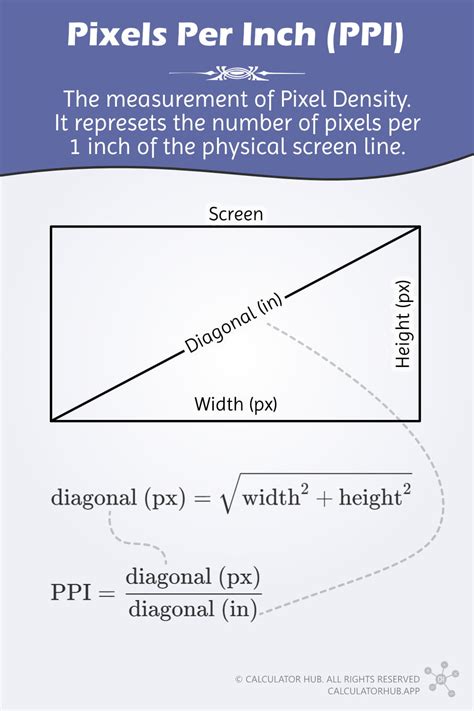
Understanding Pixels, Inches, and DPI/PPI
- Dimensions: These are typically expressed in pixels (e.g., 1920x1080 pixels) or physical units like inches or centimeters.
- Resolution: This is measured in Dots Per Inch (DPI) or Pixels Per Inch (PPI). PPI is generally the more accurate term for digital images, as it refers to the number of pixels that fit within one linear inch of the image. 72 PPI is often considered the default PPI of monitors, as assumed by many programs. However, for modern displays, especially "retina" devices, a higher PPI, such as 300 PPI, is often desirable for sharper output.
- Relationship: The PPI setting dictates how many pixels will be displayed or printed within a given physical area (like an inch). A higher PPI means more pixels are packed into that inch, resulting in a sharper and more detailed image when printed or viewed at a specific size.
Setting Up Your Krita Canvas: From New Document to First Strokes
When you start Krita for the first time, you'll typically be greeted by a welcome screen. This screen provides options to create a new file or open an existing document. To begin a new project, you'll need to create a new document from the "File" menu or by clicking "New File" on the welcome screen.
The New File Dialog Box: Customizing Your Canvas
This action opens the "New File" dialog box, where you can configure your canvas settings.
- Predefined Sizes: Krita offers a range of predefined document sizes, such as A4 (300ppi), which are convenient starting points. You can select these from the "Predefined" drop-down menu under the "Custom Document" section.
- Custom Dimensions: For more specific needs, you can manually input your desired Width and Height in pixels or physical units.
- Color Settings:
- Color Profile: Ensure the color profile is set to RGB for digital displays and web use. For print, CMYK might be more appropriate, but for Instagram, RGB is standard.
- Color Depth: Set the depth to 8-bit integer/channel. Krita also supports higher color depths (like 16-bit or 32-bit float), which can be beneficial for advanced color manipulation and can save memory if used correctly, especially when dealing with complex gradients and subtle color transitions.
- Orientation: Choose between Portrait and Landscape orientation.
After setting your preferences, click "New" to create your blank canvas.
Drawing on the Canvas and Brush Customization
Once you have your canvas ready, you can begin drawing. Simply left-click with your mouse or use a stylus on a graphics tablet. To explore Krita's vast array of brushes, you can access the "Brush Editor" in the toolbar. You can tick any of the squares to choose a brush preset.
- Brush Presets: Krita comes with numerous brush presets for various effects, including erasers.
- Eraser Toggle: For quick erasing, you can use the eraser toggle by pressing the "E" key. This function switches your current brush between erasing and painting modes, a shortcut that works with most tools.
I Tested EVERY Brush on Krita. These 10 Matter.
Resizing and Scaling Your Artwork in Krita
As your project progresses, or when you need to adapt your artwork for different purposes, you may need to change the canvas size. Krita offers several tools for this, each with its distinct function.
Image Size vs. Canvas Size
It's important to distinguish between "Image Size" and "Canvas Size" operations.
- Scale Image to New Size: This operation resizes the entire image, including all layers, to the dimensions and resolution you specify. If you link the aspect ratio, the proportions will be maintained as you change the dimensions. This is useful for overall scaling of your artwork.
- Canvas Size: This refers to the dimensions of the drawing area itself. You can change the canvas size to crop or expand the canvas around your existing artwork. The tool allows you to add new canvas space around the current image or to trim it down.
Adjusting Canvas Size
To adjust the canvas size:
- Navigate to Image > Resize Canvas… (or use the shortcut Ctrl+Alt+C).
- In the dialog box, you can set the new Width and Height.
- Choose the unit of measurement (pixels, inches, cm, etc.).
- Select the "Chain" icon to maintain the aspect ratio, ensuring your image doesn't get distorted.
- You can choose how the canvas is resized:
- Add: New canvas space is added around the current image.
- Subtract: The canvas is cropped from the edges.
- Center: The image is resized from the center.
- You can also change the canvas background color via the menu item. You can set it to be non-transparent and choose a specific color. Some file formats force a background color instead of transparency.
Cropping to Layer
If you want to resize the canvas to fit the dimensions of a specific layer, you can use the "Crop to Selection" tool or select the layer and then choose Image > Fit to Layer Size.
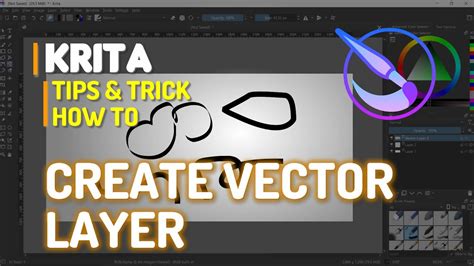
Vector Graphics and Their Role in Krita
While Krita is primarily a raster graphics editor, it does support vector layers. This allows you to incorporate vector elements into your artwork.
Understanding Vector Layers in Krita
- Rudimentary Toolset: The vector graphics toolset in Krita is considered rudimentary compared to dedicated vector programs like Inkscape. However, it's functional for basic shapes and paths.
- SVG Compatibility: Krita and Inkscape both use Scalable Vector Graphics (SVG) format, allowing you to copy and paste vector elements between them. This is a significant advantage for workflow integration.
- Limitations: You cannot expect painting tools to operate as vectors directly in Krita. A rich brush stroke, for instance, would generate thousands or tens of thousands of small paths if rendered as vectors, which is a complex implementation that hasn't been fully realized for painting brushes.
- Rendering: In theory, vector painting tools could be rendered as bitmaps to any required accuracy for screen display or printing.
Working with Image Files and Saving Your Work
Properly saving and managing your Krita files is essential for preserving your work and ensuring flexibility.
Saving Your Krita Document
To save your work:
- Go to File > Save or File > Save As….
- Select your desired folder and choose a file format.
.krais Krita's default format. It's a compressed data file that saves all layers, masks, and other Krita-specific information, allowing you to reopen and continue editing your work seamlessly.- File Recovery: Krita's
.krafiles are compressed. In case of a corrupt or broken file, you can often open it with archive managers (like 7-Zip or WinRAR) and extract the contents of the layers. This can help you recover as much data as possible.
Exporting Your Artwork
When you need to share your artwork or use it in other applications, you'll export it to common image formats:
- Export: Use File > Export… to save your image to a new location without actively opening it. This is useful for creating final versions of your artwork.
- Common Formats: Krita supports exporting to various formats like PNG, JPG, TIFF, and more.
Create Copy from Current Image: This option in the File menu creates a new copy of the current image, which is useful for making a quick duplicate before making significant edits.
Scaling Bitmaps Beyond Krita's Native Capabilities
Sometimes, you might need to enlarge a raster painting beyond what Krita's standard scaling tools can achieve without noticeable quality degradation (pixelation or unsharpness). In such cases, specialized image enlargement programs can be very effective.
AI-Powered Upscaling Tools
These programs use sophisticated algorithms, often AI-based, to intelligently enlarge images. They analyze the image content and "guess" what details should be kept sharp (like edges and lines) and what areas should be smooth gradients.
- Freeware Options: Smilla is a well-regarded piece of freeware that offers good results.
- Commercial Software: Many commercial options are available, such as On1 Resize, which provide advanced features for professional upscaling.
Preparing Artwork for Social Media and Print
When creating artwork, especially for platforms like Instagram, it's crucial to consider the final output.
Instagram Specifics
- Resolution is Key: Do not paint for Instagram at a low resolution. Use as high a resolution as your computer system and storage possibilities allow. This provides the most flexibility for future use and ensures the best possible quality when uploaded.
- File Formats: For Instagram, PNG or JPG are common formats. PNG is lossless and better for graphics with sharp lines and text, while JPG is lossy but offers smaller file sizes, suitable for photographs and complex images with smooth gradients.
Print Considerations
- PPI for Print: For printing, aim for a resolution of at least 300 PPI. This ensures that the printed image will be sharp and detailed.
- Color Space: For print, it's often recommended to work in a CMYK color space, although many modern printers can handle RGB input well. Krita's color management features allow you to work with different color spaces.
Metadata and File Information
Krita allows you to embed metadata within your .kra files and exported images. This information can include author's name, copyright details, and other relevant data for billing or organizational purposes. These details can be edited within Krita's metadata editing features.
Conclusion: Empowering Your Krita Workflow
Understanding and effectively utilizing Krita's canvas size, resolution, and scaling tools is paramount for any digital artist. Whether you are creating for social media, print, or simply exploring your artistic vision, mastering these fundamental aspects will ensure your artwork is presented at its absolute best. By leveraging Krita's powerful features and understanding the nuances of digital image creation, you can confidently manage your projects from the initial concept to the final output.