When working with digital photographs, particularly in the powerful environment of Adobe Lightroom, the ability to return an image to its unedited, original state is a fundamental yet sometimes elusive function. This is especially true for photographers who may have experimented with edits in other software or made extensive adjustments within Lightroom itself and now wish to start anew. Understanding how to revert to the original state, or at least to a clean baseline, is crucial for regaining control over your image processing workflow and ensuring you can achieve the desired final output without permanent alteration of the source file.

Understanding Lightroom's Non-Destructive Editing Philosophy
At its core, Lightroom operates on a principle of non-destructive editing. This means that when you import a RAW file or even a processed JPEG into Lightroom and begin making adjustments, the original image data is never directly altered. Instead, Lightroom meticulously records every change you make as a set of instructions, essentially a "recipe" for how the image should appear. These instructions are stored within Lightroom's catalog and are applied dynamically whenever you view or export the image. This approach offers significant advantages, primarily the ability to revisit and modify any edit at any time, or to completely undo changes without fear of degrading the original file.
However, this non-destructive nature also means that simply closing and reopening Lightroom, or even restarting your computer, does not erase the editing history. The adjustments remain, linked to the image file through the catalog. This is where the need to "revert" or "reset" becomes important, allowing you to effectively discard previous edits and begin again.
Reverting in Lightroom CC (Cloud-Based)
For users of the newer, cloud-based Lightroom CC, reverting to the original state is a straightforward process integrated directly into the editing interface. When you are in the "Edit" mode for a particular photograph, you will find an option to "Revert to Original" located at the bottom of the edit menu. Clicking this option will discard all subsequent adjustments made to the image since its import, returning it to its pristine, unaltered state as it was when first brought into Lightroom. This is the most direct way to achieve a complete reset in this version of the software.
Reverting in Lightroom Classic CC and Older Versions
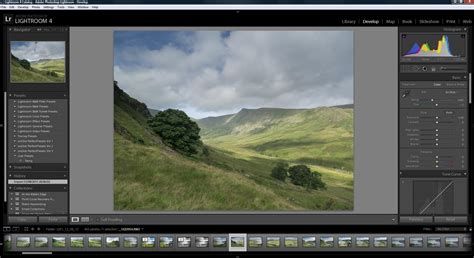
If you are using Lightroom Classic CC or an older, desktop-centric version of Lightroom, the process for reverting involves a slightly different, though equally effective, approach. Within the "Develop" module, which is where all image adjustments are made, you will find a "Reset" button. This button is typically located on the right-hand side of your monitor, beneath the various editing panels.
Clicking the "Reset" button will restore the image to Lightroom's default settings. It's important to understand that this "default" state isn't necessarily identical to how the image appeared directly out of your camera. Lightroom applies certain inherent camera profile defaults upon import to provide a starting point for editing. However, the "Reset" button will effectively zero out all sliders and parameters that you have manually adjusted within Lightroom, bringing the image back to this import-defined default state. This is often the desired outcome when you want to start a fresh edit, discarding all prior manual manipulations.
The Role of the History Panel
A key component in managing your edits and understanding how to revert is the History Panel. This panel, accessible within the Develop module, serves as a chronological log of every single adjustment you make to an image. Each step, from initial import to the most recent slider tweak, is recorded.
Navigating Through History
The History Panel operates sequentially, listing edits from the earliest to the most recent. This allows you to do more than just a full reset; you can effectively "step back in time" to any previous state of your image. By simply clicking on an earlier entry in the History Panel, you can revert the image to how it looked at that specific point in your editing process. Importantly, any edits made after that selected historical state are then discarded, and your new edits will begin from that point forward. This provides a granular level of control, allowing you to revisit and build upon earlier stages of your edit if you wish.
Understanding History vs. Adjustments
There has been some discussion and user confusion regarding the relationship between the History Panel and the actual state of the image adjustments. Some users initially believed that clearing the history would directly alter the image adjustments. However, it's more accurate to understand that the History Panel is a record of metadata, a log of the steps taken. While selecting an item in the history does change the visible state of the image adjustments, the history itself is a separate entity that can be managed.
For instance, you might want to clear your editing history for various reasons, perhaps to present a "clean" edit to a client or to simply reduce the clutter in the History Panel. In Lightroom, clearing the history does not automatically undo the edits that led to the current image state. The image remains as it is, but the detailed step-by-step record is removed. The "Reset" button, conversely, is the dedicated function to revert all adjustments to the import defaults.
History as a Non-Destructive Record
The fact that Lightroom's history is persistent, even across sessions, is a significant advantage. Unlike in Photoshop, where the history buffer is typically lost when you close the program, Lightroom's history is saved with the catalog. This means you can close Lightroom, reopen your image days, weeks, or even years later, and still access the full editing history, including the ability to revert to any previous state or the original import state.
Advanced Reversion Techniques and Related Features
Beyond the primary "Reset" button and the History Panel, Lightroom offers additional tools that contribute to managing image states and facilitating reversion.
Double-Clicking Sliders
For precise control and quick resets of individual adjustments, Lightroom allows you to double-click on slider names or panel headings. For example, double-clicking on the "Exposure" slider will immediately reset that specific slider to its default value (typically 0). This is incredibly useful for fine-tuning specific aspects of your edit without affecting other adjustments.
Simple Tricks to Navigate Lightroom History Like a Pro
Snapshots
The Snapshots panel, located just above the History Panel, provides a way to save specific editing states without affecting the chronological history. You can create a snapshot by clicking the "+" icon and naming it. Lightroom then takes a "virtual snapshot" of your image at that exact moment, allowing you to continue editing. Later, you can easily revert to any saved snapshot by selecting it from the panel. This is ideal for comparing different editing directions or for saving a particular look you might want to return to later.
Virtual Copies
When you want to create a distinctly different version of an image-for example, a color version and a black-and-white version-without overwriting your original edits, Virtual Copies are invaluable. A virtual copy is not a separate physical file; rather, it's another set of editing instructions associated with the same original RAW file. Creating a virtual copy allows you to apply entirely new edits to that copy, preserving your original edited version intact. This enables extensive experimentation and the creation of multiple final outputs from a single source image.
Addressing Potential User Misconceptions
It's common for users transitioning from other software or new to digital photography workflows to have certain expectations about how editing software should function. One such area of potential confusion, as highlighted in user discussions, is the perceived decoupling of the history list from the actual image state. While the history is a record, interacting with it-specifically by selecting an earlier state-directly changes the image's appearance to reflect that state.
Another point of discussion can be the desire to delete specific steps from the history without removing all subsequent steps, or to reorder history entries. While Lightroom's current implementation is robust, there is always room for feature enhancements. Users who feel strongly about such improvements are encouraged to submit feature requests to Adobe, as the software has evolved significantly based on user feedback during its extensive beta phases.
The ultimate goal of these tools-reverting to original, using the history panel, snapshots, and virtual copies-is to empower the photographer. They ensure that the creative process is fluid, allowing for bold experimentation and confident editing, knowing that a return to a clean slate or a specific past state is always within reach. The non-destructive nature of Lightroom, coupled with these management tools, provides a powerful and flexible environment for image enhancement.