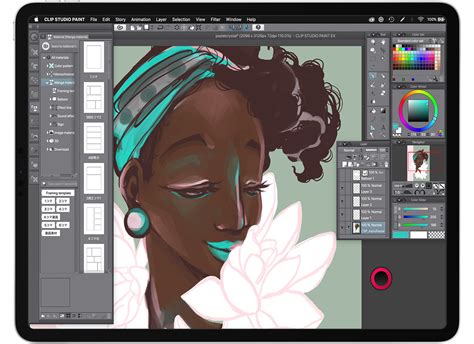
Clip Studio Paint, a robust and versatile art software, has carved a significant niche, particularly among anime, manga, and illustration enthusiasts. Its extensive feature set makes it an attractive option for artists of all skill levels, from those just embarking on their digital art journey to seasoned professionals. Upon downloading Clip Studio Paint, users will encounter a parent launcher called Clip Studio. While the initial interface, with its myriad menus and buttons, might seem daunting, persistence reveals its intuitive logic. This launcher provides access to Clip Studio Paint itself, as well as the Modeler App, a valuable tool for posing figures for drawing reference.
Within the Clip Studio launcher, users can choose to launch the Clip Studio Paint application or the Modeler app. The Modeler app is particularly useful for setting up 3D models that serve as references for character poses and proportions. Beyond these core applications, the Clip Studio launcher offers further utility. It facilitates artwork synchronization across different devices and instances of Clip Studio Paint, and enables the download of brushes and assets directly to your device. This article will delve into these functionalities and more, offering a comprehensive guide to harnessing the power of Clip Studio Paint.
Navigating the Canvas: Essential Tools and Techniques
Efficiently moving around your digital canvas is fundamental to a smooth artistic workflow. The Hand tool, typically found on the Tool palette, is instrumental for this. By default, it might appear as the Rotate tool, but expanding the Sub tool menu reveals the Hand tool. The Move tool is also highly effective for navigating the workspace. For achieving optimal pen stroke accuracy, the Rotate tool is invaluable, allowing you to angle the canvas to a more comfortable position.
For artists working with larger screens and ample screen real estate, opening the Navigator palette can be a significant advantage. The Navigator palette is a treasure trove of useful features. Crucially, it offers a thumbnail view of your artwork, allowing you to see your entire piece at a glance, even when zoomed in on intricate details. This is vital for maintaining overall composition and balance as you draw or paint.

One of the most critical functions for maintaining accurate drawing and avoiding skewed perspectives is the ability to flip your canvas horizontally. This feature, available in the Navigator palette, allows you to view your artwork as if it were a mirror image, revealing subtle errors in symmetry or proportion that might otherwise go unnoticed. While flipping horizontally can be accessed through the Edit menu (Edit → Rotate → Flip canvas → Flip Horizontal), this method is cumbersome for regular use. Instead, it is highly recommended to set up a custom shortcut for this function. Many artists, including myself, find Command + F to be a convenient shortcut, but any combination that feels natural and accessible can be assigned. To do this, navigate to CLIP STUDIO PAINT on the top left of the screen, select "Shortcut Settings," and then go to "View → Rotate/Flip → Flip Horizontal." Click "Edit shortcut" to assign your preferred key combination.
Brushes and Blending: Crafting Your Digital Medium
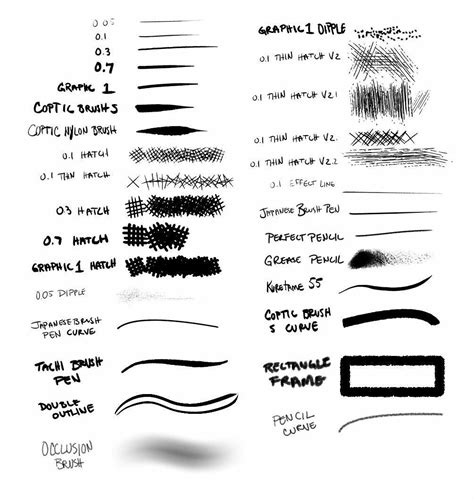
Clip Studio Paint boasts a diverse array of brushes and tools, catering to various artistic styles and needs. These include pencils, paintbrushes, markers, and more, all of which are highly customizable. You have the power to create new brushes and fine-tune existing ones by adjusting parameters such as brush size, angle, and pressure sensitivity.
The primary tools for drawing and painting are the Pen, Pencil, Brush, and Airbrush tools. Generally, the Pen tool is favored for creating clean line art, while the Pencil tool is ideal for sketching. However, the flexibility of Clip Studio Paint allows for line art to be created with the Pencil tool if a more sketchy aesthetic is desired. The ultimate goal is the result, so artists are encouraged to use the tools that feel most natural to them.
For painting, the Brush tool offers a more painterly feel, while the Airbrush tool excels at creating smooth, soft transitions for beautiful gradients. Complementing these is the Blend tool, which is exceptionally powerful for naturalistic blending. If you have experience with traditional media like watercolors or oils, the blending in Clip Studio Paint will feel remarkably intuitive and organic.
Each tool in the Tool palette is accompanied by a comprehensive Sub tool palette, functioning as an editing menu for the tool's numerous functions. To access this extensive range of options, select the desired tool and then click the arrow pointing right at the top of the Tool palette.

The software's pencil and paint brushes are designed to emulate traditional media with remarkable realism. The ability to customize these brushes to your liking is a significant advantage. It is highly recommended to spend time experimenting with the Sub tool palette settings for each brush. Make small adjustments, draw a bit, observe the effect, and then make further changes. This iterative process of experimentation will help you discover the diverse ways you can alter the appearance and feel of the brushes. Focus on adjusting the size, shape, and texture. When starting out, it's best to keep things simple. You don't need highly complex brushes to create great art; Clip Studio Paint comes equipped with excellent default brushes that are more than sufficient for beginners.
Smart Coloring and Line Art Refinement
Clip Studio Paint includes a Smart Bucket Tool, a powerful feature that allows for rapid coloring of line art through intelligent edge recognition. This tool is particularly advantageous as it enables you to color on a layer separate from your line art, maintaining a clean workflow. Ideally, the color layer and the line art layer should remain distinct, making this tool exceptionally useful.
To utilize the Smart Bucket Tool for coloring on a layer different from your line art, you must enable the "refer to other layers" option within the tool's Sub tool palette. Activating this setting allows the tool to recognize edges from other layers for accurate color filling. You may find that you need to close up your line art shapes or adjust the tool's settings to achieve the desired shape recognition for coloring. Persistence is key, and once you master this feature, it becomes a significant time-saver. Many users find the default settings to be quite effective.
One of Clip Studio Paint's most impressive features is the ability to adjust line width after the line has been drawn. This is achieved through the "Adjust line width" filter, accessible via Filters → Correct line → Adjust line width. The dialog box provides sliders to make lines thicker or thinner. This tool is invaluable for creating delicate illustrations or for refining lines that are difficult to achieve with digital art alone, offering a subtle yet impactful enhancement to your artwork.

The Power of Layers and Color Management
The layer system in Clip Studio Paint is a cornerstone of efficient digital art creation. Layers allow you to work on different elements of your artwork independently, making modifications without impacting other parts of the illustration. You can create an unlimited number of layers, each with its own customizable settings, such as opacity and blending modes.
The fundamental layer functionalities in Clip Studio Paint are remarkably similar to those in Adobe Photoshop, which is beneficial as Photoshop's layer tools are widely considered the industry standard. A particularly powerful feature is "Clipping Layers," which allows you to clip one layer to another. When a layer is clipped, its content will only appear within the boundaries of the pixels on the layer it is clipped to. This is analogous to Photoshop's "Create Clipping Mask" feature and is indispensable for digital painters. To use this, right-click on the layer you wish to clip and select "Clip to layer below."
Clip Studio Paint offers a comprehensive suite of color tools, including a color wheel, color palettes, and a color picker. You can also create custom color palettes and adjust the transparency of colors, ensuring you have everything you need to achieve your desired hues and shades.
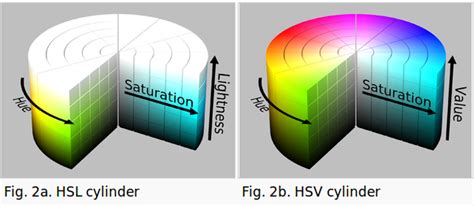
The eyedropper tool, at its most basic, allows you to sample any color directly from your canvas. Clip Studio Paint supports various Color Spaces, including CMYK and RGB, but also offers HSV (Hue, Saturation, Value). Accessing this is done via Window > Color Slider. The HSV color space is particularly beneficial for artists as it encourages a focus on foundational color theory principles: Hue, Saturation, and Value. This system allows for easy access to the core properties of color, prompting questions like "What is the right saturation for this hue?" While personal preference dictates color selection methods, Clip Studio Paint likely includes your preferred approach, whether it's the HSV or HSL color wheel, or standard CMYK and RGB sliders.
Retouching, Editing, and Advanced Features
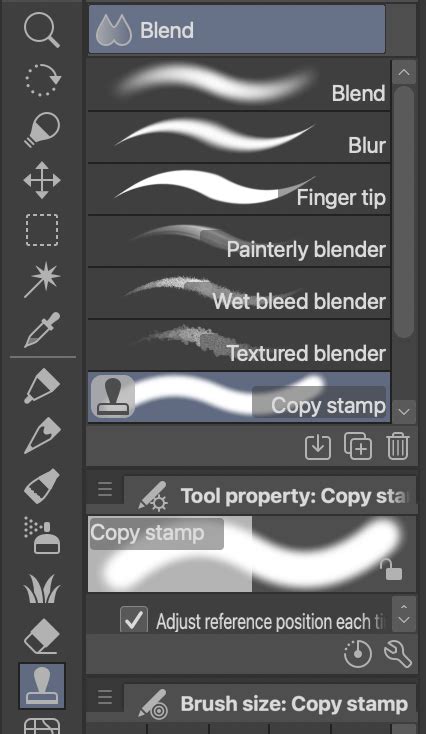
Clip Studio Paint provides a robust set of tools for retouching and editing your artwork. The Clone Stamp tool, referred to as the Copy Stamp in Clip Studio Paint, enables you to duplicate and blend parts of your artwork seamlessly. This tool is conveniently located under the Blend tool's Sub palette.
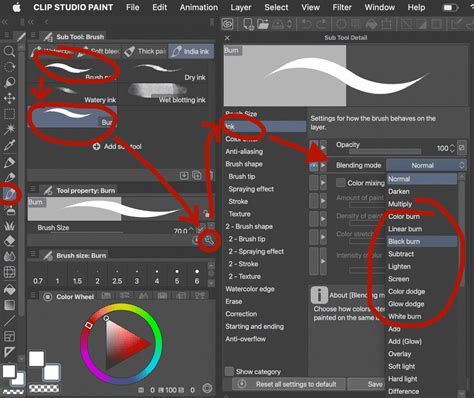
For users who frequently employ Burn and Highlight tools in Photoshop, Clip Studio Paint offers a way to create similar effects by customizing brushes with various blending modes. To achieve this, right-click on a brush in the Sub tool menu and select "duplicate." With the duplicated brush selected, click the wrench icon in the bottom right of the Tool Property palette. In the Ink section, you can then choose a new blending mode, such as Multiply, Burn, Soft Light, Color Dodge, or Overlay, which are commonly used for painting.

Clip Studio Paint also features a Perspective ruler tool, invaluable for establishing accurate perspective frameworks for your drawings. Access this by navigating to Layer menu > Ruler - Frame > Create Perspective Ruler, and then selecting the desired perspective view.
Animation and Comic Creation Tools
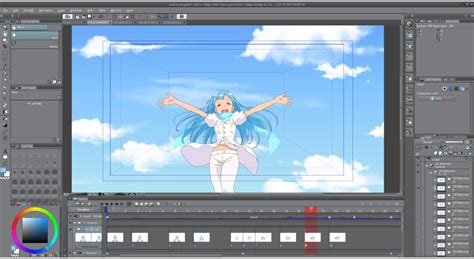
The software's animation capabilities are surprisingly robust. Clip Studio Paint offers a variety of tools for creating animated illustrations, including a timeline, keyframe animation, and onion skinning. These animation tools work seamlessly, though creating high-quality animated visuals requires a significant time commitment. The onion skinning feature allows you to view multiple frames simultaneously, facilitating smoother animation. Frame-by-frame animation supports traditional 2D animation styles. The timeline is typically located at the bottom of the screen, and you can even incorporate camera movements into your animations. The range of options within Clip Studio Paint is truly impressive, especially considering its lighter resource usage compared to Photoshop, based on my experience across multiple machines.
In the timeline interface, layers from the Layer palette and layer folders are displayed as vertical tracks on the left side of the Timeline palette. Each frame of the animation is represented horizontally on the right side of the timeline.
For comic artists, manga creators, and graphic novelists, Clip Studio Paint provides specialized tools. These include a panel layout tool and a word balloon tool for adding speech and thought bubbles. The word balloon tool can be found on the Tool palette towards the bottom. After selecting it, explore the Sub tool palette to choose your preferred speech bubble style. To begin creating comics or manga, start a new canvas by going to File > New and selecting "Comic" from the Project list.
Expanding Your Toolkit with Clip Studio ASSETS
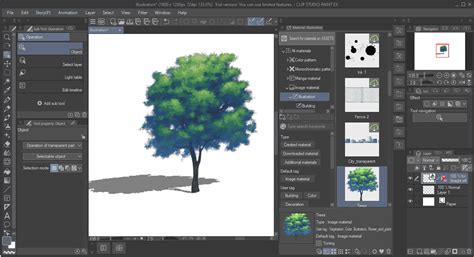
Clip Studio Paint allows you to expand your digital art arsenal through Clip Studio ASSETS, a platform for downloading brushes, textures, and 3D models. These downloadable items are collectively referred to as "materials" within the software and can be accessed via the ASSETS tab in the Clip Studio Launcher. You'll find both official Clip Studio Paint materials and a vast collection created by the user community. To explore these assets, open the Clip Studio Launcher, navigate to "Clip Studio Assets," and click on "popular" to discover the most downloaded brushes, textures, and 3D models.
Cloud Synchronization and Time-Lapse Recording
Leveraging the Clip Studio cloud service enables you to share your artwork and settings across multiple devices. The initial step for cross-device synchronization is to log into the same account on all your devices. Once logged in on your primary device (e.g., iPad), open Clip Studio Paint, tap the Clip Studio logo in the top left corner, and select "Open Clip Studio." In the "Manage Works" screen, activate syncing for the desired artworks. Allow a minute or two for the synchronization process to complete. On your other device, open Clip Studio, navigate to "Manage works," and then click on "Cloud." Your synchronized artwork should be available there for download and further work.
Clip Studio Paint also offers a feature to record a time-lapse of your drawing process. When creating a new file (File > New), you can click "record timelapse." If you save your work and reopen it later, the time-lapse recording will continue. Once you've finished your artwork, you can export the time-lapse video by going to File > Timelapse > Export timelapse.
Exporting Your Masterpieces
Clip Studio Paint provides a wide range of export options, ensuring your artwork can be shared in various formats. You can export your illustrations as common image files such as JPG, PNG, and PSD. For animation projects, you can export your work as video files.
Community and Learning Resources
The Clip Studio Paint community is renowned for its willingness to share knowledge. Many artists, like Liz Staley, a long-time user and author of several books on the program, actively contribute tutorials and tips. Watching and reading about how other users approach the software can be incredibly insightful. The videos shared in this context are often under 20 minutes, making them accessible and up-to-date.
For those new to digital painting, practical tips and exercises, such as those offered by Sinix Design, can be easily adapted as skills improve and are excellent for studying composition and value. Beginners can find encouragement and learn how to leverage CSP's functions for quick and easy creation, as demonstrated by Naoki Saito Illust Channel2. Anatomy knowledge, broken down into basic shapes, proportions, and essential muscles, is clearly explained by NIRO.
Character design is a popular topic, with artists like Whyt Manga sharing comprehensive tips on finding references, creating character sheets, designing props and clothing, testing silhouettes, understanding shape language, and choosing colors. These tutorials often move quickly, so pausing and taking notes is recommended for capturing valuable insights. Coloring tips, particularly for shading and color adjustment, are highlighted by YeeJ Chan. Marc Brunet offers techniques for achieving professional-looking anime cel-shading, covering flat colors, shadows, highlights, and finishing touches to make art "POP!"
Creating backgrounds is another area where artists share expertise. evuu demonstrates how to draw amazing backgrounds, including perspective basics, color palette management, shading, and rendering shiny objects. The process of transforming photographs into line art and integrating them into manga art, with adjustments for shading and detail, is shown by REM Creates. Interesting uses for the lasso tool beyond simple selection are explored by kuroshiro. For aspiring Webtoon creators, Nadiaxel provides a comprehensive guide covering canvas setup, text and word balloon integration, layout checks, background creation using 3D models, and more.
How to Use Clip Studio Paint STEP BY STEP For Beginners! [COMPLETE GUIDE]
Whether you're a novice or an experienced Clip Studio Paint user, there's always something new to discover. Advanced techniques for creating compelling line art for anime-style characters are explained by Eridey. Understanding light and shade is crucial for elevating artwork. Mandala designs, with their geometric and circular composition, offer a unique artistic challenge. The art of storytelling through a single image is a profound concept explored by many artists. The journey to becoming a professional artist and earning a living from your creations is a path that many aspire to. Pushing poses to the extreme can add dynamism to character art, and stylized approaches to drawing hands can significantly impact your work.
Learning about layer blending modes and how to effectively use them can transform your digital paintings. The creation of stylized mini-versions of characters, known as "chibis," is a popular artistic endeavor. Promoting your art on community sites like Instagram or ArtStation is essential for gaining visibility and connecting with fans. Shortcut keys are fundamental for speeding up the digital drawing process, allowing for quick tool and command changes. For artists transitioning from traditional drawing tablets to digital ones, understanding software-specific workflows is key.
When setting up a new file, initial settings are crucial. Some artists prefer to swap certain tool shortcuts, such as the eyedropper and object tools, from Ctrl to Alt for easier access. A thorough exploration of the available tools, including selection tools like the bucket for filling selections, is recommended. The pencil, pen, airbrush, and brush tools each offer unique capabilities. The pen tools are particularly effective for clean line art, the airbrush for soft shading and gradients, and the brush tool for a more traditional feel. The blending tool, especially its blur function, is a favorite for many users. Decorative brushes offer creative possibilities, and the gradient tool is useful for creating smooth color transitions.
During the drawing process, tools like the lasso selection tool, combined with the transform function (Ctrl + T), allow for precise manipulation of sketches. Holding down Control while transforming enables skewing. Adding flat colors and utilizing adjustment layers (created by right-clicking a layer and selecting "new correction layer") are standard practice. Masks can be applied to sketch layers, and airbrushes can be used to softly fade out strong lines.
Polishing drawings is an iterative process. Adjustment layers like tone curves can increase or decrease values, affecting the overall brightness and contrast. Gradient maps are useful for unifying colors, and users often experiment with downloaded gradients from Clip Studio Assets. After applying these adjustments, flattening the drawing into a single layer allows for selective blurring across the entire image.
For symmetrical objects or geometric patterns, the symmetrical ruler is an invaluable tool, mirroring your drawing on the opposite side for perfect symmetry. When starting to ink, lowering the opacity of the sketch layer and flipping the canvas can aid in achieving cleaner lines. After laying down flat colors and backgrounds, adding volume to elements like antique frames can be achieved through abstract shadow shapes, often drawn from imagination.
Yana Van Houtte, also known as Cosmic Spectrum, is a Toronto-based artist specializing in character art and comics, showcasing the diverse talent within the Clip Studio Paint community.