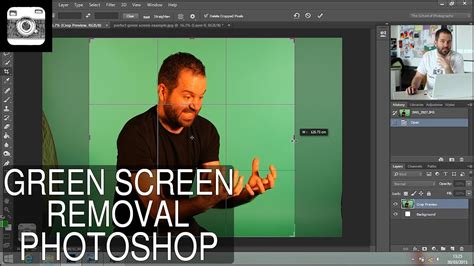
Editing green screen footage in Photoshop, a process also known as chroma keying, opens up a world of creative possibilities for visual artists and content creators. Whether you're a seasoned professional or just beginning your digital editing journey, understanding the techniques for effectively removing a green screen is a fundamental skill. Photoshop offers multiple robust methods to achieve clean and convincing results, allowing you to seamlessly integrate subjects into entirely new environments. This tutorial will guide you through the essential steps, from initial selection to final refinement, ensuring your green screen edits are professional and impactful.
Initial Selection: Isolating Your Subject
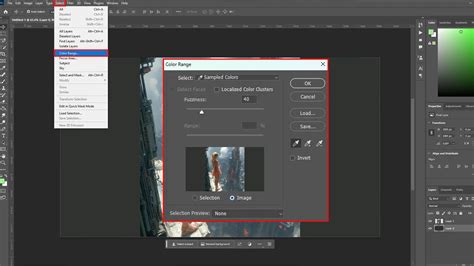
The first crucial step in green screen removal is accurately selecting your subject. Photoshop provides several powerful tools for this, and the best approach often depends on the complexity of the image and the quality of the green screen itself. One highly effective method involves using the "Color Range" selection tool.
To initiate this process, navigate to Select > Color Range. Within the Color Range dialog box, you'll encounter a dropdown menu labeled "Select." Here, you have the option to choose a specific color to target. For a typical green screen, you would select "Green" from this Master dropdown menu. In some instances, particularly with certain shades of green, you might find that "Yellow" yields better results. It is often beneficial to experiment with both options to determine which provides the cleanest initial selection for your particular image. As you adjust the "Fuzziness" slider, which controls the tolerance of the selection to variations in the target color, and observe the "Selection Preview" set to "Black Matte," you can visually assess how effectively Photoshop is isolating your subject from the background. A "Black Matte" preview will show your subject in white and the background in black, making it easy to see what is being selected. If you find that your selection has inadvertently included too much of the background or excluded parts of your subject, don't worry. You can always undo your last action by pressing Control-Z (or Command-Z on a Mac) and try again with different settings.
Once you have a satisfactory initial selection, the next vital step is to apply this selection as a layer mask to your subject. With your subject layer active and the selection in place, click on the "Add Layer Mask" icon at the bottom of the Layers panel. This action will create a mask that conceals everything outside of your selection, effectively removing the green screen background.
Refining the Mask: Achieving Perfection
While the initial selection is a significant accomplishment, the mask is rarely perfect at this stage. There will often be residual green fringing around the edges of your subject, or areas where the mask has been too aggressive, subtly cutting into the subject itself. This is where the "Refine Edge" tool becomes indispensable for achieving a professional finish.
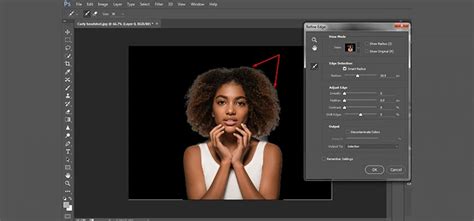
After applying your initial layer mask, you can access the "Refine Edge" workspace. This powerful tool allows you to intelligently analyze the edges of your selection and make highly precise adjustments. Within the Refine Edge options, you'll find sliders for "Radius," "Smoothness," "Feather," and "Contrast," as well as a crucial "Decontaminate Colors" option. The Radius setting helps Photoshop detect finer details, while Smoothness and Feather can help soften harsh edges. Contrast can sharpen them. The "Decontaminate Colors" feature is particularly effective at removing any lingering green color spill that may be present on the edges of your subject. You can also use the Refine Edge brush to manually paint over areas where the mask needs to be improved, further enhancing the accuracy of your cut-out.
For more intricate areas, such as hair or fur, you might need to employ additional techniques. One such method involves holding down the Control key (or Command on a Mac) and clicking on the layer mask thumbnail in the Layers panel. This action will load the mask as a selection. Once you have this selection, you can go to Select > Modify > Contract and contract the selection by a small value, such as 2 pixels. This step helps to bring the mask edge slightly inward, further reducing any potential green halo. Following this, you can then re-apply the "Refine Edge" tool to these newly contracted edges to ensure a smooth and natural transition.
Integrating the New Background
Now that you've successfully removed the green screen and refined your subject's mask, it's time to bring in your new background. This is a straightforward process: simply drag and drop your desired background image into your Photoshop document, or if it's already open in another tab, you can easily switch to it and copy-paste it onto a new layer beneath your subject layer.
When you edit green screen in Photoshop and place your subject onto a new background, it's crucial to consider how the lighting and color of the original scene interact with the new environment. The mask is looking pretty good, but it's definitely not perfect. Keep in mind that we’re only looking at the body right now. This means that the subject might still appear slightly out of place if the lighting or color tones don't match.
Color Grading and Final Touches
To make the integration of your subject and new background seamless, color grading is an essential final step. This involves adjusting the colors and tones of your subject to match the new environment. Photoshop offers a variety of adjustment layers that are perfect for this task.
One highly effective method for quick and vibrant color grading involves using two "Color Lookup" adjustment layers. These layers allow you to apply pre-defined LUTs (Look-Up Tables) or create your own custom color grades. By experimenting with different LUTs, you can quickly achieve a cohesive look between your subject and background. For instance, if your new background has a warm, golden hour feel, you would select a LUT that introduces similar warm tones to your subject.
Powerful COLOR GRADING techniques in Photoshop
In addition to Color Lookup, you can utilize other adjustment layers like "Hue/Saturation," "Color Balance," or "Curves" to fine-tune specific color channels or overall brightness and contrast. For example, if your subject appears too cool compared to a warm background, you can use a "Color Balance" adjustment layer to add more red and yellow tones to the midtones and highlights of your subject.
As a creative flourish, you might consider adding an "Inner Glow" layer style to your subject. Set this style to "Screen" blending mode and use a very soft, light blue color, such as #95c9f9. This can help to create a subtle rim light effect, suggesting ambient light from the new background wrapping around your subject and further enhancing the illusion of integration. Remember, these last few steps are not even necessary for a basic green screen removal, but they elevate your work to a professional standard.
Alternative Tools and Plugins
While the "Color Range" and "Refine Edge" methods are powerful, Photoshop also offers other tools that can be useful for green screen removal. The "Select Subject" tool, for instance, can sometimes provide a good starting point for isolating your subject, especially in well-lit images with clear separation from the background.
It's also worth noting that this Adobe Photoshop green screen removal tool works on other colors as well. If your subject has a distinct color that contrasts sharply with the background, you can often use the same techniques with "Color Range" to isolate it.
For those looking to streamline their workflow, specialized Photoshop plugins can be a valuable asset. If you're looking to make quick and clean cuts, try out the "Easy Cut Photoshop Plugin." These add-ons are often designed to automate many of the repetitive steps involved in masking and selection, saving you time and effort.
Furthermore, for tasks like adding a sky to an existing image, there are Photoshop add-ons that can quickly create extra space on your canvas by extending the edges, which can be incredibly useful when working with landscape or architectural photography that might benefit from a green screen-like compositing approach.
Ultimately, that is how quick extracting an image from a green screen can be when you leverage the right tools and techniques within Photoshop. "Color Range" will do most of the work for you, and then "Refine Edge" will take care of the rest, leading to professional-looking composites.