Color management is a crucial yet often complex aspect of post-production, ensuring that the image captured by the camera translates accurately to the viewer's display. For those working with DaVinci Resolve, understanding and implementing effective color management workflows is paramount, especially with the advent of advanced color spaces like DaVinci Wide Gamut. This article aims to demystify the process, guiding users through setting up their color management using nodes, with a particular focus on the Color Space Transform (CST) tool. We will explore how to handle footage from various cameras, apply creative looks, and ensure a consistent and accurate image from capture to final output.
The Foundation: Understanding Color Management
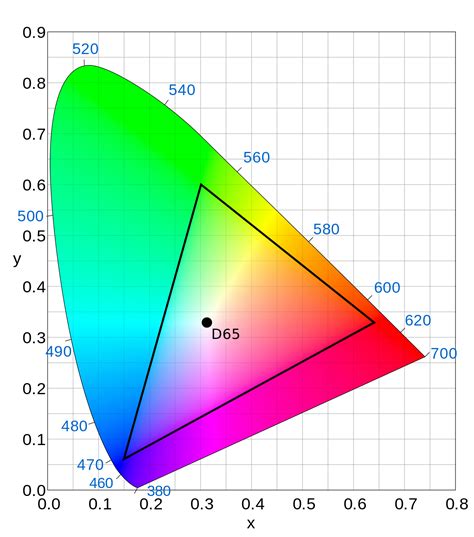
At its core, color management is the bridge between what a camera records and what your display can accurately represent. The ultimate goal is to see your image on screen as it appeared on set when it was originally captured. This involves transforming the camera's native color space and gamma into a standardized working space, and then into a display-referred space.
Why Use Groups in DaVinci Resolve?
DaVinci Resolve's Group functionality is an invaluable tool for managing footage from multiple cameras or different shooting conditions within a single project. By grouping clips, you can apply node-based adjustments to an entire set of clips simultaneously, streamlining your workflow and ensuring consistency. This is particularly useful when dealing with footage captured in different color spaces, as demonstrated with ARRI Alexa footage.
Imagine a timeline populated with clips from various cameras, each requiring individual attention. For instance, the first three shots might all originate from ARRI Alexa cameras, captured in the ARRI Wide Gamut LogC3 color space. To manage these consistently, we can leverage Resolve's Group function. By selecting these clips (e.g., shot one through three) and right-clicking, you can choose "Add Into a New Group" and label it "Alexa." This organizational step is the first of many in establishing a robust color management pipeline.
Navigating Node Levels: Clip, Group, and Timeline
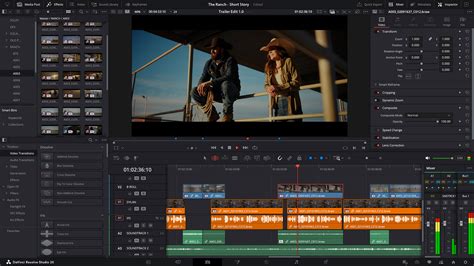
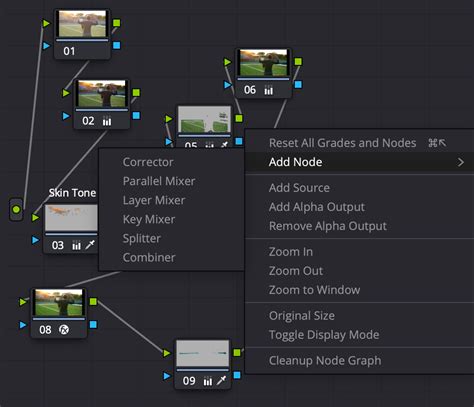
Understanding the different levels within DaVinci Resolve's node editor is fundamental to effective color management. Above the node graph, you'll typically find two dots representing the Clip level and the Timeline level. The Clip level is where adjustments are made that are specific to an individual clip. The Timeline level, conversely, affects all clips on that timeline.
When you create a group, these levels expand. For our "Alexa" group, the number of dots increases from two to four. This introduces two new sections: Group Pre-Clip and Group Post-Clip. The Group Pre-Clip level is where the initial stages of color management, such as converting to a common working color space, are best performed. Any adjustments made here are applied to all clips within that group as their very first operation, before any creative color grading takes place. This is ideal for establishing a unified starting point for your footage.
The Two-Step Color Management Journey
Our approach to color management can be broken down into two essential steps, primarily executed using the Color Space Transform (CST) effect.
Step One: Establishing a Common Working Color Space
The first step is to transform your footage from its native camera color space into a common working color space. For this workflow, we'll utilize DaVinci Wide Gamut Intermediate, a space designed for broad color and dynamic range.
To achieve this, navigate to the Effects library, find the "Color Space Transform" effect, and drag it onto the first node within the Group Pre-Clip level of your "Alexa" group. Within the CST settings:
- Input Color Space: Select "ARRI Wide Gamut 3."
- Input Gamma: Choose "ARRI LogC3."
- Output Color Space: Set this to "DaVinci Wide Gamut."
- Output Gamma: Select "DaVinci Intermediate."
- Tone Mapping: Ensure this is set to "None."
We generally don't need to engage Tone Mapping or Gamut Mapping when converting from a camera's native space to our working space. This node, which we can label "IN," effectively takes all your ARRI material and converts it into the standardized DaVinci Wide Gamut Intermediate.
It's important to note that while some colorists opt to manage color directly within DaVinci Resolve's Project Settings, using CSTs in the node editor achieves the same outcome through a different mechanism. Both methods are driven by the same underlying mathematical principles.
After this first step, your image will still appear somewhat flat. This is because you are still within a Log color space. The image has been normalized for processing, but it hasn't yet been transformed into a display-ready format.
Step Two: Transforming to a Display Color Space
The second step involves transforming your image from the working color space (DaVinci Wide Gamut Intermediate) to a display color space. For most broadcast and online content, this will be Rec.709 Gamma 2.4. This transformation is applied at the Timeline level of the node graph.
Add another Color Space Transform effect to a node on the Timeline level. Configure it as follows:
- Input Color Space: Select "DaVinci Wide Gamut Intermediate."
- Input Gamma: This will typically be "DaVinci Intermediate."
- Output Color Space: Choose "Rec.709."
- Output Gamma: Set to "Gamma 2.4."
Label this node "->709" to indicate its function. This second CST takes the image from your common working space and prepares it for your display.
Refining the Output: Tone Mapping and OOTF
To ensure a consistently pleasing image on your screen, especially when dealing with the limitations of display brightness and color gamut, further adjustments are necessary. These are typically applied within the second CST node (the one on the Timeline level).
Tone and Gamut Mapping
- Tone Mapping Method: Select "Luminance Mapping."
- Custom Max Input: Set this to "10,000 nits." This represents a very high dynamic range, allowing the CST to interpret the full potential of your working space.
- Custom Max Output: Set this to "100 nits." This is a common peak brightness for many displays, ensuring that the image is appropriately scaled for typical viewing environments.
- Gamut Mapping: Choose "Saturation Compression." This helps to prevent colors from becoming overly saturated as they are mapped to the display's gamut.
Advanced Settings: Applying the OOTF
Under the "Advanced" settings of the CST, ensure that "Apply Forward OOTF" is enabled. OOTF stands for Opto-Optical Transfer Function, sometimes referred to as System Gamma. Enabling this setting correctly translates the signal's gamma curve to match the display's characteristics, ensuring accurate brightness and contrast reproduction. While a deep dive into OOTF is beyond the scope of this article, these settings are crucial for accurate display mapping.
These tone and gamut mapping settings ensure that as your image approaches the brightness and pixel color limits of your display, it gracefully decelerates, preventing clipping or other undesirable artifacts.
After applying these output transforms, your ARRI Alexa footage should now accurately represent how it would have appeared on set, providing a solid foundation for creative color grading.
Handling Footage from Different Cameras: RED Raw Workflow
The color management process becomes more nuanced when dealing with footage from different camera manufacturers, such as RED cameras. These cameras often capture in their own proprietary raw formats, requiring specific handling.
Setting Up a RED Group
Similar to the ARRI footage, we'll create a new group for our RED clips. Toggle to the Clip level, select the RED footage, right-click, and choose "Add Into a New Group," labeling it "RED."
Decoding RED Raw Footage
A critical consideration for RED Raw (R3D) files is the debayering process â converting the raw sensor data into a viewable image. This is best handled within DaVinci Resolve's Project Settings before applying node-based transforms.
Go to Project Settings > Camera Raw. For RED Raw footage:
- RED Raw profile: Set "Color science" to "IPP2."
- Color space: Choose "REDWideGamutRGB."
- Gamma curve: Select "Log3G10."
These settings are RED's recommended parameters for decoding their raw material, providing the optimal starting point for color management.
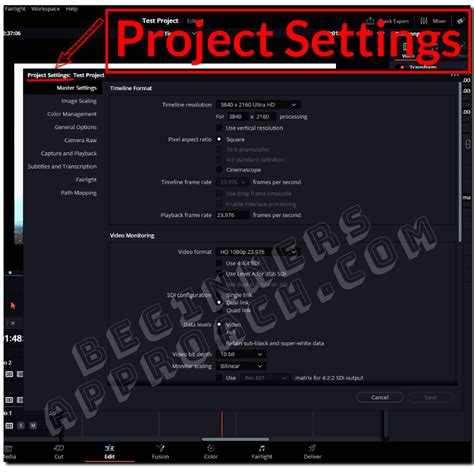
Additionally, under the "Use Camera Metadata" section, ensure that ISO and Color Temp boxes are selected. This carries forward the metadata captured by the cinematographer, preserving their intended look. Remember to click "Save" after making these changes.
Applying CST to RED Footage
Now, within the Group Pre-Clip level of your "RED" group, add a Color Space Transform:
- Input Color Space: Select "REDWideGamutRGB."
- Input Gamma: Choose "RED Log3G10."
- Output Color Space: Set to "DaVinci Wide Gamut."
- Output Gamma: Select "DaVinci Intermediate."
For RED Raw footage, you can typically turn off Tone Mapping and Inverse OOTF in this specific CST node, as the debayering process in Project Settings has already handled some of these transformations. This node effectively maps your RED camera's color space into your working space.
Addressing Double-Transformed Footage
Occasionally, you may encounter footage that appears blown out, over-saturated, and harsh. This is often a sign of "double-transformed" footage. Essentially, the image has already been processed into a display color space (like Rec.709) and is then being transformed again by your timeline's color management, leading to incorrect results.
If a clip looks like this and is not yet in a group, it's likely being processed directly by the Timeline level CST. Turning off this Timeline node might reveal that the image was originally captured in Rec.709 Gamma 2.4 and is already normalized.
Working with Rec.709 as Input
While it might seem counterintuitive to re-process footage that is already in your target display color space, sending it through your working space (DaVinci Wide Gamut Intermediate) offers benefits. This ensures all clips, regardless of their origin, are processed through a consistent pipeline, facilitating creative grading.
- Add to a Group: Create a new group for this clip and label it "->709."
- Group Pre-Clip CST: Add a CST to the Group Pre-Clip level.
- Input Color Space: Select "Rec.709."
- Input Gamma: While "Gamma 2.4" is a common choice, you might experiment with "Gamma 2.2" or "Rec.709-A" for potentially better results when going from a baked image to a working space. For consistency, we'll stick with "Gamma 2.4" here.
- Output Color Space: Set to "DaVinci Wide Gamut."
- Output Gamma: Select "DaVinci Intermediate."
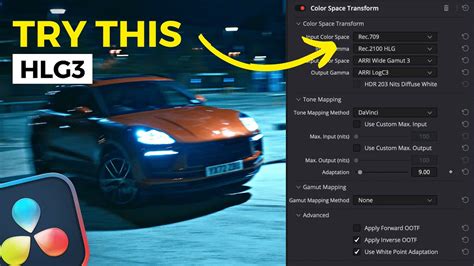
- Tone Mapping for Baked Footage: When dealing with baked-in footage like this, you might re-engage Tone Mapping in this CST node, but with different parameters.
- Tone Mapping Method: "Luminance Mapping."
- Custom Max Output: Set to "2000 nits." This is a good value to start with, though you can go up to 10,000 if needed.
- Custom Max Input: Adjust this slider to recover as much highlight detail as possible without darkening the overall image. For this specific example, around 120 nits might be effective. Scrolling through this slider will reveal how much information can be recovered.
The Power of a Common Color Space for Creative Grading
Even when your final output is Rec.709, sending all footage through DaVinci Wide Gamut Intermediate provides a unified platform for creative decisions. This common color space is essential for applying consistent looks and LUTs across your entire timeline.
Applying Macro-Level Creative Transforms (Looks)
Once all your footage has been transformed into DaVinci Wide Gamut Intermediate, you can apply creative looks that will affect the entire timeline uniformly. This is done by creating a new node in the Timeline level, upstream of your output transform.
For example, you might want to apply a Kodak film print emulation LUT. These LUTs often expect a specific input color space and gamut, typically Cineon Log and Rec.709. However, with your established workflow, you can now apply LUTs that are designed to work with DaVinci Wide Gamut Intermediate.
Let's say you have a LUT pack and want to use the "Cabra LUT" from the "Voyager" subfolder. You would apply this LUT to a node in the Timeline level, before your final output CST. This LUT acts as a baseline creative transform for all shots in your timeline, providing a cohesive starting point for further grading.
DaVinci Resolve Film Look LUTs - How to Apply PROPERLY!
This method ensures that your creative LUTs are applied consistently, regardless of the original camera source, because all footage has been normalized to the same working color space. Even after applying a LUT, some manual grading will likely be necessary to fine-tune exposure and color balance on individual shots.
Nodes vs. Project Settings: A Comparative Look
While setting up color management within DaVinci Resolve's Project Settings might appear simpler initially, the node-based approach offers greater flexibility and control. Using Color Space Transforms within the node editor allows for granular adjustments at different stages of the signal flow, catering to complex workflows involving multiple camera formats and specific creative requirements. The underlying science and mathematics are identical, but the node-based method provides a more transparent and adaptable pipeline for many colorists. This detailed breakdown empowers you to confidently manage your color pipeline in DaVinci Resolve, ensuring accurate and visually compelling results.