Photoshop has revolutionized the way we approach image editing, transforming complex, manual processes into sophisticated, automated features. Among its most powerful tools is the Content-Aware Move tool, which empowers users of all skill levels to achieve professional-looking results with remarkable ease. This tool allows you to seamlessly relocate elements within an image, or even between different images, with an astonishing degree of realism. Gone are the days when such intricate edits required extensive professional expertise; the Content-Aware Move tool makes advanced compositing accessible to everyone.
Understanding the Core Functionality
The fundamental purpose of the Content-Aware Move tool is to select an object or a portion of an image and relocate it to a new position. Crucially, as the selected area is moved, the void it leaves behind is intelligently filled with surrounding pixels, creating a seamless and natural-looking reintegration into the background. This automatic recomposition is what sets it apart from simpler copy-and-paste operations. The tool analyzes the content of the source area and the destination background, then intelligently blends the pixels to create a smooth, imperceptible transition. This capability is particularly valuable when you want to reposition elements for better composition or remove unwanted objects by moving them to a more suitable location within the image.
Selecting Your Target: Precision Matters
Before you can move anything, you need to make a selection. The Content-Aware Move tool offers flexibility in how you define the area to be moved. You can create a basic selection by simply drawing a freehand outline around the object you wish to manipulate, similar to using the Lasso tool. For many common tasks, this direct approach is sufficient.
However, for more complex shapes or when precision is paramount, leveraging Photoshop's advanced selection tools can yield significantly better results. Tools like the Object Selection tool are invaluable. With a single click or a drag of a marquee, Photoshop can often automatically detect and select the intended subject.
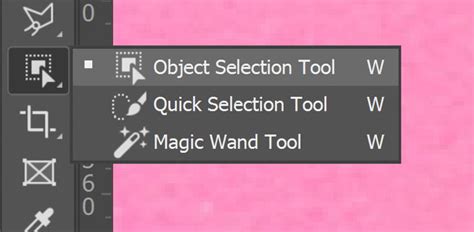
Even with advanced selection tools, you may need to refine the initial selection. For instance, if the Object Selection tool includes unwanted elements, such as the trunk of a tree, you can use other selection tools, like the Lasso tool, in conjunction with modifier keys (Shift to add, Alt/Option to subtract) to precisely trim down your selection. Drawing around the trunk to remove it from the initial selection ensures that only the desired part of the object is moved. This iterative refinement process is key to achieving professional-grade edits.
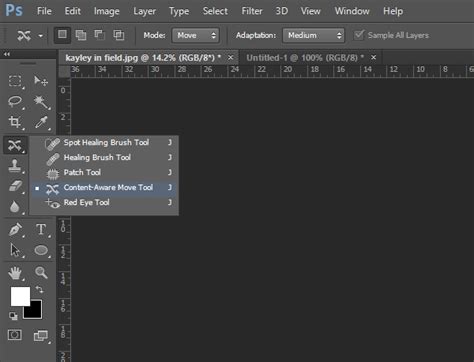
Navigating the Tool's Options Bar
Once the Content-Aware Move tool is active and you've made your selection, the Options bar at the top of your Photoshop workspace becomes your control panel. Here, you'll find key settings that govern how the tool operates:
Mode: Move vs. Extend
The first critical decision is choosing the mode.
- Move: This is the primary function. When in "Move" mode, you select an object, drag it to a new location, and Photoshop automatically fills the original space. The selected object is then placed in its new position.
- Extend: While not the core function of the Content-Aware Move tool, the concept of "extending" an object is closely related to how the tool fills gaps. If you select an object and then drag outwards, Photoshop attempts to intelligently duplicate and extend the selected content. However, for true object extension, dedicated techniques might be more effective.
Structure and Color: The Blending Controls
The true magic of the Content-Aware Move tool lies in its ability to blend the moved content seamlessly with its new surroundings. This is primarily controlled by two sliders: Structure and Color.
Structure: This setting determines how closely the patch (the area where the object was moved from) should reflect existing image patterns. A value of 7 means the patch will adhere very strongly to existing image patterns, attempting to mimic the texture and detail of the surrounding pixels with high fidelity. Conversely, a lower Structure value allows for more flexibility, meaning the filled area might be less concerned with precisely matching the original texture.
For example, if you are moving a complex object with intricate patterns, a high Structure value will work diligently to reconstruct those patterns in the vacated space. If the object is simpler or the background more uniform, a lower Structure value might suffice and even look more natural.

When the Structure value is set to zero, the tool makes minimal effort to replicate the original textures, which can lead to an unnatural appearance, almost as if the Smudge tool has been used. Conversely, setting Structure to its maximum (7) aims for the most faithful reconstruction of the original image's patterns in the area that was moved.
Color: This slider controls the extent to which Photoshop applies algorithmic color-blending to the patch. A value of 10 means Photoshop will aggressively blend the colors of the moved object with the colors of the new background. A value of 0, on the other hand, disables color blending entirely. This means the colors of the moved object will remain distinct and uninfluenced by the background colors.

If you are creating a collage or want a distinct separation between elements, setting Color to zero might be desirable. However, for seamless integration, a higher Color value is usually preferred. When the Color value is set to zero, there will be no merging of colors, which can make the moved object appear "stuck on" rather than naturally integrated.
The interplay between Structure and Color is crucial. Often, a balance needs to be struck. For instance, you might want strong structural integrity (high Structure) but subtle color blending (moderate Color) to ensure the object fits tonally without looking artificial.
Transform On Drop: Immediate Resizing and Refinement
A highly convenient option is "Transform On Drop." When this checkbox is ticked, after you release the mouse button to place the moved object, a bounding box will automatically appear around it, along with transform handles. This allows you to immediately resize, rotate, or skew the object in its new location without needing to activate the Free Transform tool separately.

If "Transform On Drop" is enabled, the object will still be visible at its original location until you confirm the transformation. You can then click and drag the corner handles to scale the part of the image you've just moved. This feature streamlines the workflow, allowing for quick adjustments to the size and orientation of the moved element.
Advanced Techniques and Workflow Tips
The Content-Aware Move tool is not a one-size-fits-all solution, and its effectiveness can be enhanced by understanding a few advanced techniques:
Utilizing Layer Information
When working with multiple layers, you can enable an option to create the result of the move in another layer, using information from all visible layers. This is incredibly useful for maintaining a non-destructive workflow. Instead of directly altering existing pixels, the moved content and the filled background are placed on a new layer, allowing you to easily make further adjustments or revert changes without affecting the original image data.
Saving Tool Presets
Photoshop allows you to create and save Tool Presets for virtually any tool. If you find yourself frequently using the Content-Aware Move tool with a specific combination of settings (e.g., a particular balance of Structure and Color, or with "Transform On Drop" always enabled), you can save these settings as a preset. This means you can quickly and easily recall these configurations in the future, saving valuable time and ensuring consistency in your edits. To reset any tool back to its default settings, you can right-click on the Tool Presets button and select "Reset Tool."
Understanding Selections and Deselection
It's a common pitfall for beginners to forget that a selection remains active after an operation. Most other tools and actions in Photoshop are either disabled or behave differently when a selection is active. You'll typically see the "marching ants" (a moving dashed line) indicating an active selection. However, if the selection is small or subtle, it might not be immediately obvious.
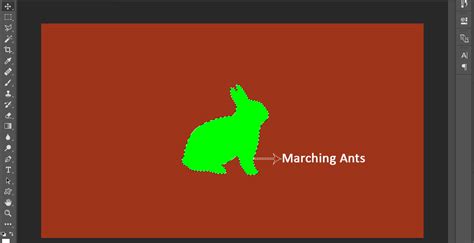
If you find yourself unable to perform an expected action, it's highly probable that a selection is still active. The universal shortcut to deselect everything is Ctrl+D (Windows) or Cmd+D (Mac). Pressing this combination will remove the active selection, allowing you to proceed with other tools and edits. If no selection was active, pressing Ctrl+D will have no effect.
Case Study: Moving a Fox's Tail
Consider a scenario where an image of a fox has an aesthetically displeasing grey blur at the end of its tail. The Content-Aware Move tool can be employed to rectify this.
- Select the Content-Aware Move Tool.
- Choose "Move" mode.
- Draw a selection around the problematic grey blur at the end of the fox's tail.
- Drag the selection slightly away from the tail. Photoshop will then attempt to fill the void left by the blur with pixels that match the surrounding tail fur.
- Adjust Structure and Color: You might need to experiment with the Structure and Color sliders. If the filled area doesn't match the texture of the tail, increase the Structure value. If the color doesn't blend well, adjust the Color slider.
- Deselect: Once satisfied, press
Ctrl+Dto deselect.
The result should be a tail that appears naturally complete, with the distracting blur removed.
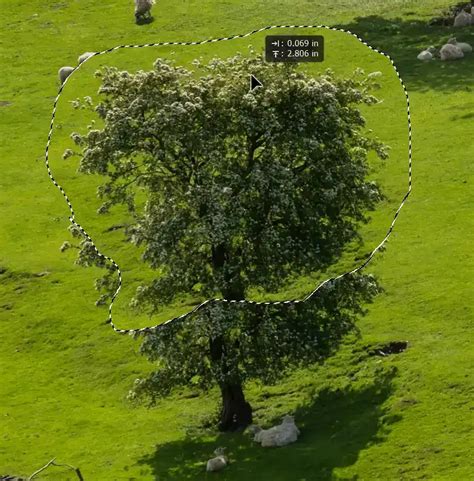
Case Study: Extending a Tree
Imagine you have a photograph of a tree, and you need to extend its height for compositional reasons.
- Use a precise selection method: Start by selecting the tree using a tool like the Object Selection tool for a more accurate initial mask.
- Refine the selection: If the initial selection includes unwanted elements (like the ground or sky), use tools like the Lasso tool to subtract those areas.
- Activate the Content-Aware Move tool.
- In the Options bar, set the Mode to "Extend." (Though technically "Move" is used, the principle is to select and then manipulate.)
- Drag the selection downwards to create more of the tree trunk.
- Adjust Structure: A high Structure value (e.g., 7) is crucial here to ensure the new bark texture and patterns match the existing tree.
- Transform On Drop: Enable "Transform On Drop" to immediately resize the extended section.
- Align and Refine: You may need to slightly move the enlarged tree section to ensure the trunk aligns perfectly. Click and drag a top corner handle to resize.
While this method can produce good results, for highly critical extensions, specialized tutorials might offer even more refined techniques. The key takeaway is that the quality of your initial selection significantly impacts the final outcome.
Beyond Basic Moves: Creative Applications
The Content-Aware Move tool opens up a world of creative possibilities:
- Removing Unwanted Objects: As demonstrated with the fox's tail, this tool is excellent for cleaning up distracting elements in a photo.
- Repositioning Subjects: If a person or object in a photo is awkwardly placed, you can move them to a more pleasing spot.
- Creating Illusions: By moving elements and adjusting their size, you can create entirely new scenes or alter the perceived depth of field. For instance, making a moved fox appear larger can give the impression that it is closer to the camera.
- Compositing: While professional compositing often involves more advanced techniques, the Content-Aware Move tool provides a quick and effective way to integrate elements from one image into another, especially when a degree of blending is desired.
How to Seamlessly Move People or Objects in Photoshop Tutorial - Content-Aware Move Tool
Limitations and Considerations
Despite its power, the Content-Aware Move tool is not infallible. The success of the tool heavily relies on the complexity of the surrounding pixels.
- Complex Backgrounds: On highly detailed or chaotic backgrounds, the tool might struggle to generate convincing replacements for the moved object. The results can sometimes be blurry or contain artifacts that are only obvious to a discerning eye.
- Simple Selections: As mentioned, making a basic freehand selection can sometimes lead to less-than-ideal results, especially when trying to extend or seamlessly blend complex textures.
- "Photoshopped" Look: In some instances, especially with aggressive settings or difficult source/destination material, the edit might still look "Photoshopped." This is where careful adjustment of Structure and Color, and sometimes a combination of tools, becomes essential.
Conclusion
The Content-Aware Move tool is a testament to Photoshop's evolution, offering a powerful yet accessible method for image manipulation. By understanding its core functions, mastering the options bar controls for Structure and Color, and employing smart selection techniques, you can achieve remarkably realistic results. Whether you're removing blemishes, repositioning subjects, or embarking on more ambitious creative projects, this tool is an indispensable asset in any Photoshop user's toolkit. Experiment with its settings, practice with different images, and you'll soon be moving elements with confidence and artistry.