Gaussian blur is a foundational effect in digital image and video editing, celebrated for its versatility and naturalistic results. This guide delves into the intricacies of applying Gaussian blur within Adobe Photoshop, exploring its mathematical underpinnings, practical applications, and step-by-step implementation. Whether you aim to soften distracting details, enhance focus on your subject, achieve a dreamy aesthetic, or protect sensitive information, understanding Gaussian blur is key to elevating your creative workflow.
Understanding Gaussian Blur: The Science Behind the Softness
Gaussian blur is a type of low-pass filter that operates on an image by applying a mathematical function. This function, developed by the renowned mathematician Carl Friedrich Gauss, effectively smooths out sharp details by averaging pixel values. It doesn't treat all surrounding pixels equally; those closest to the center of the blur are given more weight in the calculation, while those farther away have less influence. This weighted averaging process creates a naturally pleasing blur, mimicking how light scatters through a camera lens.
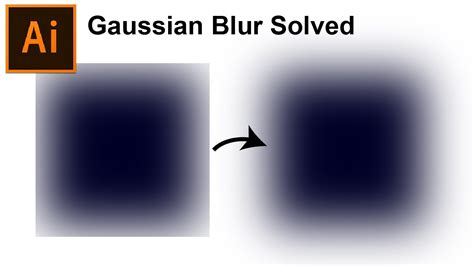
The strength of the blur is controlled by a setting often referred to as the "radius" or "amount," technically known as "sigma." A smaller radius value results in a subtle softening, ideal for reducing noise or gently smoothing edges. Conversely, a larger radius creates a more pronounced, dreamy blur, perfect for softening backgrounds or creating artistic effects. This mathematical approach ensures that the blur appears smooth and organic, avoiding the flat or artificial look that can sometimes result from simpler blurring techniques.
Why Choose Gaussian Blur? Versatile Applications in Editing
The ubiquity of Gaussian blur stems from its wide array of practical uses across photography and videography. Its ability to subtly or dramatically alter an image makes it an indispensable tool for many editing tasks.
Reducing Image Noise and Grain
Photographs and videos captured in low-light conditions or at high ISO settings often exhibit noticeable noise and grain. Gaussian blur effectively mitigates these distracting speckles by averaging the values of neighboring pixels. This process results in a cleaner, more professional-looking image without sacrificing essential sharpness entirely. It can also help to mask minor visual imperfections, making flaws less conspicuous and drawing attention back to the main subject.
Softening Harsh Edges and Artifacts
In digital art, graphics, or heavily edited photographs, edges can sometimes appear unnaturally sharp or jagged. Gaussian blur gently softens these transitions, creating a more natural and aesthetically pleasing visual flow. It is also effective at reducing the appearance of chromatic aberration - the colored fringes (often red, blue, or green) that can appear around high-contrast edges, particularly in landscape photography. By softening these chromatic fringes, the overall image looks more refined.
Creating Depth of Field and Bokeh Effects
Professional camera lenses naturally create a shallow depth of field, rendering the background out of focus while keeping the subject sharp. Gaussian blur can convincingly replicate this effect in post-production. By applying the blur selectively to the background elements, the main subject is emphasized, drawing the viewer's eye and lending a cinematic quality to the image. This technique is fundamental in portrait photography and videography for isolating the subject.
Hiding Sensitive Information
In scenarios where privacy is paramount, Gaussian blur offers a discreet method for obscuring sensitive details. Faces, license plates, brand logos, or personal text can be blurred effectively without completely obliterating the surrounding context. This allows for the preservation of the image's overall composition while ensuring that identifying information remains hidden.
Enhancing Portraits with Smoother Skin Tones
Portrait retouching often involves addressing minor skin imperfections such as blemishes, wrinkles, or uneven texture. A carefully applied Gaussian blur can soften these details, resulting in a smoother, more flattering skin appearance. When used judiciously, it can enhance natural skin texture without making it look artificial.
Preparing Images for Edge Detection
In technical applications like graphic design or computer vision, sharp noise can interfere with edge detection algorithms. Applying a Gaussian blur smooths out these random variations, allowing edge detection filters to identify only the significant lines and boundaries, thereby improving the accuracy of such processes.
Blending Layers Seamlessly
When combining multiple images or graphic elements, the edges of cutouts can sometimes appear abrupt and out of place. A subtle Gaussian blur applied to the edges of these elements helps them integrate more harmoniously with the background, creating a cohesive and realistic composite image.
Generating Glow and Light Effects
By blurring bright areas of an image and then layering them back, it's possible to create soft glowing effects, ethereal halos, or luminous light streaks. This technique is particularly useful in digital art and photography for adding a touch of magic and enhancing the visual impact of light sources.
Directing Viewer Focus
In visually complex images or videos, a Gaussian blur can be strategically employed to guide the viewer's attention. By softening less important areas, the primary subject or focal point stands out more prominently, improving the narrative clarity and overall impact of the visual content.
Stylizing Backgrounds for Clarity
Busy or distracting backgrounds can detract from the main subject or render text illegible. Gaussian blur transforms these backgrounds into smooth, unobtrusive surfaces, effectively highlighting the subject and providing a clean canvas for overlays such as captions or logos.
Creating Smoother Transitions in Video
In video editing, abrupt cuts between scenes can sometimes disrupt the viewing experience. A Gaussian blur applied during a transition can soften the visual shift between clips, creating a more fluid and professional flow.
Achieving a Cinematic Look
Modern digital footage can sometimes appear overly sharp, lacking the softer aesthetic often associated with traditional film. A subtle application of Gaussian blur can temper this digital sharpness, imparting a more polished, cinematic feel to videos.
Implementing Gaussian Blur in Photoshop: A Step-by-Step Guide
Photoshop offers a robust and user-friendly interface for applying Gaussian blur. The recommended workflow involves using Smart Objects to ensure that the blur effect remains editable at any time.
Step 1: Open Your Image and Prepare the Layer
Begin by opening your desired image in Adobe Photoshop using File > Open. If the image appears as a "Background" layer, it's advisable to work on a duplicate to preserve the original. Press Ctrl + J (Windows) or Cmd + J (Mac) to create a duplicate layer. This ensures you can always revert to the original image if needed.
Step 2: Convert to a Smart Object
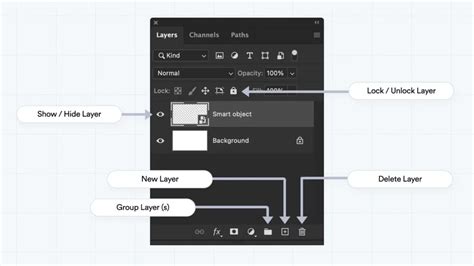
To enable non-destructive editing of the Gaussian blur, right-click on the duplicated layer in the Layers panel and select "Convert to Smart Object." This transforms the layer into a Smart Object, allowing you to apply filters as Smart Filters, which can be modified or removed later without permanently altering the image pixels.
Step 3: Apply the Gaussian Blur Filter
Navigate to the Filter menu, then select Blur, and choose Gaussian Blur from the dropdown list. This action will open the Gaussian Blur dialog box.
Step 4: Adjust the Radius and Preview
The Gaussian Blur dialog box features a "Radius" slider and a "Preview" window. Drag the Radius slider to control the intensity of the blur. As you adjust the slider, observe the changes in the Preview window. For a more accurate representation of how the blur will appear at its intended size, it's recommended to view your image at 100% zoom. You can toggle the "Preview" checkbox on and off to compare the blurred image with the original. A common starting point for the radius is around 7.0, but this will vary greatly depending on your image and desired effect. Be mindful of the "halo" effect, which indicates excessive blurring.
Nifty Preview Tricks:Within the Gaussian Blur dialog box, you can interact with the preview in several helpful ways:
- Hover Preview: Hold your cursor over the Preview Window. The cursor will change to a "hand" icon, indicating you can see the effect of the blur.
- Direct Preview: Place your cursor directly onto your actual image within the Photoshop canvas. A small square box will appear around your pointer. Click and hold on an area of your image, and that area will be displayed in the Preview Window, allowing you to see the blur effect in context.
Step 5: Refining the Blur with Layer Masks
Often, you'll want to apply the blur selectively to certain areas of your image. After applying the Gaussian Blur as a Smart Filter, a mask thumbnail will appear beneath the filter in the Layers panel. Click on this mask thumbnail to select it.
Now, use a soft black brush to paint over the areas where you do not want the blur to appear. Painting with white on the mask will reveal the blur. This allows for precise control over where the blur is applied.
Step 6: Fine-Tuning Mask Edges
For smoother transitions, especially around delicate areas like hair or complex edges, reduce the opacity of your brush. Gradually build up the effect rather than applying it all at once. A larger, softer brush is generally more effective for blending edges and preventing harsh lines or halos.
Step 7: Adjusting Blur Strength and Opacity
One of the key benefits of using Smart Objects is the ability to adjust the blur strength at any time. Simply double-click on "Gaussian Blur" under the Smart Filter in the Layers panel to reopen the dialog box and fine-tune the Radius.
If the overall blur effect feels too strong, you can further reduce its intensity by adjusting the layer's Opacity in the Layers panel. Experimenting with different blending modes (e.g., Lighten, Darken) can also lead to unique creative outcomes.
Step 8: Advanced Techniques: Selective Background Blur
A common use case is blurring only the background while keeping the subject sharp.
- Select your subject using Photoshop's selection tools (e.g.,
Select > Subject, the Quick Selection Tool, or the Pen Tool). - With the subject selected, click the "Add Layer Mask" icon at the bottom of the Layers panel. This will create a mask that hides everything except your selected subject.
- To blur the background, you'll need to invert this mask. Select the mask thumbnail and press
Ctrl + I(Windows) orCmd + I(Mac). Now, only the background will be visible, and the blur will be applied to it. - Clean up the mask around the edges of your subject using a soft brush to ensure a seamless blend.
Step 9: Saving and Exporting
Once you are satisfied with your edits, save your working file as a PSD (File > Save As) to retain all layers, masks, and Smart Filters. For sharing or web use, export a copy using File > Export > Export As or File > Save a Copy.
Exploring Third-Party Plugins: Boris FX Optics
For users seeking an expanded range of blur effects and presets, third-party plugins like Boris FX Optics offer powerful alternatives and complements to Photoshop's built-in tools. Optics is available as a standalone application and as a plugin for Photoshop and Lightroom, providing hundreds of customizable presets.
Using Boris FX Optics for Blurring
- Import and Prepare: As with any Photoshop task, open your image and duplicate the layer, converting it to a Smart Object.
- Launch Optics: Go to
Filter > Boris FX > Optics. - Apply Blur: Within Optics, use the search bar to find "Blur" effects. You'll discover a variety of blur types and customizable presets.
- Adjust and Apply: Select a desired blur effect and preset. Customize parameters in the right-hand panel. Click "Apply" when satisfied.
Beyond Gaussian Blur: Other Photoshop Blur Filters
Photoshop offers a suite of other blur filters, each with distinct applications:
- Iris Blur: Allows you to define a focal point and blur the surrounding area, creating a circular or elliptical blur.
- Motion Blur: Simulates the effect of movement, ideal for adding dynamism to an image.
- Radial Blur: Creates a blur that radiates from or towards a central point, useful for spinning or zooming effects.
- Field Blur: Part of the Blur Gallery, offering a more advanced way to apply varying levels of blur across an image.
- Tilt-Shift Blur: Mimics the effect of a tilt-shift lens, often used to create a miniature world effect or to selectively focus.
Understanding these different blur types and their specific functions will enable you to choose the most appropriate tool for any given editing task, maximizing your creative potential.