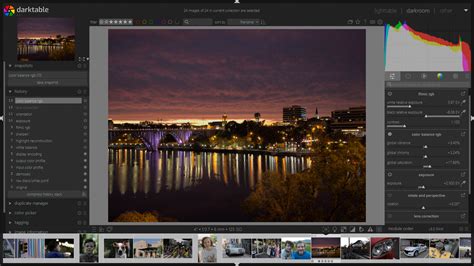
Darktable, a powerful open-source photography workflow application and raw developer, offers a robust set of features for photographers. While its graphical user interface is intuitive, unlocking its full potential often involves mastering its extensive keyboard shortcut system. This article delves into the world of darktable keyboard shortcuts, from their underlying architecture to practical applications that can dramatically speed up your editing process. We will explore how shortcuts are managed, how to customize them, and highlight a selection of frequently used and highly effective shortcuts that can transform your workflow.
The Architecture of Darktable's Keyboard Shortcuts
The development of darktable's keyboard accelerator system, while experiencing some unforeseen twists and turns, has reached a significant milestone. The core functionality is now in place, with provisions for minor bug fixes and string changes, particularly concerning the new translation system which requires thorough testing. The system is designed to provide a flexible and powerful way for users to interact with the software, allowing for both global and context-specific keybindings.

Upon entering the preferences dialog in darktable, users will discover a new tab dedicated to keyboard accelerators. This tab presents a tree view that meticulously lists every registered keyboard accelerator within the system, logically organized into expandable and collapsible groups. This hierarchical structure allows for a clear overview of available shortcuts and their intended contexts.
Remapping and Conflict Resolution
The ability to remap shortcuts is a cornerstone of darktable's customizability. Double-clicking on an entry in the accelerator list enables users to assign a new key combination. Furthermore, pressing the backspace key provides a straightforward method to clear an existing keyboard accelerator, effectively resetting it to its default or removing it entirely.
A sophisticated conflict resolution mechanism is integrated into the system. As users remap keys, the system automatically identifies and deletes any conflicting keybindings. The rules governing these conflicts are nuanced, acknowledging that a shortcut might be universally applicable across the entire program or restricted to a specific view, such as the darkroom, lighttable, capture, or filmstrip modules.
Global shortcuts, by their nature, will conflict with any other shortcuts, regardless of their group. However, shortcuts within specific views, like the lighttable, will only conflict with other lighttable shortcuts and global ones. This intelligent design allows users to map the same key to multiple shortcuts, provided there is no feasible scenario where they could be activated simultaneously. This means a key can perform one action in the lighttable and a different action in the darkroom, offering a high degree of personalized control.
Context-Specific Shortcuts and Module Customization
The understanding of shortcut scope is crucial for efficient use. For instance, a shortcut intended for the darkroom might not function in the lighttable, and vice-versa. This context-awareness prevents accidental activation and allows for more intuitive key assignments.
An especially helpful feature, suggested by the user "boucman" on IRC, is the inclusion of a "show" accelerator for every darkroom module. This accelerator is empty by default, but users can define custom shortcuts for frequently used modules. This feature significantly streamlines the process of accessing and manipulating specific editing tools, especially for complex or repetitive tasks. The accelerator interface is also designed to translate accelerator names, leveraging the new translation system to ensure accessibility for a global user base. A script integrated into the build process facilitates this by splitting accelerator paths into their constituent parts, making them recognizable by intl-tool for translation. Consequently, when building a specific branch of darktable and generating a .pot file, the new accelerator strings will be readily available for localization.
darktable from A to Z: 8 - Preferences and Settings: Part 2
Top Darktable Keyboard Shortcuts for an Accelerated Workflow
While the customization options are extensive, a core set of keyboard shortcuts can dramatically improve efficiency for most users. These shortcuts are particularly valuable for repetitive tasks and quick navigation within the program. The following list presents a selection of highly effective shortcuts, categorized by their primary function and context within darktable.
Navigating and Previewing Images in the Lighttable
The lighttable is where photographers manage and cull their images. Efficient navigation and previewing are paramount.
Sticky preview with focus detection (lighttable) > CTRL+Alt+W: This is a favorite shortcut for quickly culling photos. It provides a full-window preview with focus points highlighted in red squares. While not 100% accurate in all cases, it offers a small yet valuable aid in identifying sharp areas within an image, significantly speeding up the selection process.
Toggle culling mode (lighttable) > X: This shortcut toggles the culling mode, allowing for quick marking of images for deletion or keeping. It’s a simple yet effective way to streamline the initial review of a large number of photos.
Change number of images per row (lighttable) > CTRL+Mouse Scroll: Adjusting the thumbnail density in the lighttable is made effortless with this shortcut. Scrolling the mouse wheel while holding CTRL allows for rapid changes in the number of images displayed per row, enabling users to quickly switch between a broad overview and a more detailed view of their collection.
Enhancing Usability in Both Lighttable and Darkroom
Several shortcuts offer benefits across different modules of darktable, providing consistent efficiency gains.
Toggle side borders (lighttable & darkroom) > TAB: This shortcut toggles the visibility of side borders in both the lighttable and darkroom views. Hiding the borders maximizes screen real estate, allowing for a larger view of images, which is particularly useful during detailed editing.
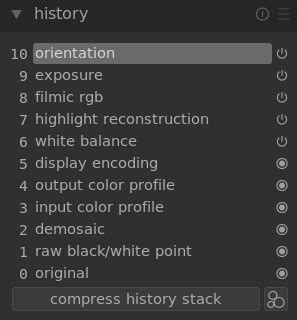
History Stack Copy & Paste (lighttable & darkroom) > CTRL+C & CTRL+V: The ability to copy and paste editing history between images is a workflow game-changer. CTRL+C copies the entire editing history of a selected image, and CTRL+V pastes it onto another selected image. This is invaluable for applying a consistent look to a series of photos or quickly replicating a successful edit.
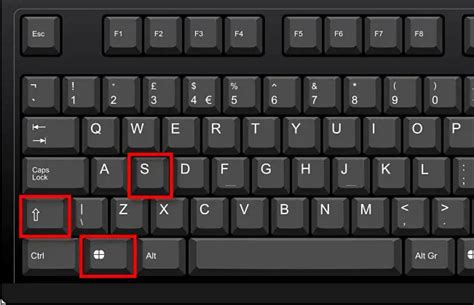
Duplicate Image (lighttable & darkroom) > SHIFT+CTRL+D: Creating a duplicate of an image is a common task, whether for experimentation with different edits or for archival purposes. This shortcut provides a quick way to duplicate the currently selected image, preserving the original while offering a clean slate for further manipulation.
Fine-Tuning Edits in the Darkroom
The darkroom module is where the magic of image editing happens. These shortcuts help refine details with precision.
Zoom to 100%, 200% and back (darkroom) > Middle Mouse Click: Precise zooming is critical for detailed work. A middle mouse click on an image in the darkroom toggles between 100% and 200% zoom levels, allowing for rapid inspection of detail and overall composition without navigating complex zoom menus.
Set hardness & opacity on drawn masks > SHIFT+Mouse Scroll & CTRL + Mouse Scroll: When working with drawn masks, controlling their hardness and opacity is essential for subtle blending. Using SHIFT + Mouse Scroll adjusts the opacity, while CTRL + Mouse Scroll adjusts the hardness. This direct manipulation offers an intuitive way to fine-tune mask transitions.
Keep the shape in the drawn masks > CTRL + Mouse Click: When drawing masks, maintaining a specific shape, such as a perfect circle or square, can be challenging. Holding CTRL while clicking and dragging to draw a mask constrains its shape, ensuring geometric accuracy for precise selections.
Accessing Help and Understanding Shortcuts
Even with a comprehensive guide, knowing how to find help within the software is crucial.
- Keyboard shortcuts Help > H: For a quick reminder or to explore available shortcuts, pressing the 'H' key brings up the keyboard shortcuts help dialog. This is an indispensable tool for learning and remembering the vast array of shortcuts darktable offers.
Redefining Your Darktable Experience
The ability to redefine darktable's keyboard shortcuts within the preferences is a testament to the software's user-centric design. By taking the time to explore the preferences dialog and experiment with remapping, users can tailor darktable to their unique working style. Identifying the shortcuts that align with your most frequent tasks and assigning them to comfortable key combinations can lead to significant time savings and a more fluid editing experience.
The new keyboard accelerator system, with its robust remapping capabilities and intelligent conflict resolution, empowers users to create a personalized interface that perfectly complements their photographic workflow. Whether you are a beginner looking to speed up basic operations or an advanced user seeking to optimize complex editing sequences, understanding and utilizing darktable's keyboard shortcuts is a fundamental step towards mastering this powerful raw developer.
Further Exploration of Darktable
For those eager to delve deeper into darktable's capabilities, a wealth of resources is available:
- Darktable Tutorials Hub [from beginner to advanced]: This hub offers a comprehensive collection of tutorials covering a wide range of darktable topics, suitable for users of all skill levels.
- Quick Darktable Tutorial to get started for travel photographers: Tailored for travel photographers, this tutorial focuses on essential features and a streamlined workflow for on-the-go editing.
- Darktable vs Lightroom: is Darktable a good free Lightroom alternative: This comparison helps users understand darktable's strengths and weaknesses in relation to the industry-standard Adobe Lightroom, particularly for those seeking a free alternative.
- How to import the Lightroom catalogue in Darktable [with the same workspace]: For users transitioning from Lightroom, this guide provides crucial information on migrating their existing catalog and maintaining a similar workspace.
- Darktable workflow - from organizing to editing [the quick and effective way]: This resource outlines an efficient workflow for managing and editing photos within darktable, emphasizing speed and effectiveness.