Microsoft Word, a ubiquitous tool for document creation, extends far beyond simple text entry. Its robust customization and formatting capabilities allow users to imbue their documents with a unique visual flair, transforming ordinary text into dynamic design elements. This is particularly useful for materials like newsletters, logos, posters, and magazine layouts, where eye-catching typography can significantly enhance engagement. One such powerful formatting option is the ability to curve text, adding a professional and polished aesthetic to your work. This guide will explore two primary methods for achieving curved text in Microsoft Word, suitable for all versions of the software, including Office 365.

Mastering Text Effects with WordArt
The WordArt feature in Microsoft Word is a versatile tool that not only allows for stylistic modifications to text, such as color and outline, but also provides the functionality to curve or shape text around other elements. This method is particularly effective for creating circular text or text that follows a specific path, making it ideal for designs that incorporate images or logos.
Step-by-Step Guide to Curving Text Using WordArt:
Insert an Image (Optional but Recommended for Context): Begin by opening your Microsoft Word document. To provide a visual anchor for your curved text, you might want to insert an image first. Navigate to the
Inserttab, click onPictures, and select the image you wish to use.Insert WordArt: With your document open, go to the
Inserttab again. In theTextgroup, click on theWordArtdropdown menu and select a desired style. A common choice for clarity is a style with a distinct outline, such as black text with a white outline.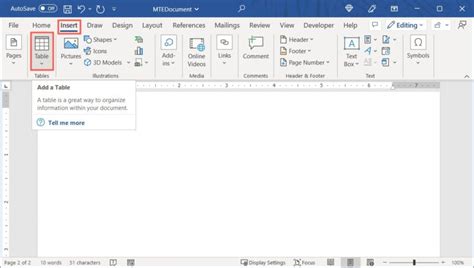
Enter Your Text: Upon selecting a WordArt style, a placeholder box with text like "Your text here" will appear. Click on this placeholder text and replace it with your desired content.
Access Text Effects: To apply the curving effect, you need to ensure the WordArt object is selected. Once selected, a contextual tab will appear on the ribbon, typically labeled
Shape Format(orDrawing Tools→Formatin older versions). Within theWordArt Stylesgroup on this tab, locate theText Effectsbutton. This button is often represented by a stylized letter 'A' with blue coloring around it. Hovering your mouse over it will confirm it as "Text Effects."Apply the Transform Effect: Click on the
Text Effectsbutton. A dropdown menu will appear. From this menu, selectTransform. This section offers a variety of pre-set text transformations, including numerous curving options.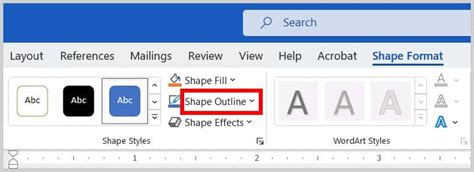
Choose a Curve Style: Under the
Follow Pathsection within theTransformoptions, you will find various curve styles. For a standard curve,Archis a popular choice. For a complete circle, selectCircle. Experiment with different styles to find the one that best suits your design.Adjusting Curvature and Placement: Once a curve style is applied, you will notice a WordArt object with your text now conforming to the selected shape. The selected text will be highlighted, and you can use the bounding box outline to reposition the WordArt object. The anchor points on the corners and sides of the bounding box allow you to resize the entire WordArt object. Crucially, a small yellow diamond-shaped handle will appear on the curved text itself. This yellow point is your primary tool for fine-tuning the degree of curvature. Dragging this handle will either tighten or loosen the curve, allowing for precise adjustments.
How to Write Curve Text in MS Word
Additional Customizations with WordArt:
Curving Text in a Circle: To achieve a perfect circular text effect, select the
Circleoption from theFollow Pathsection in theTransformmenu. For optimal results with this style, ensure your text is sufficiently long to form a complete or near-complete circle. This is particularly effective for taglines or slogans that need to be integrated around a logo.Wrap Text as a Square (Conceptual): While there isn't a direct "wrap text as a square" effect within the
Transformoptions for WordArt, the concept of wrapping text around a square or rectangular object is achieved by manipulating the WordArt object's shape and position. If you intend to frame an image with text, you might need to duplicate your WordArt style and arrange the pieces around the image to create a square or rectangular enclosure. TheLayout Optionsbutton, which appears near the selected WordArt object, also offers various text wrapping styles that can be applied to the WordArt itself, influencing how other content flows around it.
Creating Curved Text Without Relying on WordArt
In certain scenarios, such as formatting articles, editorial copy for newspapers, or magazine layouts, you might prefer to curve text without the distinct visual style of WordArt. This method offers a more subtle integration of curved text into your document's existing design.
Step-by-Step Guide to Curving Text Using a Text Box:
Insert a Text Box: Open your Word document and navigate to the
Inserttab. In theTextgroup, click on theText Boxdropdown. SelectDraw Text Boxfrom the options.Draw and Populate the Text Box: Left-click and drag on your document page to draw the text box to your desired size. Once drawn, click inside the text box and type the text you wish to curve. You have full control over the font, size, color, and other standard text formatting within this box.
Access Shape Formatting: After typing and customizing your text, you need to make the text box itself transparent and then apply the curve effect to the text within it. Right-click on the outline of the text box. From the context menu, select
Format Shape.Remove Fill: The
Format Shapepane will appear, usually on the right side of your screen. Click on theShape Optionstab (often represented by a square icon). Then, click on theFill & Linebutton (a paint bucket icon). Under theFillsection, selectNo fill. This makes the background of the text box invisible, allowing the text to appear as if it's directly on the page.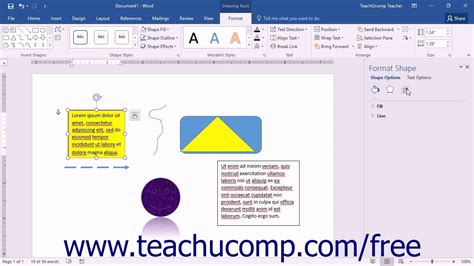
Apply the Curve Effect: With the text box outline still selected, navigate to the
Shape Formattab on the main ribbon. In theWordArt Stylesgroup, click on theText Effectsdropdown. Similar to the WordArt method, selectTransform.Choose a Curve Style: From the
Transformoptions, select a desired curve style. For instance,Arch: Downis a good option for creating a downward curve.Adjusting Curvature and Position: Once the curve effect is applied, the text within the text box will be curved. You can then use the outline of the text box to move it around your document. The anchor points on the text box allow you to resize it. Just as with WordArt, a yellow diamond-shaped handle will appear on the curved text, enabling you to adjust the intensity of the curve by dragging it.
Undoing Text Curvature in Microsoft Word
Should you decide to revert your text from a curved state back to its original straight form, there's a straightforward process to undo the effect without needing to delete and retype.
Steps to Remove Text Curve:
Select the Curved Text: First, select the text that has been curved. This could be WordArt text or text within a text box.
Access Text Effects: Navigate to the
Shape Formattab on the ribbon. In theWordArt Stylesgroup, click on theText Effectsdropdown.Select "None": From the
Text Effectsdropdown, chooseTransform. In theTransformmenu, the very first option, usually a straight line or simply labeledNone, will remove any applied transformation, including the curve effect.
By following these methods, you can effectively incorporate curved text into your Microsoft Word documents, enhancing their visual appeal and professionalism for a variety of purposes. The flexibility offered by both WordArt and text box approaches ensures that you can achieve the desired typographic effect for any project.
Frequently Asked Questions:
Q: How can I easily curve text in Microsoft Word?A: The easiest way is to insert WordArt, type your text, then navigate to Shape Format > Text Effects > Transform and select a curve style.
Q: How do I curve text in Word without using WordArt?A: To curve text without WordArt, insert a Text Box from the Insert tab. Type your text into the box, then go to Shape Format > Text Effects > Transform and choose a curve style. Ensure the text box fill is set to No fill for a seamless look.
Q: How can I undo curved text in Word?A: To remove a curve effect, select the curved text. Go to Shape Format > Text Effects > Transform and select None. This will straighten the text back to its original form.