DaVinci Resolve 20 stands out as a powerful and accessible video editing software, particularly for newcomers eager to rapidly acquire editing skills. This comprehensive tutorial is designed to walk you through the entire workflow, from the initial stages of project setup to the final export of your polished video. The information presented here is an AI-assisted distillation of key concepts and techniques essential for mastering the fundamentals of DaVinci Resolve 20.
Project Initialization and Configuration
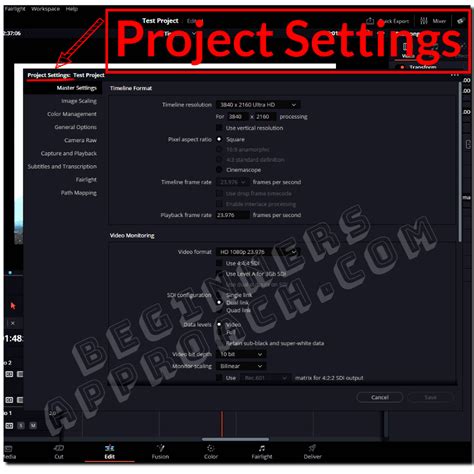
The very first step in any video editing project is to establish the correct project settings. This ensures that your project aligns seamlessly with your raw footage, preventing compatibility issues and maintaining the intended visual quality. The primary settings to focus on are the frame rate and the resolution of your video. These parameters dictate the smoothness of motion and the overall sharpness of your final output, respectively.
To access and modify these crucial settings, locate the "settings wheel" icon, which is conveniently situated at the bottom of the DaVinci Resolve interface. Clicking on this icon will open a panel where you can meticulously match your project's frame rate and resolution to those of your imported video clips. For instance, if your footage was captured at 24 frames per second (fps) and a resolution of 1920x1080 pixels (Full HD), your project settings should mirror these values precisely. Deviating from this can lead to juddery playback, scaling artifacts, or unnecessary file size increases. This meticulous attention to detail at the outset lays a solid foundation for a smooth editing process and a professional-looking final product.
Importing and Organizing Your Media
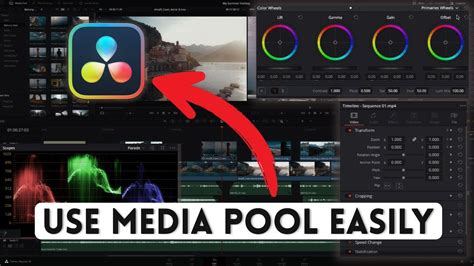
Once your project is configured, the next logical step is to bring your raw footage and other media assets into the DaVinci Resolve environment. This process is known as importing. DaVinci Resolve offers several intuitive ways to accomplish this, catering to different workflow preferences. You can import clips directly through the "Media" page, which is the dedicated section for managing all your project's assets. Alternatively, you can import directly within the "Cut" page or the more advanced "Edit" page, depending on your immediate needs.
The "Media" page provides a comprehensive browser where you can navigate your computer's file system, select the desired clips, and drag them into your project's media pool. This media pool acts as a central repository for all your imported files, including video clips, audio tracks, images, and graphics. Maintaining an organized media pool is paramount for efficient editing, especially on larger projects. Consider creating folders within the media pool to categorize your assets by type (e.g., "Interviews," "B-roll," "Music," "Graphics") or by scene. This proactive approach will save you considerable time and frustration when you need to locate specific files later in the editing process.
Fundamental Editing Techniques: Trimming and Cutting
With your media imported and organized, you're ready to begin the core editing process: assembling your story by cutting and arranging your clips. DaVinci Resolve provides two primary pages designed for this purpose: the "Cut" page and the "Edit" page. The "Cut" page is specifically optimized for rapid, streamlined editing, making it an excellent starting point for beginners. The "Edit" page offers more granular control and a wider array of advanced tools.
On either page, the fundamental actions involve trimming your clips to remove unwanted sections and arranging them in the desired sequence. There are several ways to trim footage. One common method is to use the "Blade" tool (often activated by pressing 'B' on your keyboard). This tool allows you to make precise cuts within a clip, effectively splitting it into multiple segments. You can then delete or rearrange these segments as needed. Another straightforward method is to simply drag the start or end points of a clip directly on the timeline. By hovering your mouse cursor over the edge of a clip, you'll see it change to indicate that you can trim. Clicking and dragging allows you to shorten or lengthen the visible portion of the clip. Mastering these basic trimming techniques is the bedrock of effective video editing, enabling you to sculpt your narrative from raw footage.
DaVinci Resolve 20 - Tutorial for Beginners in 13 MINS ! [ FULL GUIDE ]
Enhancing Your Narrative with B-roll Footage
B-roll footage, also known as secondary footage, plays a crucial role in enriching the visual storytelling of your video. It provides visual interest, illustrates points being made in the narration or dialogue, and helps to cover cuts or transitions, making the overall viewing experience more engaging. Integrating B-roll effectively can elevate a simple talking-head video into a dynamic and compelling piece.
To incorporate B-roll, you first need to import it into your project, just like any other media clip. Once imported, you will typically position the B-roll clips on a track above your main footage (often referred to as A-roll) on the timeline. This layered approach ensures that when the B-roll is playing, it will obscure the A-roll underneath. You can then adjust the duration and placement of the B-roll clips to synchronize them with specific moments in your audio or main video. For example, if your narration discusses a particular object, you can cut to a close-up shot of that object as B-roll. The key is to use B-roll judiciously; overusing it can be distracting. Aim for B-roll that directly supports or enhances the content being presented, adding depth and context without overwhelming the viewer.
Crafting Visual Appeal: Titles and Text Overlays
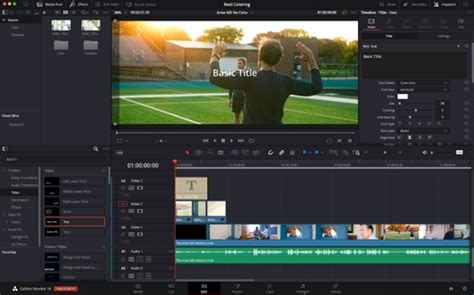
Titles and text overlays are essential tools for providing information, reinforcing key messages, and adding a professional polish to your videos. DaVinci Resolve offers a robust set of tools for creating and customizing these elements. To access them, navigate to the "Effects" panel, typically located in the upper right corner of the "Edit" page. Within the Effects panel, you will find a category labeled "Titles."
Clicking on "Titles" will reveal a library of pre-designed title templates, ranging from simple lower thirds (text appearing at the bottom of the screen) to more elaborate animated titles. You can drag and drop these templates directly onto your timeline, positioning them above your video clips. Once a title is placed on the timeline, you can select it and use the "Inspector" panel (usually in the upper right) to customize its appearance. This includes changing the font, size, color, and position of the text, as well as adjusting animation parameters if the template includes them. For more advanced control, you can also create entirely custom text elements using the Fusion page, DaVinci Resolve's powerful visual effects and motion graphics module. However, for beginners, utilizing the pre-built title templates and customizing them through the Inspector is an excellent way to achieve professional-looking results quickly.
Seamless Storytelling with Transitions
Transitions are visual effects used to move from one video clip to another. While they can be powerful tools for guiding the viewer's eye and signaling a change in time or location, they should be employed with care. DaVinci Resolve provides a wide array of transitions, accessible from the "Effects" panel, similar to titles.
The most common transition is the "Cross Dissolve," where one clip gradually fades out while the next fades in. Other popular options include "Wipes," "Slides," and various animated transitions. To apply a transition, you typically drag it from the Effects panel and drop it onto the edit point between two clips on your timeline. Once applied, you can often adjust the duration of the transition in the Inspector panel. The key principle when using transitions, especially for beginners, is to use them sparingly and purposefully. Overusing complex or attention-grabbing transitions can detract from your content and make your video feel cluttered or amateurish. Often, a simple cut (no transition) is the most effective way to move between shots. Reserve transitions for moments where you want to explicitly indicate a passage of time, a change in scene, or to soften a jarring cut.
Applying Visual and Audio Effects
Beyond titles and transitions, DaVinci Resolve boasts an extensive library of effects that can dramatically enhance the look and sound of your video. These effects are also found within the "Effects" panel and are categorized into various groups, such as "OpenFX," "Video Transitions," and "Video Filters."
Video effects can range from simple adjustments like brightness and contrast to more complex manipulations such as blurs, distortions, and color grading presets. To apply a video effect, drag it from the Effects panel onto a specific clip on your timeline. Once applied, the effect's parameters can be fine-tuned using the "Inspector" panel. This allows you to control the intensity, duration, and specific attributes of the effect. Similarly, DaVinci Resolve offers a powerful suite of audio effects for mixing, mastering, and enhancing your sound. These can include equalization (EQ) to adjust frequencies, compression to control dynamic range, and noise reduction to clean up unwanted background sounds. Experimenting with these effects is a key part of developing your unique editing style, but always remember to use them to serve the story, not to overpower it.
Mastering Audio: Music and Sound Design
Audio is often considered the unsung hero of video production. High-quality audio, including well-chosen music and sound effects, can significantly impact the emotional resonance and overall professionalism of your video. DaVinci Resolve provides robust tools for managing and enhancing your audio.
For background music, many creators source tracks from dedicated music libraries. Platforms like Epidemic Sound and Artlist are highly recommended for their extensive collections of royalty-free music specifically curated for content creators. These services offer simple licensing models, ensuring you can use their music legally in your projects without copyright concerns. Once you've acquired your music, import the audio files into DaVinci Resolve just as you would any other media. You'll then place these music tracks on audio tracks beneath your video clips on the timeline.
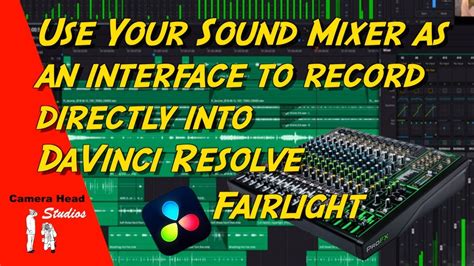
Adjusting audio levels is critical. Use the audio tracks on the timeline and the dedicated "Fairlight" page (DaVinci Resolve's advanced audio post-production environment) to balance the music with dialogue or narration. You'll want to ensure that your primary audio (dialogue, voiceovers) is clear and prominent, with the music providing a supportive background ambiance. Consider using audio fades to smoothly introduce and conclude music tracks, preventing abrupt starts and stops. Sound effects can also add a layer of realism and impact. Browse libraries for relevant sound effects (e.g., a door creak, a car horn, a subtle ambient hum) and integrate them onto separate audio tracks to enhance specific actions or moments in your video.
The Art of Color Grading: Enhancing Visuals
Color grading is the process of altering and enhancing the color of video footage to create a specific mood, style, or aesthetic. DaVinci Resolve is renowned for its industry-leading color correction and grading tools, largely due to its dedicated "Color" page. This is where the magic of transforming raw footage into a visually stunning final product truly happens.
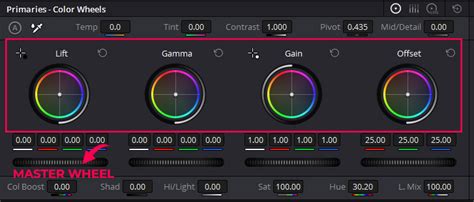
While advanced color grading can be complex, beginners can start with fundamental adjustments. Begin by addressing basic exposure and white balance issues. Use the primary color wheels and controls in the Color page to adjust overall brightness, contrast, and the color temperature (making the image appear warmer or cooler). Once the footage is balanced, you can then move on to more creative grading. This might involve increasing saturation to make colors pop, or decreasing it for a more subdued look. You can also use secondary color correction tools to target specific colors or areas of the image for adjustment. For instance, you might want to make the blues in a sky more vibrant or subtly shift the hue of a subject's clothing.
Experimentation is key here. Observe how different color palettes affect the mood of your footage. A warm, golden hue might evoke happiness or nostalgia, while a cooler, desaturated look could suggest drama or melancholy. DaVinci Resolve also offers a wide range of LUTs (Look-Up Tables), which are pre-set color grading filters that can be applied to quickly achieve a specific style. While LUTs can be a great starting point, remember that they are often best used as a foundation upon which to build your own unique grade.
Finalizing Your Project: Rendering and Exporting
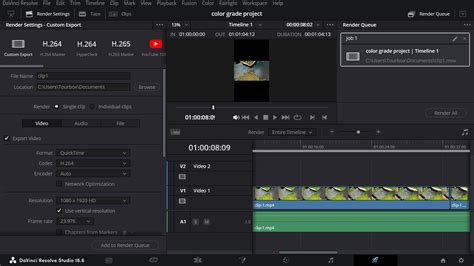
The final stage of the video editing process is rendering and exporting your completed project. This is where DaVinci Resolve compiles all your edits, effects, and color grades into a single video file that can be shared online, played on various devices, or delivered to clients. To begin this process, navigate to the "Deliver" page, typically found at the bottom of the DaVinci Resolve interface.
On the Deliver page, you'll configure the settings for your export. This involves choosing the appropriate preset for your intended platform, such as YouTube, Vimeo, or a general broadcast format. Each platform has recommended settings for resolution, frame rate, codec, and bitrate, which influence the quality and file size of your final video. You'll need to name your video file and select a save location on your computer where the exported file will be stored. Key settings to pay attention to include:
- Format: Choose a widely compatible format like MP4 or MOV.
- Codec: H.264 and H.265 (HEVC) are common and offer good compression.
- Resolution: Match your project's resolution (e.g., 1920x1080 for Full HD, 3840x2160 for 4K).
- Frame Rate: Should match your project's frame rate (e.g., 24, 30, or 60 fps).
- Quality/Bitrate: Higher bitrates generally result in better quality but larger file sizes. For platforms like YouTube, selecting "Best Quality" or a suitable pre-set is often recommended.
Once you have configured all the desired export settings, you will add your render job to the queue and then initiate the render process. The time it takes to render will depend on the complexity of your project, the length of your video, and the power of your computer's hardware. patience during this final step ensures that your hard work is translated into a high-quality, shareable video file.