Creating transparent text in Photoshop is a versatile technique that allows you to integrate text seamlessly into your images, revealing the content beneath the letters. This method is particularly useful when you need to add text to an image but struggle to find a clear space for it, or when you want to use the text itself as a frame for a specific subject. This tutorial will guide you through various methods to achieve this effect, from simple knockout techniques to more advanced uses of smart objects and layer styles, ensuring your text is both visually appealing and functionally effective.
The Knockout Text Effect: Punching Through Layers
One of the most straightforward ways to create transparent text is by using Photoshop's "knockout" feature. This technique effectively punches a hole through a layer, allowing the content of the layers below to show through the shape of the text.
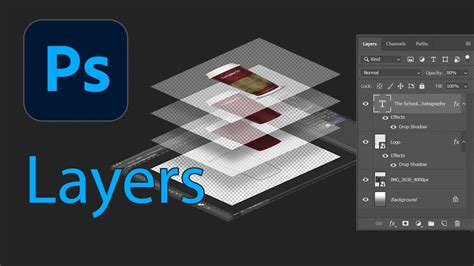
To begin, open the image you intend to use as your background in Photoshop. In the Layers panel, you'll typically see your image on the "Background" layer. To prepare for the transparent text, add a new layer above your background. This new layer will serve as the solid color block that surrounds your text.
In the Fill dialog box, select "White" for the Contents. This will fill the new layer with a solid white color. Next, select the Text tool from the toolbar. In the Options Bar, choose your desired font. For this technique, a larger font size is often effective; set it to 150 pt. Ensure your text color is set to black. If it's not, press the 'D' key on your keyboard to reset the foreground and background colors to their defaults, which usually includes black as the foreground color.
Click within your document to add your text. Photoshop will automatically surround your text with a transform box and handles. Before resizing, ensure the link icon between the Width and Height fields in the Options Bar is selected. This maintains the font's proportions as you scale it. Drag any of the handles to resize the text, and then click and drag inside the transform box to reposition it. For example, you might move your text to sit in front of a specific element in your image, like a waterline.
To make the text transparent, you need to access Photoshop's Layer Style dialog box. With the text layer selected, go to Layer > Layer Style > Blending Options, or double-click on the right side of the text layer in the Layers panel. Within the Layer Style dialog box, navigate to the "Advanced Blending" section. Here, change the "Knockout" setting from "None" to "Shallow." Click "OK" to apply the changes.
You will now observe that the text itself has become transparent, and crucially, the area on the white-filled layer directly beneath the text has also been "punched out," creating a clear window. You might want to adjust the size of this white area. To do this, select the white-filled layer. In the Options Bar, this time, unlink the Width and Height fields by clicking the link icon. Then, drag the top and bottom handles to resize the white area, ensuring it doesn't cover the entire photo.
Finally, you can fine-tune the visibility of the transparent text by adjusting the opacity of the white-filled layer. Increasing the opacity will make the surrounding white area more solid, rendering the type easier to read. Conversely, decreasing the opacity will cause the text area to fade more subtly into the background image.
Handling Non-Background Layers
The steps above assume your primary image is on the "Background" layer. If your image is on a different layer, or if you have multiple layers you wish to incorporate, you'll need to group your layers. Select the type layer and the white-filled layer in the Layers panel. Hold down the Shift key while clicking to select both. Then, right-click and choose "Group Layers" (or press Ctrl/Cmd + G). This organizes your transparent text elements and ensures they interact correctly with the layers beneath them.
Advanced Transparency with Smart Objects and Filters
For more complex and dynamic transparent text effects, employing smart objects and filters offers greater flexibility and non-destructive editing capabilities. This approach is particularly useful when you want the text to appear as if it's interacting with an image's texture or undergoing a transformation.
Start by creating a new document. A 2,000 x 2,000-pixel document with a 72 resolution in RGB mode and a white background is a good starting point. Unlock the background layer by clicking the lock icon, then right-click on the layer and choose "Convert to Smart Object." This action encapsulates your background image within a smart object, allowing you to apply filters and transformations non-destructively.
Double-click the smart object's thumbnail in the Layers panel to open it in a new PSB file, representing the contents of the smart object. Inside this smart object, you can load images that will eventually show through your text. Use "File > Place Embedded" to import your desired images. You can place multiple images within the smart object, scaling and arranging them as needed to fill the canvas.
Smart Objects in Photoshop: Learn The Basics
Once you've arranged your images within the smart object, save the PSB file (Ctrl/Cmd + S). This will update your original document, displaying the content of the smart object. Now, duplicate this smart object layer. You can name one "Image Placement" (your background) and the other "Blur."
The "Blur" layer will be used to create the transparent text illusion. To apply a filter non-destructively, ensure the "Blur" layer is selected. Go to Filter > Blur > Gaussian Blur. A blur radius of around 10 pixels is a good starting point. Because this is a smart object, the filter is applied as a smart filter, meaning you can adjust or remove it later. Click "OK."
Back in your original document, you will see the blurred version of your smart object content. The key to this technique is understanding how duplicated smart objects function: changes made to one instance of a smart object are reflected in all its duplicates.
Now, it's time to add your text. Select the Text tool (T) and type your desired word, for instance, "Clear." Open the Character panel (Window > Character) if it's not already visible. Choose a font like "Henny-Penny" (a free font often available for download). Set the text size to 970 pixels with a tracking of -20. The color can be white, but it doesn't critically matter at this stage. Position this text layer between the "Blur" layer and the "Image Placement" layer.
To make the blur layer interact with the text, create a clipping mask. Hold down the Option (Alt) key on your keyboard and hover your mouse between the "Blur" layer and the text layer in the Layers panel. Your cursor will change to a down arrow with a small square. Click once to clip the "Blur" layer to the text layer. Now, the blur effect will only be visible within the boundaries of your text.
Enhancing Text with Layer Styles and Filters
To further refine the transparent text effect, you can use layer styles and additional filters. Select the text layer and duplicate it (right-click > Duplicate Layer). Move this duplicated text layer above all other layers.
Double-click the duplicated text layer to open its Layer Style dialog box. Remove any existing layer effects. Critically, reduce the "Fill" of this layer to 0% in the Layer Style's "Blending Options" section. This makes the actual text content invisible, but allows layer styles to be applied to its shape.
Turn off the visibility of the original text layer and the blur layer by clicking their eye icons. You should now see only the outline of your text, which is essentially a mask. With the duplicated text layer still selected, right-click and choose "Rasterize Layer Style." This is important because applying certain filters, like the "Wind" filter, works best on rasterized layers rather than smart objects for this specific effect.
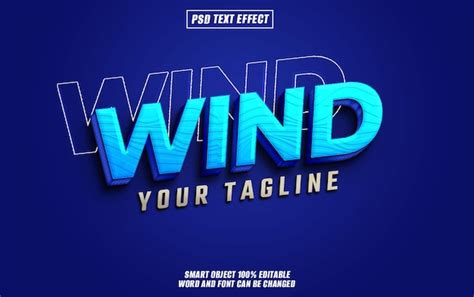
Now, go to Edit > Transform > Rotate 90 degrees clockwise. Apply the "Wind" filter: Filter > Stylize > Wind. Choose "Wind" as the method and "From the Right" as the direction. Since we rotated the layer, this will create a wind effect from top to bottom of the text. You can apply this filter multiple times to intensify the effect. After applying the wind filter, rotate the layer back to its original orientation: Edit > Transform > Rotate 90 degrees counterclockwise.
Turn the original text layer back on. You may need to nudge the layers into alignment using the arrow keys on your keyboard.
The difference between applying filters to smart objects versus rasterized layers is crucial here. If you had made the duplicated text layer a smart object before applying the "Wind" filter, the effect would have been applied based on the layer's original orientation (left-to-right), not the rotated one (top-to-bottom), which is what we want for an "icicle" or "drip" effect.
Finally, you can create a layer mask for the duplicated text layer. With the layer selected, click the "Add layer mask" icon at the bottom of the Layers panel. You can then paint on this mask with black to further refine the appearance. Re-enable the blur layer by clicking its eye icon. This combination of a clipped blur layer and a filtered, rasterized text layer with a mask creates a sophisticated transparent text effect.
Transparency Through Opacity and Fill Manipulation
A fundamental aspect of achieving transparency in Photoshop involves understanding and manipulating the "Opacity" and "Fill" properties of a layer. While often used interchangeably, they offer distinct controls over a layer's transparency.
Opacity affects the entire layer, including its content and any applied layer styles like drop shadows or strokes. Reducing the opacity makes the entire layer, and everything on it, more transparent.
Fill, on the other hand, affects only the intrinsic content of the layer itself (e.g., the pixels of the text) and leaves layer effects intact. This is a powerful distinction. If you want your text to be transparent but its outline or drop shadow to remain fully visible, you reduce the "Fill" to 0% while keeping the "Opacity" at 100%. If you want the entire layer, including effects, to be transparent, you adjust the "Opacity."
To apply this:
- Open your document: Ensure your visual and text are on separate layers.
- Select the text layer: In the Layers panel, click on the layer containing the text you wish to make transparent.
- Adjust Opacity or Fill: At the top of the Layers panel, you'll find the "Opacity" and "Fill" sliders. Reduce the percentage of either (e.g., to 50% to start) by moving the slider or entering a value.
- Observe the result: The text will immediately become semi-transparent, revealing the background. Adjust the percentage until you achieve your desired effect.
This method is excellent for creating subtle watermarks or integrating text that needs to be legible but not overpowering.
Strategic Use of Semi-Transparent Text
Semi-transparent text can serve strategic purposes for branding and communication:
- Discreet Watermarks: Watermark your images with your logo or brand name to protect them or reinforce attribution without obscuring the main content.
- Ambient Text on Images: Integrate quotes, slogans, or key information directly into photos of your team or products. This creates an immersive, professional atmosphere where the text serves the message without hiding it.
Key Tip for Legibility: Always ensure your text remains perfectly legible, regardless of its transparency. Text that is too transparent on a complex or colorful image can become indecipherable.
Tips to Maintain Legibility:
- Use Simple Backgrounds: Prefer images with relatively solid or blurred areas behind your transparent text.
- Add a Light Background: A subtle rectangle or band of semi-transparent color behind your text can greatly improve legibility without completely obscuring the image.
- Choose the Right Font: Thicker sans-serif fonts are often easier to read with transparency than thin or script fonts.
Transparent Text as a Frame: The "Punch Out" Method Revisited
Another effective way to create transparent text is by using it as a frame. This involves creating a solid block of color and then "punching out" the text shape from it, allowing the image beneath to show through the text's negative space.
- Open your image: Start with the image you want to use as your background.
- Create a solid color overlay: Add a new layer above your image layer. Fill this layer with a solid color, often white, but any color can work depending on your design. You can use the Shape Tool (U) to create a rectangle that covers the area where you want your text frame.
- Add your text: Use the Text Tool (T) to add your desired text. Choose a thick, blocky font in a large size, as this will create a more substantial frame. The color of this text layer doesn't matter as it will become transparent.
- Position the text: Place the text layer in the middle of your solid color shape.
- Apply the Knockout effect: Right-click on the text layer in the Layers panel and choose "Blending Options." In the "Advanced Blending" section, set the "Knockout" dropdown to "Shallow." Click "OK."
- Adjust Layer Fill: To further refine the effect and make the text appear as a hole in the solid color, you can reduce the "Fill" of the text layer to 0% while keeping its "Opacity" at 100%. This ensures that any layer styles applied to the text (like a subtle stroke or drop shadow) remain visible, creating a defined edge to your transparent text frame.
This technique is excellent for creating impactful titles or call-to-action elements that draw attention to a specific part of your image without completely obscuring it.
Combining Techniques for Unique Effects
The true power of Photoshop lies in combining these techniques. For instance, you could use the knockout method to create a solid frame and then apply a subtle gradient overlay to the frame itself. Or, you could use smart objects to place an image within the transparent text area created by the knockout method, offering a layered and sophisticated look.
By understanding the nuances of opacity, fill, knockout settings, and the non-destructive power of smart objects, you can achieve a wide array of transparent text effects in Photoshop, enhancing your designs with professionalism and creativity.