Photoshop, a powerhouse in digital art and design, offers a versatile toolkit for creating a myriad of shapes, including the ubiquitous star. Whether you're designing a celestial-themed graphic, a patriotic emblem, or a sparkling accent for your artwork, understanding how to effectively generate and manipulate star shapes is an invaluable skill. This tutorial delves into the various methods for creating stars in Photoshop, from basic shape layer construction to more intricate pixel-based designs and advanced techniques for hollowed-out and customized stellar forms. We will explore the flexibility offered by vector shapes, the immediacy of pixel designs, and the power of tool presets to streamline your workflow, ensuring you can produce virtually any type of star imaginable.
Harnessing the Polygon Tool for Star Creation
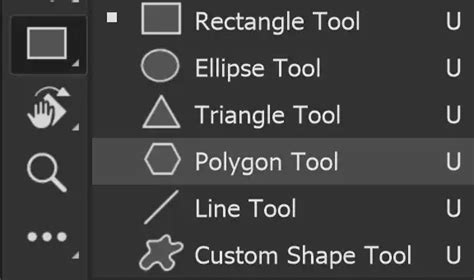
While Photoshop may not feature a dedicated "star tool" in the same way it offers a triangle one, the Polygon tool serves as a remarkably capable substitute for generating star shapes. This tool allows for a high degree of customization, enabling users to define the number of points and the "intensity" of the star through its ratio setting.
To begin, select the Polygon tool from the toolbar. In the options bar at the top of the screen, you'll find settings to control the shape's properties. The key to creating a star lies in adjusting the "Star Ratio". By default, this is set to 100%, which would produce a simple polygon. To transform this into a star, you must set the Star Ratio to a value less than 100%. A lower percentage will result in a more pronounced, sharper star. For a classic, deeply pointed star, setting the Star Ratio to as low as 5% can yield an intense star design.
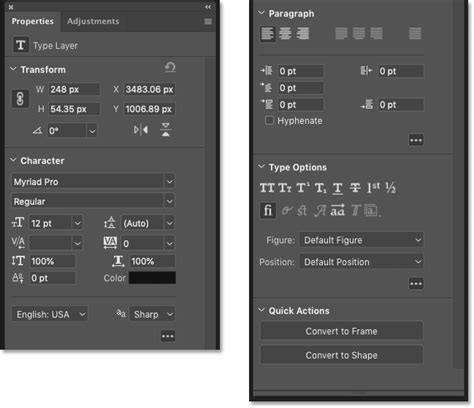
Furthermore, the "Sides" option within the Polygon tool's settings allows you to specify the number of points your star will have. While this setting is primarily used when creating a new star shape, for interactive modification of points and radii, the Properties panel, accessible through the Window menu, becomes essential. This panel provides a dynamic way to adjust these parameters after the initial shape has been drawn.
Leveraging Tool Presets for Instant Stars
For designers who frequently incorporate stars into their work, Tool Presets offer a significant workflow enhancement. These presets allow you to save and quickly recall specific tool configurations, including those for star shapes. You can set up quick access to frequently used star designs, such as a standard 5-point star or a curved star, directly from the top-left corner of your Photoshop interface.
To create a tool preset for a star, first configure the Polygon tool with your desired settings-number of points, star ratio, and even color if you intend to store it. Then, open the Tool Presets panel (Window > Tool Presets). Click the "Create new tool preset" button and name your preset. Once saved, you can simply select this preset from the panel and then click and drag on your canvas to instantly create a star with those exact properties. This method works seamlessly in both shape and pixel modes.
Tool presets are particularly useful for tools like the Polygon tool, where a variety of custom shapes might be needed. They can store settings such as the number of star points, the star ratio, and even certain tool options like fixed size. While tool presets do not store transforms or effects applied later, they are invaluable for quickly generating the foundational star shape. You can create hundreds of instant stars through presets, significantly speeding up the design process. For those who prefer a tailored experience, you can customize the displayed tools in the preset panel to show only those relevant to your current task.
Shape Layers vs. Pixel Designs: Flexibility and Application
When creating star shapes in Photoshop, you have two primary approaches: as a shape layer or as a pixel design. Each method offers distinct advantages depending on your project's needs.
Vector Shape Layers: The Power of Scalability
Adding a star as a vector shape layer provides immense flexibility. Vector graphics are resolution-independent, meaning you can scale, rotate, and transform the star design to any size without any loss of quality. This is particularly beneficial for designs that may be used across various media, from web graphics to large-format prints.
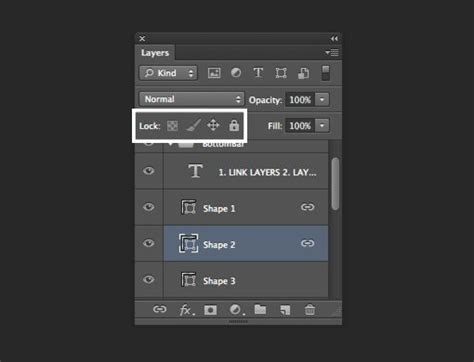
As a shape layer, stars can be easily combined with other shapes using Photoshop's Combine Shapes commands found in the Layer menu. Commands like "Unite," "Subtract Front Shape," "Intersect Shape Areas," and "Exclude Overlapping Areas" allow you to create incredibly complex and unique star formations by merging or cutting away from existing shapes. This opens up possibilities for creating literally millions of different star variations and intricate celestial patterns.
Furthermore, the Properties panel for shape layers allows for fine-tuning of individual star points, including inner and outer radii, after the initial shape has been drawn. This is achieved using the Direct Selection Tool, which enables precise manipulation of anchor points and path segments.
Pixel Designs: Direct Manipulation and Texture
Alternatively, stars can be added as a pixel design. This approach involves rasterizing the shape or drawing it directly with pixel-based tools. While pixel designs lose quality when scaled up, they offer direct control over individual pixels, which can be useful for creating textured stars, starburst effects, or integrating stars seamlessly into photographic elements.
When a shape layer preset is applied in pixel mode, it's rendered as pixels using the current foreground color and does not retain the stored color information from the preset. This means you have immediate control over the color and texture of the star as it's being created.
Advanced Star Techniques: Hollow Stars and Customization
Beyond basic star creation, Photoshop offers advanced techniques to produce more specialized star designs, such as hollowed-out stars and highly customized point structures.
Creating Hollow Star Designs
To create a hollow star design, you can utilize the "Subtract Front Shape" command. The process begins by creating your first star as a vector layer. Then, hold down the Alt (or Option on Mac) key and drag the star design to duplicate it. Resize this duplicated star to be smaller than the original. Use the alignment tools in Photoshop to perfectly center the smaller star within the larger one. Finally, go to the Layer menu, select Combine Shapes, and choose "Subtract Front Shape." This operation will effectively cut out the shape of the smaller star from the larger one, resulting in a hollow star.
Modifying Individual Star Points
For even greater control, the Direct Selection Tool is your ally when working with vector star shapes. This tool allows you to select and manipulate individual anchor points of the star. You can adjust the position of each point, alter the curvature of the segments, and precisely control the inner and outer radii of each individual point. This level of granular control is essential for creating unique, non-uniform star shapes or for refining existing ones to achieve a specific aesthetic.
Beyond the Polygon Tool: Brushes and AI
While the Polygon tool and its associated settings are primary methods for star creation, Photoshop offers other avenues for generating stellar imagery.
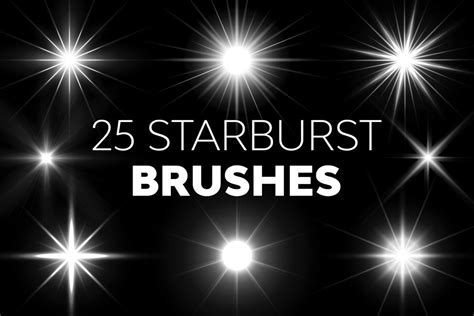
Star Brushes for Multiples
If your project requires creating stars in large quantities, such as a dense field of stars in a night sky, a star brush tool can be an efficient solution. Photoshop allows you to create custom brushes, and you can design or import brushes that render star shapes. With a star brush, you can quickly "paint" multiple stars onto your canvas with a single click or stroke.
AI-Powered Enhancements
In the realm of modern digital art, AI-powered photo editing software is increasingly being integrated into workflows. These advanced tools can perform complex manipulations, such as rapidly transforming daytime scenes into night skies, or adding celestial phenomena like comets, meteors, and star trails to existing images. While not a direct star-creation tool within Photoshop's core functionality, AI can significantly augment and enhance star-related imagery.
Thematic Applications of Star Shapes
Stars are ubiquitous in visual communication and artistic expression, appearing in a vast array of contexts. Their symbolic significance and inherent visual appeal make them a versatile design element.
- National Flags and Emblems: Stars are a common motif in national flags, representing states, provinces, or ideals. Their inclusion often carries historical or political meaning.
- Graphic Design and Marketing: From award certificates to promotional flyers, stars are frequently used to signify excellence, achievement, or to add a decorative flourish.
- Cartography and Astronomy: Stars are fundamental to celestial mapping, charting the night sky. In astrophotography, they are the very subjects of the images, captured in breathtaking detail.
- Artistic Expression: Artists use stars to evoke a sense of wonder, magic, or to represent celestial bodies in illustrations, digital paintings, and abstract compositions.
How To Create Stunning Star Trail Photographs START TO FINISH
The ability to create virtually any type of star-from classic five- or six-pointed designs to shimmering pixelated stars or photorealistic night sky scenes-empowers designers to bring their celestial visions to life within Photoshop.
Advanced Techniques for Starry Backgrounds
Creating convincing starry backgrounds often involves more than just placing individual star shapes. Photoshop offers powerful techniques for generating complex and atmospheric starry vistas.
Generating a Star Field Using Noise and Blur
One effective method for creating a starry background involves using noise and blur filters in conjunction with a solid color fill layer.
- Create a New Solid Color Fill Layer: Begin by ensuring your foreground and background colors are set to black and white, respectively. Navigate to Layer > New Fill Layer > Solid Color. Choose black as your fill color. This will create a black canvas.
- Add Noise to a New Layer: Create a new, empty layer above the black fill layer. Select this new layer and go to Filter > Noise > Add Noise. In the dialog box, choose Gaussian distribution and select Monochromatic to ensure the noise appears as white specks on black. Adjust the "Amount" to create a dense field of specks, which will form the basis of your stars. You may need to rasterize this layer if prompted to edit it further.
- Apply Gaussian Blur: With the noise layer still selected, go to Filter > Blur > Gaussian Blur. Apply a subtle blur. This step helps to soften the harshness of the noise and give the specks a more star-like appearance, simulating varying distances and intensities.
- Introduce a Threshold Effect: To further define the stars and create a more dramatic effect, apply a Threshold adjustment. Go to Image > Adjustments > Threshold. This will convert the grayscale image into a pure black and white image, making the brighter specks stand out more sharply as distinct stars. You can adjust the threshold level to control the density and brightness of the stars.
- Adjust Background Color (Optional): If you wish to change the background color from black, you can add another Solid Color fill layer beneath your star layer and select your desired background color.
This method, while seemingly simple, can produce remarkably convincing starry backgrounds that can be further refined with layer styles or additional effects.
Utilizing Adobe Stock for Celestial Imagery
For those seeking high-quality photographic elements of celestial phenomena, Adobe Stock offers a vast library of images. You can find numerous assets depicting starry nights, meteor showers, the Milky Way, and even auroras glowing dramatically over landscapes. Integrating these professional images can save significant time and elevate the visual impact of your projects, providing a realistic and awe-inspiring backdrop for your designs.
By mastering these techniques, from the fundamental use of the Polygon tool to advanced AI integrations and the strategic application of filters, you are well-equipped to create a diverse range of star shapes and celestial scenes within Photoshop, catering to any creative need.