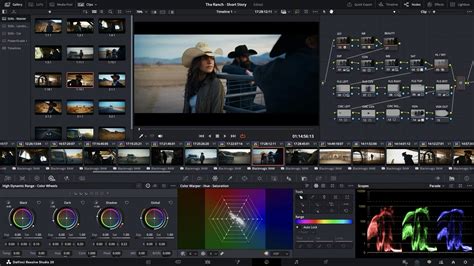
Learning the functionalities of DaVinci Resolve can initially seem daunting, especially for newcomers. However, by systematically approaching each feature, users can achieve proficiency in the software efficiently. A fundamental skill that significantly elevates video production is the ability to effectively incorporate text, which aids in storytelling and provides crucial context to visual content. This guide aims to provide a thorough exploration of both basic and advanced text manipulation techniques within DaVinci Resolve, with a specific focus on adding shadows to text for enhanced visual impact.
Adding Basic Text to Your Timeline
DaVinci Resolve offers a straightforward process for adding text to your video projects. This foundational step is essential for creating titles, lower thirds, or any on-screen text elements.
Importing Media and Placing Clips
Before you can add text, ensure your video clips are in place. Navigate to either the Cut page or the Edit page. Once your media is imported into DaVinci Resolve, drag and drop the desired clips onto your timeline. This establishes the canvas upon which your text will be layered.
Incorporating Text Elements
To introduce text to your timeline, locate the "Titles" section in the top-left corner of the interface. From there, drag the "Text" effect onto your timeline, positioning it over your video clip. For a more expedited workflow, you can utilize keyboard shortcuts: Ctrl + T on Windows or Cmd + T on a Mac.
Accessing the Inspector for Customization
Once the text element is on your timeline, select it. This action will reveal the "Inspector" panel, typically located in the top-right corner of the interface. The Inspector is your central hub for all text adjustments and stylistic modifications. Clicking the Inspector button will ensure it is visible and ready for use.
Editing Text Content
Within the Inspector panel, you will find a section labeled "Title." This is where you can directly alter the content of your text by typing your desired words into the provided text box. Beyond the text itself, this section allows for a wide range of quality adjustments, including font selection, style modifications, color changes, positional adjustments, and the application of various effects.
Modifying Font Style and Appearance
To change the typeface of your text, utilize the "Font Family" dropdown menu. This menu presents a comprehensive list of available fonts. Adjacent to the font selection, you will find buttons to modify the "Font Face" and "Font Style," enabling you to switch between options like bold, italic, and regular.
Adjusting Font Size and Position
Precise placement of text is crucial for readability and aesthetic appeal. Scroll down within the Inspector panel to find the options for font size, position, and anchor point. The "Size" slider allows you to increase or decrease the font size. The "Position X" and "Position Y" sliders enable you to move the text horizontally and vertically across the screen until its placement is satisfactory.
Changing Font Color
The color of your text plays a significant role in its legibility and how it integrates with your video's visual theme. Still within the Inspector panel, click the "Color" button. This action will open a color picker, allowing you to select any hue to apply to your text.
Adding Outlines and Drop Shadows to Text
Enhancing text with outlines and drop shadows can significantly improve its visual presence and readability, especially when placed over busy backgrounds.
Applying an Outline
To add an outline to your text, scroll down in the Inspector panel to the "Stroke" section. Here, you can select the desired color for your outline. The accompanying slider allows you to adjust the thickness of the stroke, ensuring it is prominent enough without being overpowering.
Implementing a Drop Shadow
A drop shadow adds depth and a sense of separation between the text and the background. To apply a drop shadow, toggle on the "Drop Shadow" option. You can then customize its appearance by adjusting the "Color," "Offset" (which controls the distance and direction of the shadow from the text), "Blur" (to soften the shadow's edges), and "Opacity" (to control its transparency). Experiment with these settings until you achieve the desired effect.
Exploring Advanced Text Effects with Text+
For users seeking greater control and more sophisticated text animations, DaVinci Resolve offers the powerful "Text+" tool. This advanced feature provides extensive flexibility over text styling, motion, and effects.
Integrating Text+ into Your Project
Begin by opening your project in DaVinci Resolve and navigating to the "Effects Library." Under the "Titles" category, locate and drag "Text+" onto your timeline in the desired position.
Leveraging Pre-made Titles and Customization
DaVinci Resolve's Text+ tool not only allows for the creation of highly customized text boxes but also provides a library of pre-made, animated titles. These templates can save considerable time. It's advisable to scroll through this list first to see if any existing options meet your project's needs before building a text element from scratch.
Editing Text Content and Layout with Text+
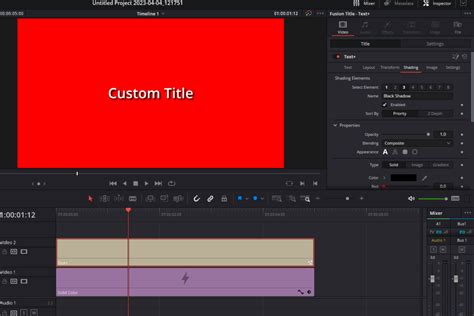
To modify the content of a Text+ effect, select it on the timeline to bring up its controls in the Inspector panel. In the "Text" field, enter the desired text. Beyond basic content editing, Text+ offers advanced controls for detailed animations of the typeface itself. The "Layout" section governs text alignment and distribution, allowing for precise placement within the frame. It also provides controls for rotating text and adding a background element.
Customizing Font and Appearance in Text+
Similar to the standard text tool, you can adjust the font type, size, and style under the "Font" section within the Inspector. However, Text+ extends this with more advanced customization options. These include detailed controls for "Shading," where you can add and animate outlines, shadows, and other effects to amplify the text's visual impact. The "Transform" settings allow you to modify the position and size of your text placement using sliders, and to pivot, shear, and rotate text for unique appearances.
Create VIRAL Text Effects in Davinci Resolve! - Full Tutorial
Creating Text Animations with Keyframes
The true power of Text+ lies in its animation capabilities, driven by keyframes. Almost every property within the Text+ Inspector can be animated, offering virtually limitless possibilities.
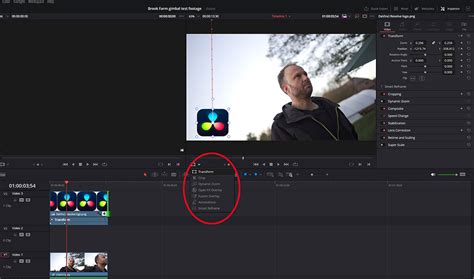
Setting Up Animation Keyframes
To begin animating, navigate to the "Settings" tab within the Inspector panel. Move the playhead to the starting point on your timeline where you want the animation to commence. Set the initial values for the attribute you wish to animate, such as position, size, or rotation. Then, click the diamond icon located next to these properties to create the first keyframe, marking the beginning of your animation sequence.
Visualizing and Adjusting Keyframes
When working with Text+ elements on your timeline, you can click the half-shaded diamond icon to visually represent the keyframes within your sequence. This allows you to easily see where your animation points are located.
Completing Animation Sequences
After setting the initial keyframe, move the playhead to the desired end point of your animation on the timeline. Adjust the properties to their final values. DaVinci Resolve will automatically generate a new keyframe for each change made at this new position. By repeating this process for various properties, you can construct complex and dynamic text animations.
Streamlining Workflow with DaVinci Resolve Templates
The effective integration of text and animations in DaVinci Resolve can significantly elevate the professionalism and engagement of your video projects. By mastering these techniques, you can add depth, context, and visual flair, transforming ordinary footage into compelling narratives. Experimentation with the vast array of options available, particularly within the Text+ tool, will unlock an infinite number of creative possibilities for your titles and text animations. Utilizing DaVinci Resolve templates can also further accelerate the creation of dynamic text elements, allowing for faster iteration and a more polished final product. The ability to add subtle yet impactful elements like drop shadows ensures that your text not only conveys information but also enhances the overall aesthetic appeal of your videos.