In the dynamic world of video editing, efficiency and creative freedom are paramount. DaVinci Resolve, a professional-grade editing software, offers a suite of powerful tools designed to streamline your workflow and bring your visions to life. Among these tools, the compound clip stands out as a fundamental yet incredibly versatile feature. This tutorial delves into the intricacies of creating and utilizing compound clips in DaVinci Resolve, empowering editors of all levels to work smarter, not harder, and unlock new levels of creative control.
Understanding the Compound Clip: A Foundation for Organization
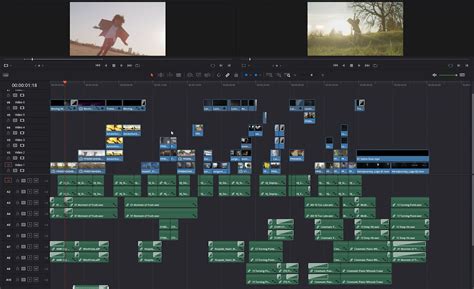
At its core, a compound clip in DaVinci Resolve is a grouping feature that consolidates multiple individual clips into a single, cohesive unit. This functionality is akin to "nesting" clips in other non-linear editing (NLE) programs, allowing you to take a sequence of shots and collapse them down into one manageable element. This process is not merely about tidying up your timeline; it's a strategic move that significantly enhances your ability to apply effects, transitions, and color grades efficiently, saving you considerable time and effort.
The concept of grouping clips is not unique to DaVinci Resolve. Editors familiar with programs like Premiere Pro will recognize the utility of this feature. Whether you're working with a series of video clips, images, backgrounds, or even layers created directly within the timeline, compound clips provide a robust solution for managing complex sequences. By uniting these elements, you create a single entity that can be treated as one clip, making your timeline far more organized and navigable. This is particularly beneficial when you need to reuse a specific sequence multiple times throughout a project, as it can be readily accessed from your media bin, eliminating the need to painstakingly reconstruct it each time.
Creating Your First Compound Clip: A Step-by-Step Approach
The process of creating a compound clip in DaVinci Resolve is straightforward and intuitive. To begin, identify the individual clips on your timeline that you wish to group together. You can select these shots by "lassoing" them with your mouse or by holding down the Control (or Command on Mac) key and clicking on each clip individually.
Once your desired clips are selected, right-click on any one of them. A dialogue box will appear, offering you the option to name your new compound clip. This naming convention is crucial, especially when working with numerous compound clips. Giving each one a descriptive name will save you from the tedious process of scrubbing through unlabelled clips in your Bin to find the correct one later.
After assigning a name, click "Create." Your selected clips will now be unified into a single compound clip, which will appear in your Bin as its own distinct media item. This newly created compound clip can then be placed anywhere on your timeline, ready to be manipulated as a single entity.
The Advantages of Compound Clips: Efficiency and Creative Control
The benefits of employing compound clips extend far beyond simple organization. One of the most significant advantages lies in the efficiency gained when applying transitions and effects. Imagine a scenario where you have a sequence comprising a title, a lower third, and an overlay, all stacked on top of each other on your timeline. If you need to apply a dissolve or a specific transition to this entire sequence as it moves to the next clip, applying the effect to each individual clip would be a time-consuming and repetitive task.
However, by first creating a compound clip from these stacked elements, you can apply the desired effect to the compound clip itself. This single action will automatically apply the effect to all the individual clips contained within it, achieving the desired outcome with remarkable speed and ease. This principle applies to a wide range of effects and transitions, dramatically accelerating your editing process.
Navigating Compound Clips: Editing and Grading
When you "Open in Timeline" a compound clip, DaVinci Resolve presents you with a new timeline containing all the constituent clips. This allows you to edit, add, or remove media within the compound clip as needed. Once your modifications are complete, a simple double-click on the main timeline name below the work area will return you to your primary timeline.
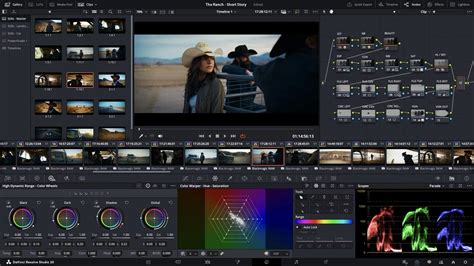
The power of compound clips is also evident in the Color page. If you've created a compound clip from several ungraded shots and then apply a grade to the compound clip as a whole, that grade will be applied uniformly to all five clips. However, this can be a limitation if you intend to grade each shot individually. To achieve this, you must step into the compound clip using "Open in Timeline" and then switch to the Color page. Within this nested timeline, you can then grade each shot separately, affording you granular control over the color of each element within the compound clip. This ability to dive into the compound clip and work on its individual components is key to maintaining creative flexibility.
Deconstructing Compound Clips: Flexibility and Modification
The ability to modify or even remove a compound clip is as straightforward as its creation. If you decide to change the content of a compound clip, perhaps by swapping out one clip for another, or if you simply no longer require it to be a compound clip, you can easily "ungroup" it. This action effectively pulls all the original clips back apart, allowing you to adjust their length, remove them, or perform any other necessary modifications to the individual clips on your timeline. This ensures that your editing process remains fluid and adaptable to evolving project needs.
Advanced Applications: Audio Effects and Beyond
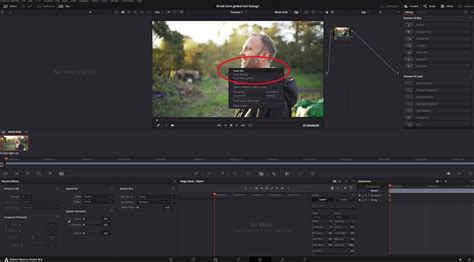
The utility of compound clips extends beyond visual elements and into the realm of audio editing. Consider a scenario where you need to apply a specific audio effect, such as a reverb, to create an "echo out" at the end of a beat, rather than an abrupt stop. While this technique might not be entirely new to experienced editors, creating a compound clip in DaVinci Resolve offers an elegant solution.
The process involves isolating the exact point in the audio clip where you want the reverb to begin. You then duplicate this isolated section and transform it into a compound clip. Within this new compound clip, you duplicate the audio track again. By extending the duration of the bottom track and muting it, you essentially trick DaVinci Resolve into believing the audio clip is longer than it actually is. This allows you to extend the clip further without introducing unwanted sound, enabling the reverb effect to play out naturally as the track fades away. This demonstrates how compound clips can be leveraged for creative audio manipulation, adding depth and polish to your sound design.

MotionVFX and DaVinci Resolve: Enhancing Your Workflow
While DaVinci Resolve offers robust native tools like compound clips, third-party plugins and elements can further enhance your editing capabilities. Companies like MotionVFX are dedicated to providing professional-grade tools that integrate seamlessly with NLEs, including DaVinci Resolve, and also Final Cut Pro. Their offerings are designed to eliminate tedious technicalities and allow creativity to flow naturally.
MotionVFX provides a comprehensive toolkit aimed at bringing ideas to the screen without friction, enabling users to achieve cinematic, million-dollar-looking effects within minutes. Their philosophy centers on the idea that when your tools work flawlessly, your creativity is unhindered by technical limitations. They offer a vast universe of elements, plugins, and software tools that can be browsed, downloaded, and applied directly within your editing software.
The only Plugins you will ever need - MotionVFX
To access the MotionVFX universe, users typically download and install an application like mExtension. This app acts as a bridge, allowing you to browse, download, and apply plugins and elements directly to your timeline without leaving your editing environment. During the installation process, you can select the software plugins you wish to install and activate the device you are working on.
MotionVFX understands the importance of experiencing their tools before committing to a subscription. They offer a 14-day free trial for each plan, which includes all plugins and comes with no watermarks or render limits. This trial period allows users to experiment with the tools and ensure they integrate well into their existing workflow before making a decision. Furthermore, they provide a collection of "Free Elements" available to all users who install mExtension, even before initiating a free trial. This collection features a versatile range of overlays, effects, transitions, typography, and add-ons, catering to diverse design aesthetics.
Subscribers have a daily download limit of 500 elements, and transferring downloaded elements between devices does not count against this limit. All subscription information and account management can be handled through "My Subscriptions" in your account or within the mExtension application.
While a payment method is requested before launching the free trial, users have the flexibility to upgrade their subscription (e.g., to an "Ultimate" plan) or change their billing period, opting for monthly or annual plans. Subscription management is designed for user convenience, allowing for cancellations before the next billing cycle to avoid further charges. Users retain access to subscription products until the end of their current billing cycle even after cancellation. Subscriptions can also be renewed if desired, with payments processed according to the schedule.
Conclusion: Compound Clips as a Cornerstone of Efficient Editing
In conclusion, DaVinci Resolve's compound clip functionality is an indispensable tool for any editor seeking to enhance their workflow efficiency and creative output. By mastering the creation, manipulation, and application of compound clips, you can transform complex timelines into organized, manageable sequences. This not only saves valuable time but also unlocks a greater capacity for applying sophisticated effects and grades with precision. Coupled with the potential for integration with powerful third-party resources like those offered by MotionVFX, the compound clip becomes a cornerstone of modern, streamlined video production.