The ibisPaint application offers a robust suite of tools designed to empower digital artists of all skill levels. Among these, the "Bucket" tool, often referred to as the Magic Wand tool in other contexts, stands out as particularly sophisticated. Its advanced functionality, while immensely useful, can present a learning curve for new users. Understanding its intricacies and settings is crucial for achieving desired results and avoiding frustration. When the tool doesn't behave as expected, the simple act of tapping the undo button and retrying the fill operation can often resolve the issue, allowing for iterative refinement of settings.
The fundamental purpose of the Bucket tool is to fill an area with color. This filling process is initiated by tapping a starting point with your finger. The tool then identifies and colors pixels that are similar in color to that initial point. A key aspect of its operation hinges on the integrity of your line art. If your line drawing is perfectly closed, with no gaps, the Bucket tool will confine the fill strictly within those boundaries. However, if even a small gap exists in the lines, the color can "leak" out and fill areas beyond your intended scope, coloring outside the lines.
Understanding Bucket Tool Settings
To effectively utilize the Bucket tool, it's essential to familiarize yourself with its various settings. For those new to the tool or encountering difficulties, a default setting is available that often yields good results.
[ Reset ]: This function is invaluable for beginners or those unsure of optimal settings. It reverts the tool's parameters to a well-balanced default configuration, providing a solid starting point for experimentation.
[ Strength ]: This setting dictates the tolerance of the tool in identifying similar colors. It defines the range of colors that are considered similar to the starting point's color, influencing how widely the fill will spread. A lower "Strength" value will result in a more precise fill, only coloring areas with very similar hues. Conversely, a higher value will encompass a broader spectrum of colors, potentially filling areas with slight variations. For instance, if you have a gradient, like a soft line drawn with an airbrush, setting "Strength" to 0% means the fill will stop at the slightest color difference. Increasing this value, even to 5% or 10%, will expand the filled area, accommodating more subtle color transitions.
- [ Unpainted Recognition ]: This setting determines how the tool behaves when encountering areas that have not yet been painted. When enabled, it can help to more accurately fill within complex shapes, especially those with varying line thicknesses. Turning this feature on can prevent unintended areas from being colored and ensure a cleaner fill within defined boundaries, even when lines are not perfectly uniform.
- [ Expansion ]: This parameter allows you to expand or contract the fill range beyond the area initially defined by "Strength." A positive value will extend the fill slightly beyond the detected color similarity, while a negative value will narrow it. This is particularly useful for ensuring that faint lines or the very edges of shapes are fully encompassed by the fill. For example, when filling colors into a line drawing created with a Dip Pen (Soft) brush, adjusting "Expansion" can fine-tune how close the fill gets to the line itself. A setting of 0px will fill precisely up to the detected edge, while 1.5px will extend the fill slightly outwards.
- [ Gap Recognition ]: This crucial setting addresses the issue of unclosed lines. If your line drawing has gaps, enabling "Gap Recognition" allows the Bucket tool to "jump" across these small openings and continue filling the intended area. Without it, the color would leak out through any breaks in the line work. This feature is indispensable for coloring sketches or line art that may not be perfectly sealed.

[ Continuous Filling ]: This option enables the tool to fill multiple, distinct areas with the same color in a single operation. If you have several separate shapes that you want to fill with the same hue, turning on "Continuous Filling" allows you to do so without having to tap each area individually. This is a significant time-saver for complex illustrations with repeating elements.
[ Under Line ]: This setting offers control over how the fill interacts with existing lines. It determines whether the fill should appear above or below the line art, influencing the final visual appearance and how the colors interact with the linework.
[ Boundary ]: This setting defines how the program determines the range of colors to be filled. You can choose to have the program decide based on Color (R, G, B, A), meaning it considers the red, green, blue, and alpha (transparency) values of pixels, or solely by Opacity. The choice between "Color difference" and "Opacity" significantly impacts the fill's behavior. If the "Reference Layer" is set to a white canvas, the entire background is opaque. In such a scenario, selecting "Opacity" for the boundary would result in the entire surface being painted.
[ Reference Layer ]: This setting dictates which layer(s) the Bucket tool will analyze to determine the fill area. You have three options:
- Current Layer: The tool analyzes only the active layer. This is useful for precise fills within a single layer without affecting others.
- Specific Layer: You can designate a particular layer to be the reference. This allows you to, for example, use a clean line art layer to guide the fill on a separate color layer.
- Canvas: This is the default setting. The tool considers the combined image from all visible layers. This provides the broadest context for color similarity determination. When "Canvas" is selected, the tool looks at the composite image to decide where to paint. If "Specific Layer" is chosen, you can then select the exact layer to reference for color analysis.
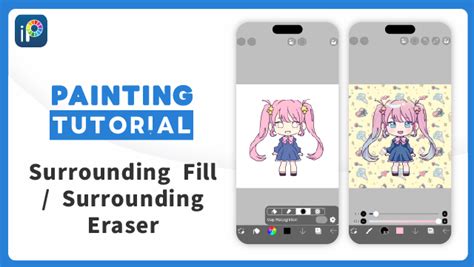
Surrounding Fill and Surrounding Eraser
ibisPaint has introduced powerful additions to the Bucket tool: "Surrounding Fill" and "Surrounding Eraser."
Surrounding Fill: This function allows you to fill enclosed areas within a specified boundary with a chosen color. You first activate "Surrounding Fill," then trace around the area you wish to fill. The tool will then precisely color the interior of that traced outline.
Surrounding Eraser: Complementary to "Surrounding Fill," this tool enables you to remove fills from outlined areas. You select "Surrounding Eraser" and trace around the area from which you want to remove the fill. This provides meticulous control over the removal of color within defined boundaries.
Advanced Vector Editing Tools
Beyond the Bucket tool, ibisPaint offers sophisticated features for vector layer manipulation, enhancing precision and editability.
Vector Eraser: This tool provides precise control over line segments.
- Up to Intersection: This mode allows you to erase parts of a line up to the point where it intersects with another line. This is ideal for cleaning up overlapping lines. You can choose the line end shape, such as "Fade" or "Round," for a smooth finish.
- Whole Line: With this mode, you can select and delete an entire line segment with a single drag.
- Short Line Removal: ibisPaint also facilitates the removal of small, unwanted line segments efficiently.
Handle Modes for Vector Curves: When working with vector curves, you can adjust the handles that control their shape using three distinct modes:
- [Smooth]: Ensures that the handles extending from a vertex remain aligned and move in tandem, facilitating the creation of fluid, natural curves.
- [Normal]: Allows for independent adjustment of handle lengths while keeping them aligned, offering a balance between smoothness and fine-tuning.
- [Angular]: Grants complete freedom to move each handle independently, enabling the creation of sharp corners and complex curve shapes.
Brush Shape Simplification: This feature streamlines vector shapes by reducing the number of control points while preserving the overall form. By adjusting the "Strength" slider, you can decrease the number of control points. The "Angle Threshold" slider helps to maintain sharp corners that might otherwise become rounded during simplification.
Enhancements for a Smoother Workflow
ibisPaint continually evolves with features aimed at improving user experience and efficiency.
Quick Eyedropper Tool: For desktop users, right-clicking now launches the quick eyedropper tool, allowing for rapid color sampling without interrupting the workflow. The activation time for this tool can be adjusted for even faster access.
Undo/Redo Filter Parameters: It is now possible to undo and redo filter adjustments, providing a safety net and allowing for experimentation with filter settings without fear of irreversible changes.
Custom Brush Creation: The "Brush Pattern" feature allows users to design and implement their own custom brushes. By drawing a design on a dedicated canvas and then entering "Test Drawing" mode, you can try out and adjust your new brush's properties, such as fade and shape. Once created, these custom brushes are automatically uploaded and become available in the Brush Window for use on any canvas.
Hovering Indicators: For styluses that support hovering, such as Apple Pencils, ibisPaint now displays a "Cross Mark" and a "Thickness Mark" while hovering. The "Show Thickness Mark while Hovering" setting can be toggled on or off, providing visual feedback on the current brush or eraser size before making contact with the screen.
Switch Tool Function: A "Switch Tool" function has been added, which can be assigned to a shortcut button on a stylus. This allows users to quickly toggle between the current tool and the one used immediately prior, streamlining the transition between tools.
Apple Pencil Pro Barrel Roll Support: ibisPaint now supports the barrel roll function of the Apple Pencil Pro. This feature allows the brush pattern to rotate in response to the physical rotation of the Apple Pencil Pro, adding a new dimension to brush dynamics and enabling more expressive strokes. This setting is found within the brush settings when an Apple Pencil is selected.
Artworks Folder Organization: The "My Gallery" section has been enhanced with the "Artworks Folder" feature. This allows users to create and manage custom folders, making it significantly easier to organize their artwork by project, status, or any other preferred categorization.
Floating Layer Window: A "Floating Layer Window" can now be kept persistently displayed within the working area. This allows for constant visibility and access to layer management features, including resizing the window by dragging its bottom-right corner.
New Filters and AI Enhancements
ibisPaint continues to expand its filter library and integrate AI capabilities.
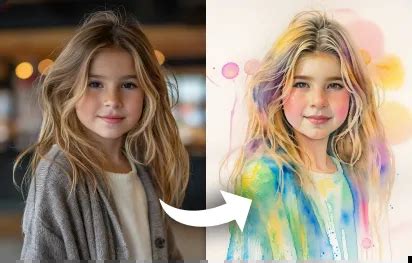
- Watercolor Filter: A new "Watercolor Filter" has been added to the "AI" filter category. This filter allows users to achieve a watercolor-like effect on their artwork, with adjustable saturation to fine-tune the intensity of the effect.
Layer Name Displayed by Eyedropper: When using the eyedropper tool, the name of the layer from which the color is sampled is now displayed. Tapping this displayed layer name directly sets that layer as the active working layer, simplifying the process of color selection and layer management.
AI Training Noise Adjustment: When using artwork with AI Disturbance applied for AI training, noise can interfere with the AI's accurate interpretation of the original style. A slider is now available to adjust the intensity of this noise, improving the effectiveness of AI training.
Background Removal (AI): The "Background Removal" feature, found within the "Filter (AI)" category, allows for the intelligent removal of backgrounds from images. After activating the feature, users can specify the object they wish to keep. The tool then automatically isolates and removes the background. Users can refine the selection by switching to background selection mode if necessary, and a "Show Mask" option allows for previewing the result before finalizing.
Vector Layers and History Retrieval
The introduction of vector layers and history retrieval significantly boosts the non-destructive editing capabilities within ibisPaint.
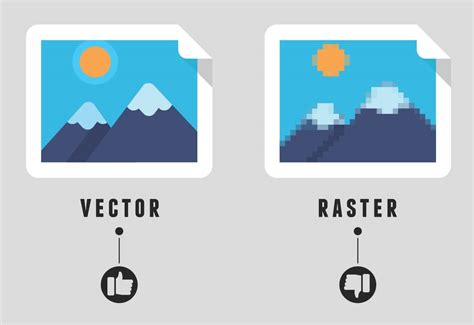
- Vector Layer Function: ibisPaint now supports vector layers, a fundamental feature for scalable and editable artwork. Lines drawn on a vector layer can be modified later in terms of color, pen type, and line thickness without any loss of quality. This is a powerful tool for illustrators and designers who require flexibility in their work.
- History Retrieval Function: This innovative feature allows users to save previous states of their artwork as IPV files while a time-lapse video of their work is being generated. This provides a robust safety net, enabling users to revert to earlier versions of their artwork if needed, effectively creating a detailed revision history.
Prime Membership and Keyboard Shortcuts
ibisPaint offers enhanced functionality for users who subscribe to Prime Membership, along with expanded keyboard shortcut support.
Prime Membership on Windows: Prime Membership is now available on the Windows version of ibisPaint. This subscription provides benefits such as increased cloud storage, access to exclusive Prime materials, and premium fonts. Details can be found within the application or the Settings window.
Expanded Keyboard Shortcuts: New keyboard shortcuts and gestures have been implemented for iPhone, iPad, Android devices, and Windows PCs when connected to a keyboard. These shortcuts cover a range of functions, including:
- Changing Brush Size: On iOS/iPadOS, hold Command + Option and drag the stylus. On Android/Windows, hold Ctrl + Alt and drag the stylus.
- Switching Tools: Pressing the "B" key switches to the Brush tool from the Eraser tool, and vice-versa.
Animation and Material Search
The application now facilitates animation creation and simplifies material discovery.
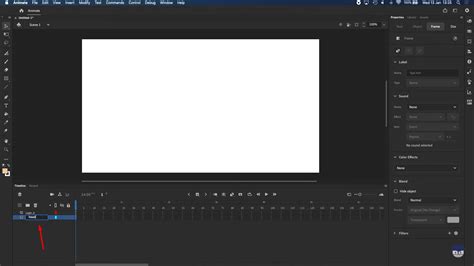
- Animation Function: ibisPaint makes animation creation more accessible. By selecting an "Animation" size when creating a new canvas, users are presented with an animation bar. New frames can be added by tapping the "+" button, allowing for the sequential creation of illustrations that form an animation. Adjusting "Frames per Second" further refines the animation's playback speed.
Material Search: With a vast library of over 18,000 materials, finding specific assets could be challenging. The "Material Tool" now includes a search function, allowing users to find desired materials using keywords, significantly reducing search time and effort.
Brush Search: Similarly, the Brush window now features a search bar. Users can type the name of a desired brush to quickly locate and select it from the available options.
Filter Enhancements and Display Options
Several new filters and display options have been added to refine the artistic process.
"Retro Game" Filter: This filter, categorized under "Artistic," allows users to emulate the aesthetic of retro video games. Parameters like Level, Dot Size, and Saturation can be adjusted to achieve the desired vintage look.
Spin Blur Filter: Added to the "Blur" category, the "Spin Blur" filter creates a radial blur effect. The intensity of the blur can be controlled by dragging a slider.
Filter History: A "History" category has been added to the filter selection menu. This provides quick access to recently used filters, making it convenient to reapply frequently used effects.
High-Resolution Image Output: When saving and sharing artwork, ibisPaint now offers the option to output high-resolution images using AI. The output image size can be double the canvas size, and a partition bar allows for comparison between the original and high-resolution versions.
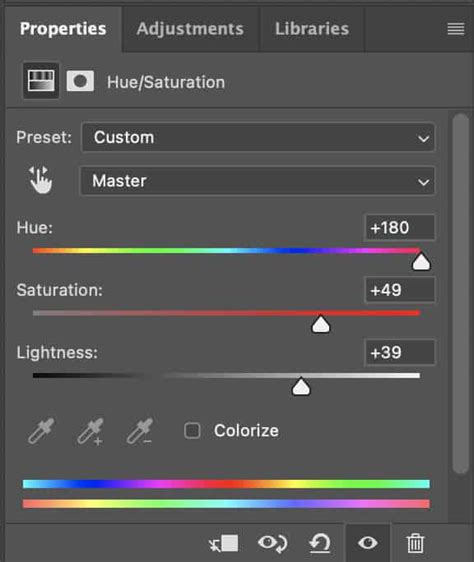
Adjustment Layers: The introduction of Adjustment Layers provides a non-destructive way to apply filters. With 21 types of filters available, users can apply, disable (by hiding the layer), or adjust filter settings at any time after application. "Hue Saturation Lightness" is one such example, allowing for precise color adjustments.
- Color History: The Color Palette now includes a "Color History" feature, displaying up to 100 recently used colors. This allows for quick selection and reuse of frequently employed hues.
Manga Manuscript Features
ibisPaint offers specialized tools for manga creation, ensuring compliance with industry standards.
Canvas Color Modes: When creating a new manga manuscript, users can now choose between "Color," "Gray Scale," and "Black & White" color modes. This flexibility allows for selecting the appropriate mode for frontispieces, manga, or specific printing requirements, such as using Black & White mode to prevent uneven screen tone finishes on printed manuscripts.
Optimized Manga Canvas Resolution: A4 and B4 sized canvases, commonly used for manga drafts, can now be created with an optimal 600 dpi resolution, ensuring that fine lines, curves, and screen tones are rendered beautifully for printing. The maximum canvas size is 16384px x 16384px.
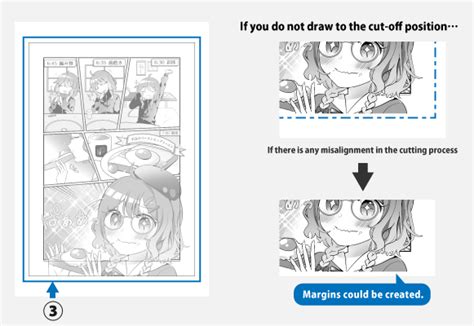
Manga Manuscript Function: This function simplifies the creation of manga manuscripts that comply with paper standards. By selecting a manuscript type from templates, users can easily set up canvases with customizable inner frames, trimming frames, guide colors, and bleed widths. The "View Menu" allows for toggling the display of these frames, aiding in storyboard creation and layout planning.
Display Interpolation Method: The "Display when Zoomed" setting allows users to choose the interpolation method used when displaying the canvas zoomed in. This can affect the perceived sharpness and clarity of the image at high zoom levels.
Gridlines: Gridlines can now be displayed on the canvas, serving as a guide for precise alignment of text, images, and for drawing pixel art. These can be toggled on or off via the "View Menu."
Selection Area Refinements
ibisPaint provides enhanced control over selection areas.
- Expand/Contract Selection Area: The ability to expand or contract selection areas is now available. This is particularly useful when extracting portions of images or illustrations, as it helps to avoid leftover fringe artifacts or unwanted background colors around the edges of the extracted image. Adjusting the "Expand by" setting in the "Selection Area" window allows for fine-tuning the selection boundary.
- One-Finger Transform: The Transform tool now allows for zooming in/out and rotating layers with a single finger drag, simplifying the process of manipulating layer elements.
The continuous development and introduction of new features in ibisPaint demonstrate a commitment to providing artists with a comprehensive and powerful digital art creation platform. From precise fill tools to advanced vector editing and workflow enhancements, ibisPaint empowers creativity across a wide spectrum of artistic endeavors.