DaVinci Resolve, a powerful post-production suite with roots stretching back to the analog era of color grading, has evolved into an integrated platform for a multitude of post-production specialties. While its initial release in 2004 as a digital equivalent to daVinci System’s renowned analog film and tape color grading system laid the groundwork, over the years, Blackmagic Design has transformed Resolve into a comprehensive toolset. This evolution supports advanced collaboration and workflows, offering distinct user interfaces optimized for various tasks, including non-linear editing, digital compositing, visual effects, color correction, and audio mixing. The platform boasts two modern, fully-featured non-linear editing interfaces: the advanced ‘Edit Page,’ which allows for fine-tuned adjustments of keyframes, and the ‘Cut Page,’ optimized for rapid editing and user-friendliness for those new to DaVinci Resolve. The core of Resolve's legacy lies in its color correction capabilities, famously used for grading Hollywood feature films. Beyond editing and color, Fairlight, a professional digital audio workstation, offers advanced mixing options like Dolby 5.1 Surround and ATMOS, while Fusion, a professional digital compositing platform acquired by Blackmagic and integrated into Resolve, serves as its advanced visual effects engine. The paid version, DaVinci Resolve Studio, distinguishes itself by being the world’s first truly integrated post-production platform, enabling editors, colorists, audio mixers, and their assistants to collaborate simultaneously within a single project file on the same timeline. The free and Studio versions are distinct software installations, but their project files are interchangeable, allowing for seamless transitions.
While mastering the entirety of DaVinci Resolve is a considerable undertaking due to the depth of its specialized components, understanding and implementing specific effects can significantly enhance your footage. This tutorial focuses on a popular visual enhancement: adding light rays. These effects aren't physical lights but rather cleverly crafted visual elements integrated within the software, each capable of influencing a scene's mood and clarity. The process of adding light effects can initially seem complex, but by breaking it down, it becomes manageable.
Applying Light Rays: A Step-by-Step Approach
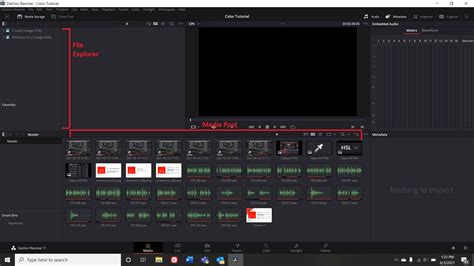
To begin adding light rays to your footage, navigate to the Edit Page within DaVinci Resolve. Ensure you have a clip loaded onto your timeline that you wish to enhance. For illustrative purposes, let's consider a clip featuring a drummer with neon lights and some haze in the background, a scenario ripe for the addition of dramatic light rays.
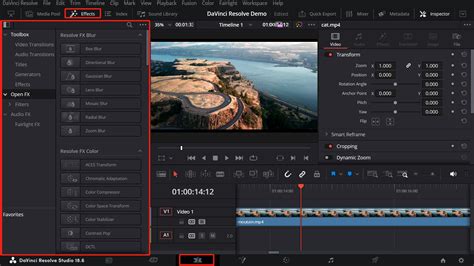
- Access the Effects Library: Locate the "Effects Library" panel.
- Navigate to Open Effects: Within the Effects Library, find and select "Open Effects."
- Search for Light Ray: Use the search bar to find the "Light Ray" effect.
- Apply the Effect: Drag and drop the "Light Ray" effect directly onto your selected clip on the timeline. The effect will be applied immediately, and you'll notice a change in your viewer.
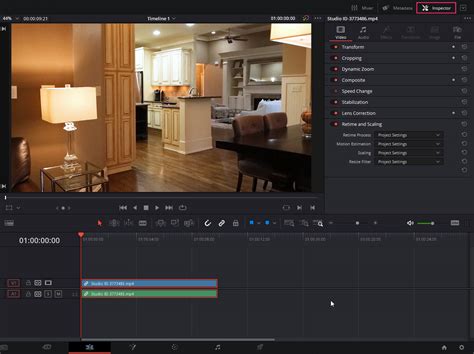
Understanding the Inspector Controls
Once the "Light Ray" effect is applied, the "Inspector" panel will display a range of parameters to control its appearance. DaVinci Resolve offers several view options within the Inspector that are invaluable for fine-tuning the effect:
- "Final Image": This view displays your video with the "Light Ray" effect fully rendered. It's the standard view for assessing the overall impact on your footage.
- "Light Rays Alone": This is an exceptionally useful option for isolating and shaping the light rays without the distraction of the underlying footage. It allows you to focus solely on the geometry, intensity, and spread of the rays themselves, making the initial shaping process more intuitive.
- "Source Regions": This view is critical for understanding and controlling where the light rays originate from within the frame. It highlights the "source regions" from which the rays will emanate and "blackout" areas where they will not appear. This helps in precisely positioning the light source for maximum realism.
Shaping Your Light Rays for Impact
Returning to the "Final Image" view, you can now begin to sculpt the light rays to integrate seamlessly with your footage. Several key sliders in the Inspector are central to this process:
- Sources Threshold: This parameter generally controls the overall strength or intensity of the light ray effect. It’s often recommended to leave this at its default setting initially. The primary adjustments for the look of the rays will come from other sliders.
- Position: This is arguably the most crucial parameter for achieving natural-looking light rays. By adjusting the position, you can dictate where the light appears to be originating from within your scene. For a natural effect, consider aligning the light ray’s origin with existing light sources in your footage or aiming it as if it's coming directly towards the camera.
- Length: This slider controls how far the light rays extend. Pushing this towards its maximum can create a dramatic, sweeping effect.
- Soften: The "Soften" slider dictates the diffusion of the light rays. A lower value will produce sharper, more defined rays, while a higher value will create softer, more atmospheric beams. Experimenting with this slider is key to avoiding an artificial look.
- Brightness: This slider directly controls the luminance of the light rays. You can increase or decrease their intensity to match the overall lighting of your scene or to create a specific mood.
When adjusting these parameters, aim for a look that feels organic to the scene. If your footage has elements like haze or atmospheric particles, these can interact beautifully with light rays, enhancing their perceived realism.
Achieving Naturalism and Realism
A common pitfall when adding light effects in DaVinci Resolve is overdoing it, resulting in footage that looks unnatural or gimmicky. To avoid this:
- Match Existing Light Sources: If your scene already contains light sources (e.g., street lamps, neon signs), try to match the position and color of your added light rays to these existing elements. This creates a cohesive visual narrative.
- Subtlety is Key: For a more realistic effect, particularly in scenes with existing atmospheric elements like haze or fog, consider employing subtle lens flares in conjunction with soft glow effects. This can mimic the natural diffusion and spill of light in the real world.
- Balance is Crucial: Avoid an excessive number of flares or overly bright rays, as these can quickly appear cheesy. The goal is to enhance, not overpower, the existing footage.
Advanced Techniques and Considerations
Color Grading and Light Interaction: Lighting effects in DaVinci Resolve truly shine when combined with smart color grading. For instance, subtly boosting the saturation or warmth of colors in the areas where your light rays appear can convincingly simulate how light naturally warms its surroundings. This integration of digital lighting with color manipulation adds a significant layer of realism.
Keyframing for Motion: When dealing with moving footage, particularly shots where the camera is panning or tracking a subject, keyframing the position of your light rays is essential. This ensures that the light rays move along with the camera's perspective, maintaining their intended origin and direction.
To implement keyframing:
- Start at the beginning of the clip.
- Adjust the "Position" of the light ray to its desired starting point. A keyframe will automatically be created at this point.
- Scrub forward through the clip to where the camera movement changes or stops.
- Re-adjust the "Position" of the light ray to follow the new perspective. Another keyframe will be generated.
- Continue this process throughout the clip, keyframing the position as needed to keep the light rays consistent with the camera's motion.
This technique is particularly effective for shots where a light source appears to be moving relative to the viewer, such as a car's headlights in a tracking shot.
Keyframe Basics in DaVinci Resolve 20: Make Your Edits Come Alive!
Creative Experimentation: Once you've mastered the basics of adding light rays, the true excitement lies in experimenting with creative looks. Don't hesitate to blend real footage with digital lighting layers to amplify the emotional impact or the overall vibe of your story. For example, in a dimly lit, atmospheric scene, adding subtle, ethereal light rays can significantly enhance the mood. Conversely, in a high-energy scene, bold, sharp rays can add a dynamic visual flair.
Avoiding Common Pitfalls:
- Excessive Brightness or Harsh Shadows: One of the most challenging aspects of light effects is managing their intensity. Overly bright rays or harsh, unnatural shadows can detract from your video's aesthetic. The solution lies in careful adjustment of the "Brightness" and "Soften" sliders, and by ensuring the light effect's intensity is natural within the context of the scene.
- Unrealistic Placement: Light rays that appear to emanate from nowhere or that do not align with the scene's implied light sources will immediately break the illusion. Always consider the physics of light and how it behaves in a real-world environment.
By thoughtfully applying these techniques and paying close attention to detail, you can transform ordinary footage into visually compelling scenes with the strategic addition of light rays in DaVinci Resolve. The platform's robust toolset, from its editing capabilities to its advanced visual effects and color correction, provides a fertile ground for creative exploration, allowing you to craft unique and impactful visual narratives.