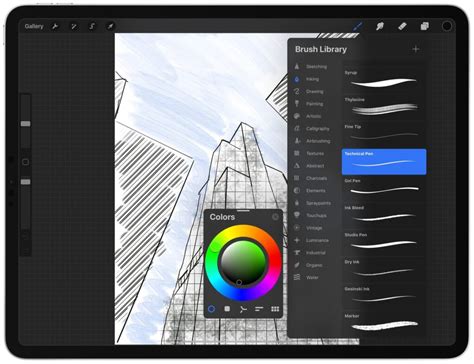
While Procreate, the powerhouse digital art application, doesn't feature a dedicated ruler tool, achieving precise measurements and drawing perfectly straight lines is entirely within your reach. This guide will walk you through the most effective methods for creating your own ruler within Procreate, transforming a perceived limitation into a powerful feature for your workflow, especially for projects intended for print.
Understanding Procreate's Drawing Guides
Procreate offers a robust set of tools designed to aid artists in achieving accuracy and consistency in their work. Among these are the Drawing Guides, which, when utilized effectively, can serve as the foundation for creating custom measuring tools. These guides are not merely for aesthetic symmetry; they are practical aids that can be configured to provide real-world measurements or pixel-based grids, empowering you to plan and execute your artwork with a high degree of precision.
The primary function of Drawing Guides is to assist in planning out and drawing artwork with precision and assisted strokes. This includes options for various forms of symmetry and grid systems, all accessible through the Actions tool, represented by the wrench icon. By delving into these settings, you can unlock the potential to create a functional ruler tailored to your specific project needs.
Activating and Configuring the 2D Grid
The most effective way to create a ruler in Procreate is by leveraging the 2D Grid option within the Drawing Guide settings. This method allows you to visualize and measure your canvas in physical units or pixels, providing a tangible framework for your artwork.
Step-by-Step Guide to Creating Your Ruler:
- Access the Actions Tool: Begin by tapping on the wrench icon, which opens the Actions menu.
- Navigate to Drawing Guide: Within the Actions menu, select the "Canvas" tab, and then locate and activate the "Drawing Guide" option.
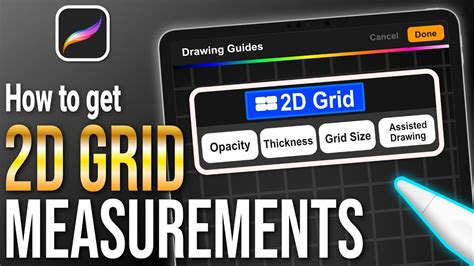
- Select the 2D Grid: From the available Drawing Guide options, choose "2D Grid."
- Adjust Grid Size and Units: This is the crucial step for creating your ruler. Tap on "Grid Size." Here, you can select your preferred unit of measurement: Inches, Centimeters, Millimeters, or Pixels. For example, if you typically print your graphic design work in inch format, selecting "Inches" is the most logical choice. You can then adjust the size of each grid square to represent a specific measurement, such as 1 inch.
- Enable Assisted Drawing: Once your grid is configured, it's time to enable Assisted Drawing. This toggle, located in the bottom right-hand corner of the Drawing Guide settings, will ensure that any lines drawn along the grid are perfectly straight and aligned.
- Draw Your Ruler Line: With the 2D Grid active and set to your desired measurement (e.g., 1 inch per square), you can now draw a straight line alongside your grid boxes. If you are creating a ten-inch ruler, you would draw a line ten boxes long.
By following these steps, your 2D Grid will now be visible against your drawn line, effectively acting as a ruler. For instance, if you set your grid to 1-inch squares, and draw a line across ten squares, you will have a visual representation of a 10-inch measurement. The .5 grid, if visible, will further enhance the precision of your measurements.
Procreate Pocket Considerations
The method described above for creating a ruler is also applicable to Procreate Pocket, the streamlined version of the app for iPhone. The core functionality of the Drawing Guide and the 2D Grid remains consistent, allowing you to achieve precise measurements even on a smaller screen.
The Importance of Rulers in Digital Art
The necessity of a ruler in Procreate largely depends on the intended use of your artwork. If you are creating graphic artwork that will be used for printing, then having precise measurements is paramount. This ensures that your designs meet specific dimensions required by printers or clients. For instance, if a client requires an A4 sized graphic, or a print that fits within a standard US Letter frame, a ruler becomes an indispensable tool.
However, if your artwork is purely for digital display, such as social media graphics or web banners, the need for precise physical measurements diminishes. In such cases, you might not need to worry excessively about using a ruler. The primary benefit of a ruler in Procreate is for projects with tangible output requirements.
Beyond Measurement: The Versatility of Drawing Guides
While the creation of a ruler is a significant application, the Drawing Guide options in Procreate serve a much broader purpose. Gaining knowledge about these tools will undoubtedly benefit your Procreate work in numerous ways, even if you don't frequently measure your art. Exploring the full capabilities of the Drawing Guide can reveal unexpected ways to enhance your creative process and improve the overall quality of your digital art.
For example, the Drawing Guide also offers options for symmetry. You can turn on 'Rotational Symmetry' to have your strokes flip as they are mirrored to the adjacent segments. This is particularly useful for creating symmetrical designs, logos, or intricate patterns where precision and balance are key. The basic use of Symmetry with Assisted Drawing, and the fundamentals of using the 2D Grid for real-world scenarios and measurements, are just the tip of the iceberg. Accessing additional settings in the Options button within the Drawing Guide menu can unlock further possibilities for assisted drawing and precise stroke creation.
Practical Applications and Client Collaboration
When working with clients, it is always a wise practice to ask them beforehand if they have specific measurements or dimensions they will need for printing purposes. This proactive approach ensures that you are meeting their exact requirements and can tailor your Procreate workflow accordingly. By using the 2D Grid to set up your canvas with the correct dimensions from the outset, you can avoid potential issues and deliver a final product that perfectly matches the client's expectations.
Consider a scenario where you are creating artwork for a client who needs it printed on a specific size of paper, like an A4 canvas which can be rotated to be landscape. By applying a 2D Grid with 1" squares (or the equivalent in millimeters or centimeters), you can meticulously plan out your composition to fit the exact dimensions. In regions like North America, the 'US Letter' size is often the closest equivalent to 'A4', and understanding these equivalencies can be crucial for international projects.
Measuring in Pixels vs. Physical Units
The 2D Grid in Procreate allows for measurement in both physical units (inches, centimeters, millimeters) and pixels. This flexibility is invaluable. For instance, if you are working on a project with a specific pixel dimension requirement, such as 4000 x 4000 pixels, you can set your grid accordingly. If the grid is set to 250 pixels per square, you can quickly ascertain that there are 16 x 16 squares across and up, providing a clear visual representation of your canvas resolution and how your elements will fit within it. This is particularly useful for digital assets where pixel density and dimensions are critical.
Ultimately, while Procreate may not ship with a built-in ruler tool, the app provides the necessary functionalities to create one. By understanding and utilizing the Drawing Guide, specifically the 2D Grid, you can achieve the precision required for any project, from intricate illustrations to print-ready graphic designs. Exploring these tools is highly recommended, as their utility extends far beyond simple measurement, offering avenues to enhance your overall artistic process.