DaVinci Resolve, a powerhouse in video editing and color grading, offers a robust set of tools for manipulating footage. Among these, the ability to split or cut clips is a fundamental skill that significantly enhances editing efficiency and creative control. Whether you are a seasoned professional or just embarking on your video editing journey, understanding how to split clips in DaVinci Resolve is an essential technique that will be frequently employed in your workflow. This guide will delve into the various methods of splitting clips, separating audio from video, and rejoining them, providing a step-by-step breakdown for both basic and more advanced scenarios within DaVinci Resolve versions 17 and 18, and touching upon newer functionalities.
Understanding Clip Splitting in Video Editing
At its core, clip splitting in video editing is the act of dividing a single video clip into two or more distinct segments. This foundational technique is invaluable for a multitude of editing tasks. For instance, you might need to meticulously trim unwanted sections from the beginning or end of a clip, or perhaps remove extraneous footage from the middle. Splitting clips also opens the door to creative possibilities, such as inserting other video clips or still images between segments of an original clip, or constructing elaborate split-screen effects. By precisely dividing your footage, you gain the granular control necessary to refine your narrative, enhance pacing, and craft a more polished and professional final product. DaVinci Resolve, with its intuitive interface and powerful features, provides several straightforward ways to achieve this essential editing maneuver.
The Blade Tool: Precision Cutting on the Timeline
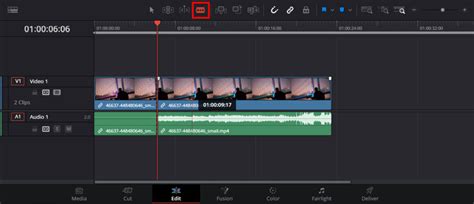
The Blade tool is perhaps the most direct and commonly used method for splitting clips in DaVinci Resolve. It offers a visual and tactile way to make precise cuts directly on the timeline.
Splitting a Single Clip with the Blade Tool
To split a single clip, the first step is to ensure the clip you intend to modify is selected on the timeline. You can do this by simply clicking on it. Next, you need to position the playhead - the vertical line indicating the current playback position - precisely at the frame where you wish to make the cut. DaVinci Resolve offers tools to aid in this precision. You can navigate the playhead frame by frame using the arrow keys on your keyboard, or utilize the zoom function to get a magnified view of the timeline, allowing for a much closer inspection of the frame you want to split.
Once the playhead is exactly where you want it, activate the Blade tool. This can be done by clicking on its icon, which typically resembles a razor blade, in the toolbar. Alternatively, a highly efficient keyboard shortcut is available: Ctrl+B on Windows or Cmd+B on macOS. With the Blade tool active, your cursor will transform into a blade icon. Simply click on the clip at the exact point where the playhead is positioned. This action will instantly divide the selected clip into two separate, independent clips. You can then move these newly created clips independently, trim them further, or apply different effects to each.
For even greater precision when splitting, especially if you're working with specific edit points, DaVinci Resolve offers dedicated shortcuts. To split a clip precisely at its designated "in point" (the start of the clip's usage in the timeline), use Ctrl+Alt+B on Windows or Cmd+Opt+B on macOS. Similarly, to split at the "out point" (the end of the clip's usage), the shortcut is Ctrl+Shift+B on Windows or Cmd+Shift+B on macOS. These shortcuts bypass the need for manual playhead positioning, streamlining the process for precise edits.
Splitting Multiple Clips Simultaneously
In many editing scenarios, you might find yourself needing to split multiple clips at the exact same point on the timeline. This is common when you want to insert a new clip, add a transition, or apply an effect across a sequence of clips uniformly. Fortunately, DaVinci Resolve makes this a straightforward operation.
The primary method involves using the Blade tool in conjunction with clip selection. Begin by selecting all the clips you intend to split. This can be achieved by clicking and dragging a selection box around them on the timeline, or by holding down the Shift key while clicking on each individual clip. Once all desired clips are highlighted, activate the Blade tool (either by clicking its icon or pressing the B key for Blade Edit Mode). Now, when you click on the timeline with the Blade tool active, it will make a cut across all selected clips at that precise point.
Another efficient method for splitting multiple clips at the same temporal location is the "Split at Playhead" command. First, position your playhead at the exact frame where you want all selected clips to be divided. Then, ensure the clips you wish to split are selected. Finally, press the Ctrl+B (Windows) or Cmd+B (macOS) shortcut. This action will perform the split on all selected clips precisely where the playhead is located, ensuring perfect alignment across your sequence.
Advanced Splitting Techniques and Related Functions
Beyond the fundamental Blade tool, DaVinci Resolve offers other functionalities that can be considered forms of splitting or are closely related to the concept.
Detaching Audio from Video
Often, you'll want to edit the audio track of a clip independently from its video component. This is crucial for tasks like re-recording dialogue, adding sound effects, or fine-tuning music. DaVinci Resolve makes it simple to "detach" audio from its associated video clip.
To achieve this, first, locate and select the video clip in your timeline or within the Media Pool that contains the audio you wish to separate. Then, right-click on the selected clip. In the context-sensitive menu that appears, choose the option "Detach Audio." This action will create a new, independent audio clip in the Media Pool, which is no longer linked to the original video. This detached audio clip can then be manipulated, edited, or even replaced without affecting the video.
Alternatively, you can use the Blade tool to split both audio and video simultaneously. Select the clip in the timeline and switch to Blade Edit Mode (press B). Position the playhead where you want the split to occur and press Ctrl+B (Windows) or Cmd+B (macOS). This will divide the clip into two segments, with both the video and audio components of each segment now separate.
Once the audio has been detached or split, you gain the freedom to edit it independently. This is particularly powerful when you move to the Fairlight page, DaVinci Resolve's dedicated audio post-production environment. Here, you can apply a vast array of audio editing tools and special effects to enhance the sound quality, mix levels, and synchronize audio precisely with the visual elements.
How to Separate Audio from Video in DaVinci Resolve 20 | Super Easy Tutorial
Rejoining Split Clips
Just as splitting clips is a core editing function, so is the ability to rejoin them. If you've split a clip and later decide to merge those segments back into a single, continuous clip, DaVinci Resolve provides a simple process.
To rejoin split clips, first, you need to select the two adjacent clips on the timeline that you wish to merge. You can do this by clicking and dragging a selection box over both clips. Once they are selected, right-click on one of the selected clips. From the dropdown menu that appears, choose the "Join Clip" option. Alternatively, you can use the keyboard shortcut Ctrl+J on Windows or Cmd+J on macOS for a quicker merge. This action will combine the two selected clips into a single, continuous clip, effectively undoing the previous split.
After rejoining, you might find that the merged clip needs further refinement. You can always use the Blade tool or other editing functions to trim or adjust the newly formed clip as needed. Similarly, you can apply any desired audio or video effects to the rejoined clip, ensuring a seamless integration into your project.
The "Color Slice" Tool: A Glimpse into Advanced Color Workflows
While the term "slice tool" might bring to mind basic timeline editing, DaVinci Resolve 19 introduces a more specialized tool, the "Color Slice tool." This functionality is not about dividing clips on the timeline in the traditional sense but rather about manipulating color information within the image itself.
The Color Slice tool, as seen in previews of DaVinci Resolve 19, represents a significant advancement in color grading capabilities. Its exact implementation and application are still being explored, but the implication is that it allows for more granular and targeted adjustments of specific color ranges or hues within a video frame. This goes beyond traditional color wheels and curves, offering a new dimension for colorists to precisely isolate and modify colors. This could involve everything from subtle color correction to dramatic stylistic grading, enabling editors and colorists to achieve highly specific looks by "slicing" through the color spectrum. The functionality/content marked as “Google Youtube” in the provided context, which uses cookies, hints at the availability of video demonstrations and tutorials for this newer feature, suggesting its impact on advanced color workflows.

Enhancing Workflow Efficiency with Advanced Tools
For those looking to optimize their editing process further, especially concerning tasks like transcription and captioning, tools like Simon Says for Resolve can be transformative. Such powerful and intuitive tools can automate complex workflows, saving significant time and effort. While not directly related to clip splitting, integrating such solutions into your DaVinci Resolve workflow can dramatically boost overall productivity, allowing you to focus more on the creative aspects of your project. The mention of "AE Captions as Fast as CapCut - No Plugins" also points towards the growing demand for efficient captioning solutions, a task that often benefits from precise clip manipulation and editing.
Conclusion: The Ubiquitous Nature of Clip Splitting
The ability to split clips in DaVinci Resolve is more than just a basic editing function; it is a cornerstone of efficient and creative post-production. From simple trimming and rearranging to complex visual effects and precise audio manipulation, mastering clip splitting empowers editors to refine their work, enhance storytelling, and ultimately save valuable time. Whether employing the straightforward Blade tool, detaching audio, or exploring the cutting-edge functionalities like the Color Slice tool, DaVinci Resolve provides a comprehensive suite of options to handle every aspect of clip division and manipulation. By internalizing these techniques, editors can significantly elevate the quality of their final output and streamline their entire post-production workflow.