The visual presentation of a video is paramount, and the chosen aspect ratio significantly influences how a story is perceived and where it can be effectively shared. If you've ever been captivated by the distinctive artistic approach of films like "The Grand Budapest Hotel," you've witnessed the power of aspect ratio in shaping a visual narrative. This guide will walk you through the straightforward steps to change the aspect ratio in DaVinci Resolve, empowering you to effortlessly transform the look and feel of your videos for various platforms, including the popular vertical format of TikTok. The choice of aspect ratio is crucial and depends on where your work will be displayed.
A Historical Perspective on Aspect Ratios
Understanding the evolution of aspect ratios provides valuable context for their modern applications. Different ratios have emerged throughout the history of visual media, each reflecting technological advancements and creative intentions.
The Golden Age and the Academy Standard: 4:3 and 1.37:1
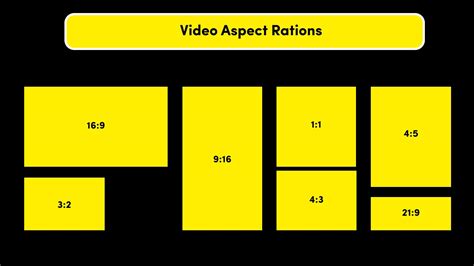
During the early stages of filmmaking, the standard film size was 4:3. This ratio adhered to the principles of the "golden ratio," offering pleasing visual aesthetics that resonated with audiences. The birth of this aspect ratio is somewhat tied to Thomas Edison. In 1909, the Motion Picture Patents Company, controlled by Edison, declared the 4:3 aspect ratio as the standard for all American films to be shot and screened. Similar to the 4:3 aspect ratio is the 1.37:1 ratio, also known as the Academy ratio. This ratio became the de facto standard for cinema for decades, shaping the visual language of early Hollywood.
The Rise of Television and Widescreen Cinema: 16:9 and 2.35:1
The advent of television brought new demands for screen formats. The 16:9 aspect ratio has become the international standard for high-definition television. This aspect ratio falls between 4:3 and 2.35:1, making it suitable for displaying almost all types of films and content. Today, 16:9 is the preferred aspect ratio for streaming videos, offering a balanced view that accommodates a wide range of content.
In contrast, the 2.35:1 widescreen aspect ratio originated in the 1940s as movie theaters sought to compete with the growing popularity of television. This wider format provided a more immersive cinematic experience, filling the viewer's peripheral vision and drawing them deeper into the on-screen action. This dramatic increase in width allowed for grander vistas and a more epic feel to filmmaking.
The Vertical Revolution: 9:16 for Mobile
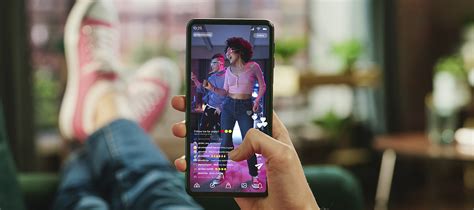
In recent years, the explosion of mobile video consumption has led to the prominence of the 9:16 aspect ratio. Compared to other aspect ratios, the 9:16 ratio provides a narrow frame that, while presenting challenges for creating visually appealing compositions with depth, is perfectly suited for viewing on smartphones held vertically. This format has become the cornerstone of platforms like TikTok, Instagram Reels, and YouTube Shorts, where short-form, vertical video content thrives. The common size for vertical short videos with a 9:16 aspect ratio is 1080 pixels wide by 1920 pixels tall.
The aforementioned aspect ratios are just a few of the most common and representative ones. The existence of various ratios is a reflection of the evolution of film, television, analog photography, and digital photography. Wider aspect ratios, in general, provide a broader sense of light and space, allowing for larger scenes to be depicted, while narrower formats can be more intimate or focused.
Calculating Aspect Ratio
Determining the aspect ratio of a video is a straightforward mathematical process. Simply divide the width of the video by its height. For example, if a video has a resolution of 1920×1080 pixels, the aspect ratio is 1920 ÷ 1080 ≈ 1.778, which is commonly rounded to 16:9.
It's important to note that on a TV screen, pixel ratios can sometimes deviate from a perfect 1:1 square pixel. When you watch a video on TV that has a 16:9 aspect ratio on a computer, you might notice the video appearing horizontally stretched. This is due to differences in how pixels are interpreted by different display technologies.
Pixel Aspect Ratio Explained
Changing Aspect Ratio in DaVinci Resolve
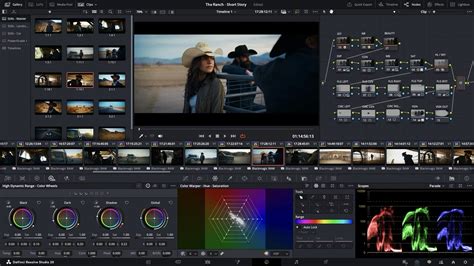
DaVinci Resolve, a powerful and versatile video editing software, offers robust tools for managing aspect ratios, whether you're working on a feature film or a quick social media clip.
Project Settings: The Foundation
To get started, launch DaVinci Resolve and create a new project. When creating your project, you can select the desired aspect ratio from the project settings. This sets the default for all timelines within that project.
Timeline Settings: Flexibility for Different Projects
However, you also have the option to customize the aspect ratio according to your specific needs on a per-timeline basis. This is crucial when you need to work with footage of different resolutions or export for different platforms within the same project.
- Create a New Timeline: Navigate to File > New Timeline.
- Uncheck "Use Project Settings": In the "Create New Timeline" settings panel, locate and uncheck the "Use Project Settings" button, typically found at the bottom left. This action will allow you to specify custom resolution and frame rate options for this particular timeline.
- Set Custom Resolution: Once "Use Project Settings" is unchecked, the "Create New Timeline" panel will enable you to manually input your desired resolution. For instance, to create a 9:16 timeline for TikTok, you would set the resolution to 1080 pixels wide by 1920 pixels tall.
Managing Mismatched Resolutions
When working with footage that doesn't match your timeline's resolution, DaVinci Resolve provides several options to handle the scaling and adjustment. This is particularly important when importing clips shot in different aspect ratios or resolutions than your intended output. You need to pay attention to a small detail in the "Format" tab, specifically the "Mismatched Resolution" option. The Mismatched Resolution setting refers to how DaVinci Resolve scales and adjusts the image when the clip resolution does not match the timeline resolution.
Here are the common options:
- Center Crop with No Resizing: This option maintains the original clip size without any scaling. If the clip is larger than the timeline, the excess will be cropped. If it's smaller, black bars will appear.
- Scale Full Frame with Crop: This option scales the clip proportionally based on the shorter edge, aligning it with the project resolution's shorter edge. This ensures the clip fills the frame, but parts of the top and bottom (or sides, depending on the aspect ratio difference) might be cropped.
- Scale Entire Image to Fit: This is the default and often the most useful option. It scales the clip proportionally based on the longer edge, aligning it with the timeline resolution's longer edge. This ensures the entire clip is visible without distortion, but black bars might appear on the sides or top/bottom if the aspect ratios don't match perfectly.
- Stretch Frame to All Corners: This option non-proportionally stretches the clip size to fit the timeline resolution entirely. This will distort the image, making it appear stretched or squashed, and is generally not recommended unless you have a specific creative reason.
After configuring your timeline settings, DaVinci Resolve will add this new "timeline" to your media pool, ready for editing.
Streamlining Workflow with the Cut Page and External Tools
While manual adjustments in the Project or Timeline settings are effective, DaVinci Resolve offers more streamlined approaches for common tasks.
The Cut Page Presets
Is there a smarter way to do it? Absolutely. Switch to the Cut Page in DaVinci Resolve. This page is designed for faster editing and offers convenient presets for common aspect ratios. Click on the arrow next to the timeline resolution settings to reveal a dropdown menu with four presets: 3840×2160 (4K UHD), 1920×1080 (HD), 1080×1920 (vertical 9:16), and 1080×1080 (square 1:1). Among them, the easiest method for quickly setting up a vertical timeline for platforms like TikTok is to change the aspect ratio in the Cut page to 1080×1920.
Pixel Aspect Ratio Explained
Enhancing Efficiency with TourBox
For editors who frequently switch between aspect ratios or perform repetitive tasks, external controllers can significantly boost efficiency. You can utilize a device like TourBox's macro function to avoid the hassle of manually entering numbers and navigating through menus. This allows you to create and modify aspect ratios with a single click.
According to your preferences and needs, you can create multiple macros to simulate the manual aspect ratio changes you make in DaVinci Resolve. Then, create a TourMenu and assign these macros with corresponding resolution names for easy identification. Now, back to your DaVinci Resolve project, you can easily change the aspect ratio of your videos with just one hand using TourBox, saving valuable time and effort. Additionally, TourBox is a creative tool loved by digital artists, content creators, and editors for its ability to customize workflows and accelerate creative processes.
Conclusion: Choosing the Right Canvas
The ability to effortlessly change aspect ratios in DaVinci Resolve is a fundamental skill for any modern video editor. Whether you're aiming for the cinematic grandeur of widescreen, the familiar comfort of 16:9 for broadcast, or the immersive vertical experience of 9:16 for social media, Resolve provides the tools to achieve your vision. By understanding the historical context and the practical application within the software, you can ensure your content is presented in its most impactful format, captivating your audience on any platform.