Final Cut Pro offers a powerful and intuitive tool for video editors looking to elevate their projects: the Scene Removal Mask. This innovative feature allows for the automatic detection and removal of video backgrounds without the cumbersome necessity of a green screen. This capability opens up a world of creative possibilities, enabling editors to seamlessly replace existing backgrounds with entirely new imagery or even insert titles and graphics between the foreground subject and the new backdrop.
Understanding the Scene Removal Mask: How It Works
The Scene Removal Mask operates by intelligently identifying the foreground subject within a video clip and subsequently isolating it. This process effectively removes the original background, rendering it transparent. Once the background is transparent, editors have the flexibility to overlay any other video clip, image, or graphic as a new background, thus transforming the scene entirely. The underlying principle is to differentiate between the primary subject and its environment, allowing for precise manipulation of the visual composition.
Prerequisites for Optimal Results
To achieve the most professional and seamless results when utilizing the Scene Removal Mask in Final Cut Pro, several key factors should be considered during the video capture process. Adhering to these guidelines will significantly enhance the effectiveness of the automatic background removal.
Camera Stability and Static Backgrounds
For the Scene Removal Mask to function optimally, the video clip should ideally possess a static background. This means the camera should remain stationary throughout the recording. Using a tripod is highly recommended to eliminate any unwanted camera movement that could confuse the masking algorithm. A stable camera ensures that the background elements remain in consistent positions, making it easier for Final Cut Pro to distinguish them from the moving foreground subject.
Establishing a Clear Visual Reference
To aid the Scene Removal Mask in its analysis, it is beneficial for the clip to include a few extra frames at the beginning or end that clearly display the background without the foreground subject present. These "clean plates" provide the software with a direct reference point for the original background, allowing for a more accurate and robust removal process. This is particularly helpful in scenarios where the subject might partially obscure the background in some frames.
Lighting Conditions: The Key to Contrast
The quality of lighting during filming plays a crucial role in the success of background removal. For best results, shoot in a bright, evenly lit environment. Indoor shooting with diffused, consistent lighting is often preferred. Avoid harsh shadows or dramatic lighting changes, as these can create inconsistencies that the mask might misinterpret. Even illumination ensures good contrast between the subject and the background, which is paramount for the algorithm to differentiate them effectively.
Subject-Background Contrast: A Clear Distinction
A significant factor in achieving clean background removal is maintaining good contrast between the foreground subject and the background. This means avoiding situations where the subject and background share similar colors or textures. When there is a clear visual difference, the Scene Removal Mask can more easily identify the boundaries of the subject, leading to a more precise cut-out. For instance, a person wearing dark clothing against a light-colored wall will be easier to mask than a person wearing a similarly colored shirt against a patterned wallpaper.
Avoiding Moving Shadows and Maintaining Spacing
Strong moving shadows can be problematic for automatic masking tools. These shadows can be misinterpreted as part of the subject or as background elements that should be removed. It's also important to maintain a reasonable amount of space between the foreground subject and the background. If the subject is too close to background elements, especially those with intricate details, the mask might struggle to create a clean separation.
Simplicity of the Background
The complexity of the background itself can also impact the effectiveness of the Scene Removal Mask. Visually simple backgrounds, free from intricate patterns, structures like windows, or cluttered bookshelves, generally yield better results. The less detail and complexity in the background, the easier it is for the software to analyze and remove it accurately.
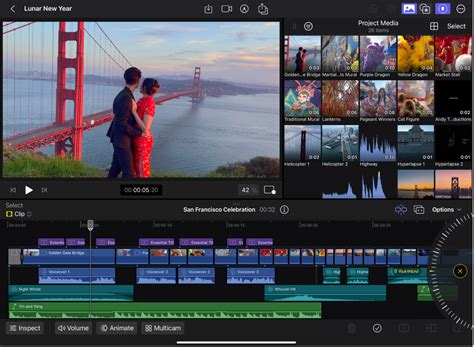
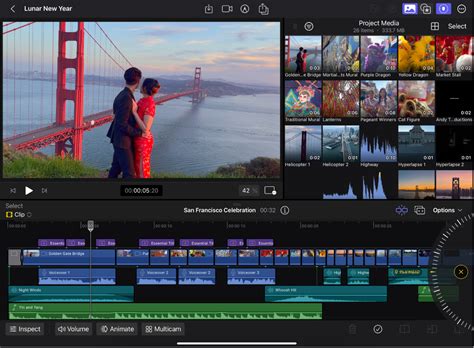
Applying the Scene Removal Mask to a Clip
Once you have prepared your footage according to the guidelines above, you can proceed to apply the Scene Removal Mask within Final Cut Pro. The process is designed to be straightforward and accessible, even for users new to advanced editing techniques.
Step-by-Step Application
- Open Final Cut Pro: Launch the Final Cut Pro app on your iPad.
- Access Your Project: Open the project you are currently working on.
- Select the Clip: In the timeline, tap on the specific video clip you wish to modify.
- Position the Playhead: Drag the playhead over the selected clip. This action will display the clip's current frame in the viewer, allowing you to see the effects of your adjustments in real-time.
- Navigate to Effects: Tap the effects icon in the toolbar. In the browser that appears, select "Effects" and then tap "Video" (if it's not already highlighted).
- Apply the Scene Removal Mask: You have several options to apply the mask:
- Drag and Drop: From the browser, locate the Scene Removal Mask thumbnail. Drag this thumbnail over the selected clip in the timeline. Release your finger when the clip becomes highlighted.
- Tap to Apply: In the browser, tap the Scene Removal Mask thumbnail. Then, tap "Apply" located beneath the browser.
- Via Inspector: With the clip selected, tap the inspector icon. Navigate to the "Masks and Keying" section and tap "Scene Removal Mask." If the "Effects" tab of the inspector is not visible, tap "Inspect" in the lower-left corner of the screen, tap the effects icon at the top of the inspector, and then select "Scene Removal Mask."
Choosing a Reference Frame
After applying the Scene Removal Mask, you will need to select a reference frame for the software to analyze. In the inspector, tap the icon next to "Reference" and choose one of the following options:
- First Frame: Final Cut Pro will use the very first frame of the clip to analyze and remove the background.
- First Frame + 1 Second: The analysis will be based on the frame located one second after the first frame.
- Last Frame - 1 Second: The software will use the frame one second before the last frame of the clip for analysis.
- Last Frame: The last frame of the clip will be used as the reference for background removal.
Once a reference frame is selected, the original background of your clip will be removed, and the foreground subject will be isolated against a transparent background. If there is no other clip positioned beneath the masked clip in the timeline, the viewer will display a black background.
Tip: For optimal playback performance, especially with more complex edits, it is highly recommended to render the clip after applying the Scene Removal Mask. This process pre-computes the effect, ensuring smoother playback.
Adding a New Background to Your Scene
With the foreground subject now isolated against a transparent background, the next logical step is to introduce a new background. This is where the creative potential of the Scene Removal Mask truly shines.
Integrating a New Background Clip
When you apply the Scene Removal Mask to a clip within the primary storyline, its background will appear black if no other media is present beneath it. To replace this black void with a new visual element, simply drag another clip from the browser to the timeline.
- Position the Playhead: Ensure the playhead is positioned over the masked clip in the timeline so you can see the effect in the viewer.
- Select Your Background Clip: Tap the media browser icon in the toolbar.
- Drag to the Timeline: Locate the clip you wish to use as your new background within the browser. Drag this clip from the browser directly to the timeline, placing it directly underneath the masked clip.
If the masked clip is part of the primary storyline, the newly added background clip will typically be attached as a connected clip. In the viewer, you will now see the foreground subject from your masked clip superimposed seamlessly over the imagery of the background clip you just added. This creates the illusion that the subject was filmed in front of this new environment, all without the need for a green screen.
Final Cut Pro Gets Easier Once You Learn This
Advanced Considerations and Troubleshooting
While the Scene Removal Mask is remarkably effective, certain scenarios might require additional adjustments or a deeper understanding of its capabilities.
Fine-Tuning the Mask
In some instances, the automatic mask might not be perfectly precise, leaving small artifacts or removing parts of the subject that should have been retained. Final Cut Pro offers tools to refine the mask. After applying the Scene Removal Mask, you can access further parameters within the inspector. These might include options to expand or contract the mask edges, feather the edges for a softer transition, or even manually adjust areas that the algorithm may have misinterpreted. Experimenting with these controls can help achieve a more polished result.
Dealing with Complex Motion
The Scene Removal Mask performs best with relatively simple foreground motion against a static background. Highly complex or erratic movements, such as rapid spinning or very dynamic gestures, can sometimes challenge the algorithm's ability to maintain a consistent separation. In such cases, consider simplifying the subject's movement if possible, or be prepared to spend more time fine-tuning the mask manually.
Layering and Compositing Beyond Simple Replacement
The ability to remove a background opens doors to sophisticated compositing. You can layer multiple elements: a foreground subject, a background video, and even text or graphics placed between them. For instance, imagine a presenter speaking, with their background removed. You could then place a graphic or a lower-third title directly behind them, appearing to float in the "space" where the original background was. This technique is invaluable for creating dynamic and engaging explainer videos, news segments, or promotional content.
Performance Considerations
As mentioned earlier, applying effects like the Scene Removal Mask can increase the processing demands on your system. Rendering your timeline, especially sections with these effects, is crucial for smooth playback and efficient export. For particularly demanding projects, consider optimizing your media beforehand or working with proxy files if your hardware struggles to keep up with the real-time processing.
Alternative Backgrounds and Creative Applications
The "background" doesn't have to be a static image or a simple video clip. You could use:
- Abstract Graphics: Create a visually interesting abstract background to make your subject pop.
- Animated Textures: Use animated backgrounds to add movement and dynamism to your scene.
- Other Video Clips: Place your subject in front of footage from an entirely different scene, creating a surreal or narrative effect.
- A Solid Color: Sometimes, a simple, solid color background can be the most effective way to highlight the subject.
The Scene Removal Mask in Final Cut Pro is a powerful tool that democratizes advanced visual effects, making sophisticated background manipulation accessible to a wider range of creators. By understanding its strengths, preparing your footage diligently, and utilizing the available refinement tools, you can unlock a new level of creativity in your video editing workflow.
Understanding the Underlying Technology (For More Advanced Users)
At its core, the Scene Removal Mask likely employs a combination of computer vision techniques, including object detection and segmentation algorithms. These algorithms are trained on vast datasets of images and videos to recognize patterns that define foreground subjects versus backgrounds. Key technologies involved could include:
- Deep Learning Models: Convolutional Neural Networks (CNNs) are frequently used for image segmentation tasks. These models learn to identify features and boundaries within an image or video frame.
- Optical Flow Analysis: For video, optical flow can help track the motion of pixels between frames. This aids in distinguishing between stationary background elements and moving foreground subjects.
- Edge Detection Algorithms: Traditional computer vision techniques like Canny edge detection might be used in conjunction with AI models to refine the precise outlines of the subject.
- Temporal Coherence: The software likely analyzes multiple frames to ensure the mask remains consistent over time, even with subtle changes in lighting or subject pose. It leverages the fact that video is a sequence of images, and the background is typically more static than the foreground.
The effectiveness of these algorithms is heavily dependent on the quality and characteristics of the input footage, reinforcing the importance of the "Best Practices" outlined earlier. The software isn't performing magic; it's applying sophisticated mathematical models to interpret visual data.
Expanding Creative Possibilities
The implications of easily removable backgrounds extend far beyond simple replacement. Consider these advanced applications:
Virtual Sets and Green Screen Replacement
While the tool is designed to avoid the need for a green screen, it can also be used to replace existing green screen footage with more sophisticated virtual sets that are dynamically generated or composited. This offers a more realistic and integrated look compared to traditional green screen workflows.
Product Demonstrations
Imagine showcasing a product on a plain background. With the Scene Removal Mask, you can isolate the product and place it against a variety of lifestyle backgrounds, studio shots, or even animated environments, making product demonstrations more visually appealing and versatile.
Educational Content
In educational videos, complex diagrams or real-world objects can be isolated and presented against simplified backgrounds, allowing students to focus on the essential information without visual distractions. This can enhance comprehension and retention.
Social Media Content and Short-Form Video
The speed and ease of use make the Scene Removal Mask ideal for creating engaging content for platforms like TikTok, Instagram Reels, or YouTube Shorts. Quick background changes can add humor, visual interest, or convey a specific mood or message rapidly.
Character Animation and Visual Effects
For independent filmmakers or animators, this tool can be a game-changer. It allows for easier integration of live-action elements into animated scenes or for creating visual effects where a character appears to move through different digital environments.
The Scene Removal Mask is more than just a background remover; it's a versatile compositing tool that empowers creators to manipulate visual reality within Final Cut Pro with unprecedented ease and flexibility. Mastering its application can significantly elevate the production value and creative scope of any video project.
tags: #final #cut #pro #remove #background