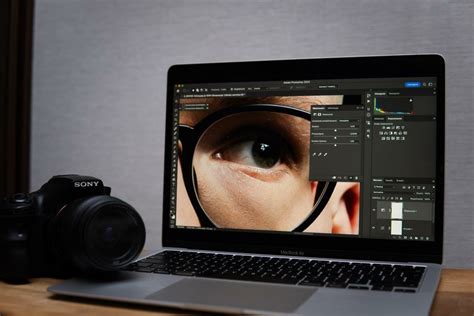
The world of digital photography offers boundless creative potential, and at the forefront of this evolution lies the art of digital backdrops. These versatile assets have become indispensable tools for photographers, from seasoned professionals to enthusiastic beginners, enabling the creation of captivating photo composites and enhancing existing imagery. With a vast selection of high-quality digital backgrounds and backdrops available, the possibilities for transforming ordinary photographs into extraordinary visual narratives are virtually limitless. This tutorial delves into the practical application of digital backdrops, overlays, and textures within Adobe Photoshop, providing a comprehensive guide to elevating your photographic work.
The Allure of Digital Backdrops: Why Embrace the Virtual Studio?
Digital backgrounds and textures offer a compelling blend of creative flexibility and practical advantages. For photographers, they represent a powerful means to achieve stunning visual outcomes without the inherent limitations and expenses associated with physical studio setups. The ability to alter the mood, color palette, or entire environment of an image post-capture is a significant draw. This includes the seamless integration of elements such as expansive skies, ethereal light effects, evocative painterly textures, lush botanical scenes, subtle grunge aesthetics, or even complete environmental settings that were not present during the original photo shoot.
Furthermore, digital backgrounds are a cornerstone of modern headshot photography. In this domain, where efficiency, unwavering consistency, and a polished professional appearance are paramount, digital assets provide a streamlined workflow. They allow for the creation of studio-quality results regardless of the shooting location or the availability of physical backdrops.
Creative Freedom and Practical Benefits
Photographers choose digital backgrounds and textures for a multitude of reasons, encompassing both artistic aspirations and practical necessities. These digital assets empower you to:
- Cultivate Visual Interest: Generate captivating visual appeal without the need to invest in and store numerous physical backdrops.
- Adapt to Space Constraints: Work effectively in confined studio spaces or on location where control over the environment is limited.
- Effortless Mood and Color Alteration: Modify the color tones and emotional resonance of an image without the logistical challenge of reshooting.
- Infuse Artistic Elements: Imbue portraits with painterly or fine art qualities, adding a unique stylistic signature.
- Ensure Consistent Results: Maintain a uniform and professional look across multiple photography sessions, which is particularly crucial for client work.
Digital backgrounds and textures are especially beneficial for photographers who prioritize a repeatable workflow that harmonizes creative exploration with operational efficiency. For those specializing in professional headshots, curated collections, such as the Ultimate Headshot Background Collection, offer studio-quality digital backdrops meticulously designed to complement and enhance realistic headshot photography.
Embarking on Your Digital Backdrop Journey in Photoshop
Before diving into the editing process, the initial step involves organizing your digital backgrounds, overlays, and textures. This ensures that these valuable assets are readily accessible when you need them, streamlining your workflow.
Importing Your Digital Assets
The process of bringing your chosen digital asset into your Photoshop project is straightforward. Open your primary image - the photograph you intend to enhance - in Photoshop. Subsequently, open the digital background, overlay, or texture file you wish to incorporate.
There are several user-friendly methods to add this asset to your existing image:
- Drag and Drop: Simply drag the digital asset file directly onto your open base image in Photoshop.
- Copy and Paste: Navigate to 'Edit' > 'Paste' after copying the digital asset.
- Place Embedded: Utilize 'File' > 'Place Embedded' to insert the asset while preserving its full resolution and allowing for independent scaling and transformation.
Upon insertion, the digital background, overlay, or texture will appear as a new layer positioned above your base image in the Layers panel. For those seeking ready-made artistic overlays perfect for portraits, fine art images, or imaginative composites, the Creative Photography Overlays Collection provides an extensive library of high-resolution effects that can be applied in mere seconds.
Seamless Integration: Adjusting Digital Backgrounds, Overlays, and Textures
Once your digital asset has been placed into your image, the critical next step is to blend it harmoniously with your original photograph. Photographers typically employ two primary methods to achieve this seamless integration.
Method 1: Mastering Opacity and Layer Masks
Reducing the opacity of a background, overlay, or texture layer allows it to blend more subtly with the image situated beneath it. By adjusting the opacity slider in the Layers panel, you can control the intensity of the effect, ensuring it feels natural and complements your base image rather than overpowering it.
For even finer control, the application of a layer mask to the digital asset is invaluable. A layer mask allows you to selectively reveal or conceal parts of the layer it's applied to. Using a soft brush, you can paint on the mask to remove the digital asset from specific areas, such as the subject's skin, clothing, or facial features, ensuring they remain crisp and unaffected. The significant advantage of layer masks lies in their non-destructive nature; any adjustments made via a layer mask can be refined or reversed at any point without permanently altering the underlying pixels.
To implement a layer mask:
- Ensure your digital background layer is actively selected in the Layers panel.
- Create a layer mask by navigating to 'Layer' > 'Layer Mask' > 'Reveal All'. Alternatively, click the layer mask icon (a rectangle with a circle inside) at the bottom of the Layers panel. This will add a white layer mask to your digital asset layer.
- Select the white layer mask thumbnail to make it active.
- Choose a black brush tool.
- Paint over the areas of your image where you wish to hide or remove the digital background, overlay, or texture.
- Adjust the softness, hardness, opacity, or flow of your brush to control the degree to which you reveal or hide the layer. The flexibility of layer masks means that if you make an error, you can simply switch your brush color back to white and paint over the mask to restore the hidden parts of the digital background.
Method 2: Harnessing the Power of Blend Modes
Blend modes fundamentally alter how a layer interacts with the layers positioned beneath it. By experimenting with different blend modes, you can achieve a wide array of sophisticated effects and seamlessly integrate your digital assets.
Several blend modes are particularly effective when working with digital backgrounds and textures:
- Multiply: Ideal for darkening layers and adding depth, it's often used to integrate textures or backgrounds that are lighter than the base image.
- Screen: This mode is perfect for lightening effects, useful for adding subtle glows or integrating brighter elements.
- Overlay: This mode creates contrast and richness by blending the layers in a way that preserves highlights and shadows, often resulting in a vibrant and impactful look.
- Soft Light: Similar to Overlay but with a gentler effect, Soft Light offers subtle tonal blending, perfect for adding a delicate mood or unifying color tones.
Experimenting with various blend modes is frequently the most expedient way to discover an effect that harmonizes beautifully with your image. In many instances, combining a chosen blend mode with a slightly reduced opacity setting yields the most natural and aesthetically pleasing results.
For instance, one of the digital overlays from the Peony Collection, when applied in 'Soft Light' mode at 50% opacity over an entire base image, can effectively alter the color tones, imparting a warmer mood and a more cohesive feeling to the photograph.
Photoshop Layer Masks Explained in 7 Minutes!
These techniques represent just a fraction of the ways you can leverage digital backgrounds, textures, and overlays to enhance your photography, digital art, or graphic design endeavors. The key to mastering these tools lies in experimentation; play with different methods to uncover what best suits your individual artistic vision and workflow.
Below is an illustrative example showcasing the final result: a maternity portrait enhanced with a peony flower digital background, seamlessly integrated to create a visually appealing composite.
The Art of Layering: Combining Backdrops, Overlays, and Textures
Digital backgrounds, overlays, and textures are not limited to independent use; they can be ingeniously layered together to achieve even more complex and compelling visual narratives. This layered approach allows for a sophisticated manipulation of environment, mood, and artistic style.
Consider this example of a layered workflow:
- A digital background can establish the foundational environment, setting the scene for your subject.
- A texture overlay can then be applied to unify the overall color palette and introduce a sense of depth and tactile quality.
- Finally, a subtle light overlay can be introduced to enhance the mood and direct the viewer's eye, adding an extra layer of storytelling.
These advanced layering techniques are widely employed in fine art portraiture, maternity photography, and styles that embrace a painterly editing aesthetic. Curated collections, such as the Ultimate Fine Art Editing Collection from The Imaginator Studio, offer a synergistic blend of painterly backgrounds, classic "old master" backdrops, and textures meticulously designed to work together seamlessly, simplifying the process of achieving sophisticated results. For a comprehensive understanding of how photographers effectively utilize textures across portrait, fine art, and creative photography genres, exploring resources on Photography Texture Overlays and Editing Techniques is highly recommended.
Strategic Application: Knowing When to Use Each Tool
Understanding the specific purpose of each digital asset type is crucial for maintaining intentionality and professionalism in your edits.
- Digital backgrounds are your go-to solution when you aim to completely replace or convincingly simulate an environment. They are perfect for placing subjects in entirely new settings.
- Texture overlays excel when your goal is to add depth, mood, or a distinct artistic character to an image without fundamentally altering the existing scene. They can add grit, softness, or a painterly feel.
- Overlays such as light leaks, atmospheric haze, or subtle motion blur effects are invaluable for enhancing storytelling and improving the visual flow of an image. They can add drama, romance, or a sense of movement.
By discerning the appropriate use case for each tool, you ensure that your editing decisions are purposeful and contribute to a cohesive and professional final image.
Cultivating Creative Mastery with Textures and Digital Assets
While this tutorial provides a solid foundation in practical techniques, many photographers find that deepening their skills through structured training yields the most significant advancements in their creative capabilities. Courses like "The Art of Texture" are specifically designed to guide photographers in creating, blending, and refining textures within Photoshop, employing painterly and fine art workflows. Such programs are particularly beneficial for individuals aspiring to develop a consistent and distinctive artistic style.
Digital backgrounds, overlays, and textures are not merely tools for correction or enhancement; they are gateways to unparalleled creative freedom, offering the ability to achieve complex artistic visions without compromising efficiency. By diligently mastering fundamental techniques such as precise placement, effective blending, and skillful masking, you can transform portraits, fine art images, and creative composites, all while retaining complete command over your unique visual style.
Ultimately, these powerful digital assets are not intended to supplant core photography skills. Instead, they serve to expand the horizons of what is creatively possible after the shutter has clicked, empowering photographers to push the boundaries of their art.