Creating a compelling visual representation of your artwork is paramount for artists looking to showcase their creations effectively. Whether you're preparing files for print-on-demand services, building an e-commerce presence on platforms like Etsy or Amazon Merch, or presenting concepts to clients, high-quality mockups are indispensable. Photoshop canvas templates offer a powerful solution, allowing artists to transform their digital designs into realistic, professional-looking product images. This guide delves into the intricacies of using these templates, from understanding bleed requirements to integrating logos and achieving a polished, retail-ready aesthetic.
Understanding Canvas Dimensions and Bleed Requirements
When preparing your artwork for printing on canvas, it's crucial to account for the physical dimensions of the canvas itself and the way the image will wrap around its edges. This is where the concept of "bleed" becomes essential. The bleed area ensures that no crucial parts of your design are cut off during the printing and wrapping process, and it also provides the image that will be visible on the sides and back of the canvas.
The required bleed amount varies depending on the thickness of the canvas. For a standard 0.75-inch thick canvas, an additional 1 inch of bleed is recommended on each side. This translates to a total increase of 2 inches in both height and width of your original image dimensions. For instance, if you are preparing an 8x12 inch image for a 0.75-inch thick canvas, your final file size, including the bleed, should be 10x14 inches.
For thicker canvases, specifically 1.50-inch thick canvases, a more substantial bleed is necessary. In this case, an extra 2 inches of bleed is recommended on each side, resulting in a total increase of 4 inches to both the height and width of your original image. Therefore, an 8x12 inch image intended for a 1.50-inch thick canvas would need to be prepared at a size of 12x16 inches.
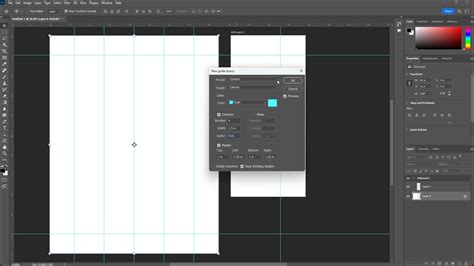
It's important to note that when resizing your image to accommodate these bleed requirements, you should always ensure the "Constrain Proportions" option is checked within Photoshop's Image Size settings. This critical step prevents your image from becoming "skewed" or distorted, maintaining its original aspect ratio. However, even with this setting enabled, the resized image may not perfectly match the exact dimensions of the template you are using. For example, if you are aiming for an 8x12 inch canvas and your original image, after resizing for bleed, becomes 10x15 inches, you will have flexibility in positioning the image within the template to select the desired portion for the front of the canvas.
Setting Up Your Image for Printing: Resolution and Resizing
The resolution of your image plays a pivotal role in the final print quality. For canvas printing, a resolution of 200 pixels per inch (PPI) is generally recommended. This ensures that the printed image will be sharp and detailed, without appearing pixelated or blurry.
Before proceeding to place your artwork into a Photoshop template, it's advisable to resize your image to the desired dimensions, incorporating the necessary bleed as discussed previously. Navigate to "Image" in the menu bar, then select "Image Size." Here, you can input your target dimensions and set the resolution to 200 PPI. Crucially, ensure that the "Constrain Proportions" box is checked. This will maintain the aspect ratio of your image, preventing any unwanted stretching or squashing. After setting your desired dimensions and resolution, click "OK."
HOW TO RESIZE AN IMAGE AND EXPORT FOR PRINTING IN PHOTOSHOP
Utilizing Photoshop Canvas Templates: Step-by-Step
Photoshop canvas templates are pre-designed files that simplify the process of creating professional mockups. These templates often come with guides and layers specifically designed to represent the front, sides, and back of a canvas print.
- Prepare Your Artwork: As outlined above, resize your image to include the appropriate bleed for your chosen canvas thickness and set the resolution to 200 PPI.
- Select Your Artwork: In Photoshop, go to the "Select" menu and choose "All." This will create a selection around your entire image.
- Copy Your Artwork: With your image selected, go to the "Edit" menu and select "Copy."
- Open the Canvas Template: Open the specific Photoshop (.psd) template file that corresponds to your desired canvas size and thickness (e.g., "8x12x.75.psd").
- Paste Your Artwork: Once the template is open, go to the "Edit" menu and select "Paste." Your artwork will appear within the template.
- Position Your Artwork: If your artwork's dimensions (after resizing for bleed) are larger than the template's front canvas area, you will have the flexibility to move it around. This allows you to select the most impactful part of your image to be displayed on the front of the canvas. For instance, if you are pasting a 10x15 inch image into an 8x12 inch template, you can shift the image to showcase a particular section.
- Understand the Guides: Within the template, you will notice guides, often indicated by different colors like green and pink. These guides are invaluable for visualizing where the edges of the canvas and the wrap-around sides and back will be located. Pay close attention to these to ensure your key design elements are not placed in areas that will be hidden or wrapped.
Enhancing Your Mockup: Optional Additions
Beyond simply placing your artwork, Photoshop canvas templates often provide options for further customization to create even more realistic and branded mockups.
Optional: Adding Your Logo
Many artists choose to incorporate their logo into their canvas mockups for branding purposes. Templates often include a dedicated layer or a designated area for logo placement. Simply select your logo file, copy it, and paste it into the appropriate layer within the template. You can then resize and position your logo as needed.
Optional: Customizing Backgrounds and Borders
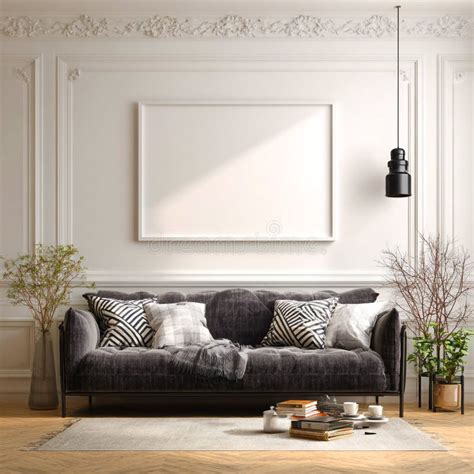
Some templates offer the flexibility to adjust the background or border colors. This can be particularly useful if you want to create a specific mood or ensure your artwork stands out against a complementary color. Look for layers named "Background Color" or similar. By selecting these layers and making them visible, you can often choose from a range of pre-set colors or even input custom hex codes to match your brand palette. This feature allows for a more tailored presentation, moving beyond a simple white background which, as many artists have found, doesn't effectively "sell a piece of art." Instead, a high-quality preview of that art hanging in a sunlit living room, or within a thoughtfully chosen interior, does.
Finalizing and Exporting Your Mockup
Once you are satisfied with the placement of your artwork, any added logos, and background adjustments, it's time to prepare your file for export.
- Hide Unnecessary Layers: Before flattening your image, it's crucial to hide any layers that are not part of the final desired output. This typically includes layers related to "Side/Back Borders" or any other guides that you don't want to appear in your final image.
- Flatten the Image: To combine all visible layers into a single image layer, go to the "Layer" menu and select "Flatten Image." You will likely receive a prompt asking if you wish to discard hidden layers; confirm by clicking "OK."
- Save as JPG: The final step is to save your flattened image in a suitable format for uploading. Go to "File" -> "Save As." Choose "JPG" as the file type. Give your file a descriptive name (e.g., "YourArtworkName_CanvasMockup.jpg").
Important Note on File Size: Ideally, the maximum file size for your final output should be 100MB to ensure smooth uploading during order creation on print-on-demand platforms or e-commerce sites. If your file exceeds this limit or is taking too long to upload, a common workaround is to place your order using a smaller thumbnail image and then mention in the "Special Instructions" that the full-resolution image will be sent separately, often via a file-sharing service like WeTransfer.
Beyond Basic Mockups: Advanced Presentation Strategies
While the core process of using Photoshop canvas templates is straightforward, understanding how to leverage them for maximum impact involves considering the broader context of art presentation.
The Power of Contextual Mockups
A digital file on a white background, while accurate, often fails to convey the true appeal of a piece of art. High-quality mockups that showcase your artwork in realistic settings are far more effective in attracting potential buyers. These templates are designed to account for subtle details that enhance realism, such as the slight reflection on a glass frame or the subtle shadow cast against a gallery wall. Whether your collection is geared towards a minimalist nursery, a cozy living room, or a dark, moody studio, these files help set a specific tone and allow customers to visualize the artwork in their own space.
Versatility for Different Platforms and Purposes
The utility of professional canvas mockups extends across various applications:
- E-commerce and Print-on-Demand (POD): Create stunning product listings for platforms like Etsy, Amazon Merch, Redbubble, and TeeSpring. Simply upload your design, select your desired wall art color, and download a marketplace-ready mockup image in seconds.
- Online Storefronts: Build a professional product catalog for your own Shopify, WooCommerce, or BigCommerce store. Consistent, high-quality wall art mockups lend an air of professionalism and credibility to your brand.
- Client Presentations: Present wall art design concepts to clients with photorealistic mockups that clearly illustrate your vision. This is invaluable for interior designers, art consultants, and graphic designers working on client projects.
- Portfolio and Brand Guidelines: Export high-resolution PNG files for inclusion in pitch decks, brand guidelines, and your professional portfolio. These polished visuals demonstrate your attention to detail and your ability to present your work effectively.
Exploring a Wide Range of Template Options
The availability of diverse mockup templates is a significant advantage for artists. Many services offer extensive libraries of hundreds of wall art mockup templates. These can often be filtered by various criteria, including color, style, viewing angle, and even the presence of models. This allows you to find the perfect template to complement your artwork and target audience.
Ease of Use and Customization
The process of using these templates is designed for efficiency and ease. Many online editors and Photoshop files feature "smart objects" and organized layers, providing a straightforward way to give your art a professional, retail-ready look. The typical workflow involves dragging and dropping your artwork, logo, or pattern onto the template. You can then export your finished mockup as a high-resolution PNG image, ready for immediate use across your various online presences and presentations.
Mockups that Sell: Beyond the Blank Canvas
The goal of a mockup is not just to display an image, but to make the art "sell itself." An impressive presentation, achievable in as little as five minutes with the right tools, can significantly impact sales. The best canvas mockups go beyond generic generators, offering a level of realism and aesthetic appeal that elevates your artwork.
Playing with Interior Design and Aesthetics
The background and surrounding environment of a canvas mockup are as crucial as the design itself. Templates that allow you to hang your artwork on the walls of diverse settings â from sophisticated living rooms and bustling art galleries to serene nurseries or industrial-chic spaces â provide context and inspiration. Even if you prefer a minimalist aesthetic, there are templates that cater to that preference, offering clean, uncluttered backdrops.
Framing and Presentation Styles
While some prefer their canvas designs presented in a minimal style, without frames, others find that frames enhance the elegance and captivation of their art. For those who appreciate this added touch, acrylic or wood canvas frame mockups are readily available. These options allow for greater flexibility in how your canvas prints are displayed.
Size and Orientation Variety
A comprehensive collection of canvas mockup PSDs should offer an extensive range of options regarding canvas size and orientation. This includes mini canvas templates, larger formats, and a variety of aspect ratios. The availability of PSDs in both vertical (portrait) and horizontal (landscape) orientations, as well as square canvas mockups, ensures that you can find a template that perfectly matches your artwork's dimensions and your presentation needs.
Multi-Panel Displays
For artists who wish to pitch more than one artwork, or present a cohesive series, split-panel canvas mockups are an invaluable resource. These templates can accommodate two, three, or even more canvas designs within a single PSD file, allowing for dynamic and artistic arrangements.
By mastering the use of Photoshop canvas templates, artists can significantly elevate their visual marketing, create professional product listings, and present their work with a polish that truly captures its essence and potential.