Photoshop offers a robust suite of tools for creating and manipulating vector paths, which are essential for defining outlines, creating shapes, and making precise selections. Among these, the Path Selection tool and the Direct Selection tool stand out as fundamental instruments for working with paths. Understanding their distinct functionalities and how to leverage them effectively can dramatically enhance your workflow and the quality of your graphic design and photo editing projects.
Understanding Path Selection vs. Direct Selection
The primary distinction between the Path Selection tool and the Direct Selection tool lies in their scope of operation. The Path Selection tool is designed to select entire paths or entire sub-paths. If you need to move a complete vector shape, manipulate a whole mask, or select a distinct path object within your document, this is the tool you'll reach for. Conversely, the Direct Selection tool offers a more granular level of control. It allows you to select and manipulate individual anchor points, segments, and direction lines that constitute a path. This precision is invaluable when fine-tuning curves, adjusting corners, or making subtle modifications to an existing shape.
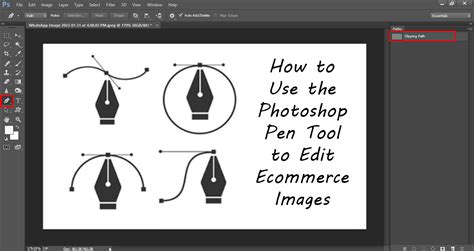
To select an entire path, use the Path Selection tool. To select segments of a path, such as anchor points and direction lines, use the Direct Selection tool. The Direct Selection tool can be used for modifying the shape of a path or shape. Both tools are in the shape of an arrow. Select the Direct Selection Tool on the Toolbar. If the path isn't visible, click on the outline of the shape. Click on the path. When I click and drag on the anchor point, it changes the shape of the path and therefore the Shape. The Direct Selection Tool allows you to edit a path and change its shape.
Selecting and Manipulating Paths
Working with multiple paths or specific points on a path requires understanding how to extend your selections. To select multiple paths, you can employ a click-and-drag marquee selection with the Path Selection tool or hold down the Shift key while clicking on each individual path. This allows for simultaneous manipulation of several vector elements.
When using the Direct Selection tool, selecting individual anchor points is straightforward. Simply click on an anchor point to select it. If anchor points are not readily visible on a path, clicking on the location where an anchor point would be will select it, even without first selecting the entire path. This is particularly useful for selecting corner points of shapes like rectangles. To select multiple anchor points with the Direct Selection tool, you can again use a click-and-drag marquee or hold the Shift key while clicking on each desired point. Clicking on an already selected anchor point with the Direct Selection tool will deselect it, while Shift-clicking on a selected anchor point will remove it from the current selection, offering flexible control over your active points.
You can tell if the anchor points have been made active because they will appear as filled squares, whereas the anchor points on a path that are not active are displayed with hollow squares. Once anchor points have been made active you can use the direct selection tool to reposition these, or use the keyboard arrow keys to nudge the anchor point positions.
Transforming Paths with Precision
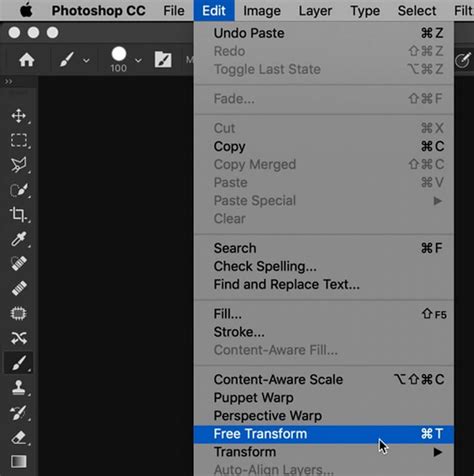
Once you have a path selected, Photoshop provides powerful tools for transforming it. Accessing the Free Transform Path command (Edit > Free Transform Path) brings up transform controls that allow for scaling, rotating, skewing, and distorting the path.
A key feature within Free Transform is the "constrain aspect ratio" option, represented by a link icon in the Options bar. Clicking this icon toggles the constraint on or off. Importantly, the state of this icon is sticky, meaning it remembers your last setting and will apply it consistently to subsequent transformations, regardless of the layer's content. To rotate a path, position your cursor outside the transformation handles until it becomes a double-headed arrow, then click and drag. The Reference Point, indicated by a crosshair in the Options bar, determines the center around which transformations occur. You can reposition this reference point to change the pivot for your transformations.
Duplicating paths is also a simple process. Hold down the Option key (on Mac) or Alt key (on Windows) and drag the selected path in the image area. This will create an exact copy of the path, allowing you to quickly build complex shapes or replicate elements.
Converting Paths to Selections and Vice Versa
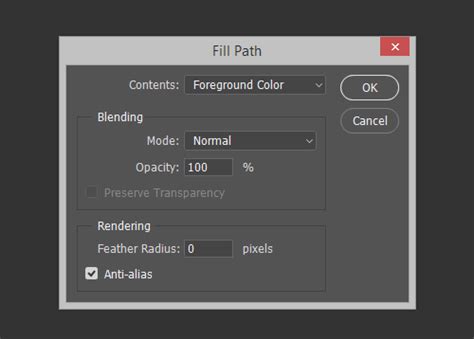
One of the most powerful uses of paths in Photoshop is their ability to be converted into selections. With any selected path active (whether it's a standalone path, part of a shape layer, or a vector mask), pressing Command + Return (on Mac) or Control + Enter (on Windows) will instantly convert that path into a pixel-based selection. This is an incredibly efficient way to create intricate selections that would be difficult or time-consuming to achieve with other selection tools.
Conversely, you can also create paths from existing selections. While this is not directly covered by the provided text in terms of a direct shortcut, the concept is fundamental to Photoshop's vector workflow. By using the "Make Work Path" command from the Paths panel, you can convert pixel-based selections into editable vector paths, which can then be refined using the Direct Selection tool.
Advanced Path Drawing Techniques
Photoshop's Pen tool offers several advanced features to streamline the path drawing process.
Repositioning Anchor Points While Drawing
When drawing with the Pen tool, if you've just clicked to set an anchor point and realize you need to move it before releasing the mouse, holding down the spacebar will allow you to reposition that anchor point. This is a crucial tip for maintaining accuracy as you draw. If you've already released the mouse, holding Command (Mac) | Control (Win) will temporarily toggle the Pen tool to the Direct Selection tool, enabling you to reposition the anchor point or its direction lines.
The Convert Point Tool
The Convert Point Tool, accessible by holding Option (Mac) | Alt (Win) over an anchor point while the Pen tool is active, allows you to seamlessly switch between curved and straight segments. Clicking on a curved anchor point with this tool will convert it into a corner point, while clicking and dragging on a corner point will transform it into a curved segment with adjustable direction handles.
Previewing Paths and Magnetic Drawing
To get a better visual understanding of the path you're creating, enable the "Rubber Band" option in the Pen tool's Options bar (by clicking the gear icon). This will display a preview of the path segment that will be drawn as you move your cursor.
The Magnetic Pen Option, available with the Freeform Pen tool, assists in creating paths by analyzing and snapping to edge areas in images. This can be particularly helpful for tracing objects with well-defined edges. When using the Freeform Pen tool with the Magnetic Option enabled, a double-click will close the path.
Photoshop Quick Tip: The Curvature Pen Tool (CC 2018 and later)
The Curvature Pen Tool
A more intuitive approach to path drawing is the Curvature Pen Tool. When adding anchor points with this tool, a single click creates a curved segment, while a double-click draws a straight segment. It's important to note that the initial segment created by the first two anchor points always appears as a straight line. To delete an anchor point, simply select it and press the Delete key.
The Paths Panel: Your Path Management Hub
The Paths panel is your central command center for all things related to vector paths. Here, you can view, select, and manage all the paths within your document. To select a path on the panel, click on its name. This panel is also where you can initiate actions like stroking a path or converting it to a selection.
Creating Fluid Painting Strokes with Paths
Paths can be used to create incredibly smooth and controlled painting strokes. The process involves first creating a path with the Pen tool, then setting up your desired painting tool (e.g., a brush with specific size, opacity, and color settings). From the Paths panel's fly-out menu, select "Stroke Path" and choose the desired tool. To simulate pressure sensitivity, which mimics the natural variation of a brushstroke, check the "Simulate Pressure" option before stroking. This creates a stroke that tapers at the beginning and end, mimicking the effect of varying brush pressure.
In the illustration below, the first path was stroked with a brush with the Simulate Pressure option unchecked, resulting in a uniform stroke. The second path, stroked with Simulate Pressure enabled, exhibits a more natural, varied thickness.
Customizing Path Appearance
For better visibility, especially on high-resolution monitors, you can customize the appearance of paths. Select the Pen tool, click the gear icon in the Options bar, and adjust the Thickness and Color of the path. These settings will also affect the appearance of paths for shape layers and vector masks. Further path display preferences, including options for guides and grids, can be found under Photoshop's Preferences > Guides, Grid, & Slices. To disable anti-aliasing for guides and paths, navigate to Preferences > Performance, click Advanced Settings, and uncheck the "Anti Alias Guides and Paths" option.
It's worth noting that since Photoshop CS6 (2012), Adobe has refined the behavior of dragging vector curves, resulting in more graceful reshaping of paths when manipulating line segments. This enhancement makes precise adjustments smoother and more intuitive.
Beyond Basic Selections: The Power of Paths
While Photoshop offers a multitude of selection methodsâfrom the Marquee and Magic Wand tools to Color Range selectionsâthe Pen tool and its associated path manipulation tools offer unparalleled precision for defining complex outlines. When faced with an object that has a slightly complicated outline or is photographed against a busy background, using the lasso tools might seem tempting, but can often be less efficient and yield less accurate results than drawing a pen path.
Mastering the art of drawing pen paths is not an immediate endeavor; it requires practice and dedication. However, the skill is undoubtedly worth acquiring. In the long run, using the Pen tool to draw a path that accurately defines an object's outline, especially in challenging scenarios, proves to be significantly easier and more effective. Once the path is created, converting it into a selection allows you to use it in the same way as any other selection, but with the benefit of its meticulously defined vector origins.
The Direct Selection Tool is used for moving or selecting paths or shapes. You can create and save a Tool Preset for any tool, which will remember settings that you choose for that tool, so you can quickly and easily select different presets and settings for a particular tool. You can reset any tool back to its default settings by right-clicking on the Tool Presets button and selecting Reset Tool.
A Stroke in Photoshop is an outline. You can adjust Stroke Width either with the dropdown size box and the slider, or directly, using the Scrubby Slider. Move the cursor over the word "Stroke" and watch for the cursor to change to a hand with arrows. Click and drag to the left to decrease, or to the right to increase the width of the stroke. The Stroke options are highlighted in green. Caps: Caps are the beginning and end of a line. More Options: You can also select the above 3 options in More Options. This works the same as in word processors. This option is only valid in Paragraph Text, where text is within a box. It does not apply to Point Text. Shapes interact in the same way as selections interact. Bring Shape Forward brings a shape forwards, so it is in front of the next shape. Send Shape Backward sends a shape backwards so it is behind other shapes.
As with the Path Selection Tool, while dragging, you only see where the path is being moved to. This time, I have clicked and dragged directly on the path itself. As with the Path Selection Tool, you can also change other options, such as Fill and Stroke. If you want to move the path without changing its shape, you will need the Path Selection Tool. You can either select that from the same button on the Toolbar, or press and hold Ctrl and click.