Photoshop dust brushes offer a versatile way to add realism, texture, and artistic flair to your digital creations. Whether you're aiming for a gritty, aged aesthetic, simulating atmospheric effects, or even adding a touch of sparkle, understanding how to install and effectively utilize these brushes is key. This comprehensive guide will walk you through the process, from basic installation methods to advanced techniques for creating your own custom dust effects.
Installing Your Photoshop Brush Sets
Acquiring Photoshop brushes is the first step, but getting them into your workflow can sometimes present challenges. Fortunately, there are several straightforward methods to install your .abr brush files.
Direct Installation Method
One of the simplest ways to install a brush set is by directly dragging and dropping the .abr file. Locate the downloaded .abr file on your computer. Then, open Adobe Photoshop. You can then drag the .abr file directly onto your Photoshop icon. Alternatively, you can open the Brushes panel (Window > Brushes) and drag the .abr file into this panel. Photoshop will automatically recognize and import the brush set, making it available for immediate use.
Library Integration
For users who prefer a more organized approach or work across multiple Adobe applications, integrating brushes into your Creative Cloud Library is an excellent option. This method is particularly useful if you find that direct installation methods are giving you trouble.
- Add the brush set to your library: You will typically find a link at the top of the story or within the download instructions to add the brush set to your library. Follow this link.
- Access the Libraries panel: In Photoshop, navigate to
Window > Libraries. This panel will display all the assets you've added to your Creative Cloud Libraries, including your newly installed brushes.
This method ensures your brushes are accessible from any device where you are logged into your Adobe Creative Cloud account, streamlining your creative process.
Exploring Grunge and Dust Brushes: Texture and Atmosphere
Once your brushes are installed, the real creative work begins. Photoshop offers a vast array of brushes, and grunge and dust varieties are particularly effective for adding depth and character. Experimenting with their various settings is crucial to unlocking their full potential.
Getting Grungy: Mastering Grunge Brushes
Grunge brushes are designed to impart a sense of age, wear, and texture. They can range from subtle imperfections to bold, distressed marks.
- Permanent Marker Effect: To achieve a permanent marker look, size the flat-edged grunge brushes down significantly. This allows for finer, more controlled lines that mimic the sharp edges of a marker tip.
- Stamp Effect and Texture Building: Conversely, when you size the same brush up, you can use it as a stamp. This is ideal for building up large areas of texture quickly. Sizing up not only increases the brush's coverage but also exposes the inherent grain of the brush tip, as well as any blank space within its design. This can create a more organic and less uniform texture.
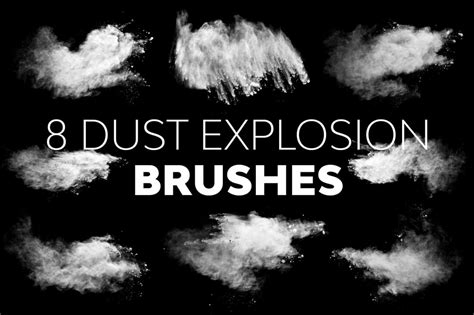
Time to Dust: Utilizing Dust Brushes
Dust brushes are invaluable for simulating atmospheric effects, creating subtle overlays, or even generating unique artistic patterns.
- Streaks and Chalk-like Effects: Similar to grunge brushes, sizing dust brushes down can produce interesting results. You can create delicate streaks, smoky wisps, or chalk-like smudges, adding a subtle layer of realism or artistic abstraction.
- Ink Splatters and Paper Grain: When sized up, dust brushes can produce spaced-out shapes that resemble ink splatters. This can be a dynamic way to add visual interest to a design. They can also mimic the natural grain of handmade paper, providing a tactile quality to your digital artwork.
Creating Your Own Dust Brushes in Photoshop
While pre-made brush sets are incredibly useful, creating your own custom dust brushes offers unparalleled control and allows you to tailor effects precisely to your needs. This process involves leveraging Photoshop's robust brush engine and image manipulation tools.
Step 1: Creating the Cloud Dust Photoshop Brush
This section focuses on generating the foundational elements for your dust brushes.
- Create a New File: Begin by opening Photoshop and creating a new document (
File > New). The dimensions are not critical at this stage, but a reasonably sized canvas (e.g., 1000x1000 pixels) will provide ample space for experimentation. - Establish the Base Texture:
- Select the Brush Tool (B).
- Choose a hard or soft round brush. The choice will influence the initial texture.
- Set the foreground color to black (
#000000). - Brush over the canvas to create an initial layer of black marks. This will form the basis of your dust cloud.
- Now, switch to a soft round brush.
- Set the foreground color to white (
#ffffff). - Brush over the black texture area you just created. This will start to reveal the underlying texture and create variations in density and form, mimicking the diffuse nature of dust clouds.
Step 2: Refining the Cloud Dust Brush
With the initial texture in place, you'll refine it to create a brush preset.
- Load the Texture as a Selection:
- Ensure your texture layer is selected.
- Go to
Select > Color Range. - In the Color Range dialog box, set
SelecttoHighlights. - Adjust
Fuzzinessto around20%andRangeto around190%. This will select the lighter areas of your texture. - Click
OK. This will create a selection based on the white areas of your brush strokes.
- Create a Layer Mask:
- With the selection active, go to
Layer > Layer Mask > Reveal Selection. This will isolate the selected (white) areas, effectively turning your texture into a mask.
- With the selection active, go to
- Prepare for Brush Definition:
- Select the Brush Tool (B) again.
- Choose a hard round brush.
- Set the foreground color to black (
#000000). - Brush over the texture area to expand or modify it as needed. This step allows for further refinement of the shape and density.
- Define the Brush Preset:
- Press
Control + Alt + Shift + E(Windows) orCommand + Option + Shift + E(Mac) to create a merged screenshot of all visible layers. This captures your refined texture. - Press
Control + I(Windows) orCommand + I(Mac) to invert the colors of this merged layer. This is crucial because Photoshop defines brushes based on black areas being opaque and white areas being transparent. - Now, go to
Edit > Define Brush Preset. Give your new brush a descriptive name, such as "CloudDustBrush". ClickOK.
- Press
Your custom cloud dust brush is now ready to use. You can access it by opening the Brush Settings panel (Window > Brush Settings), selecting your new brush, and making adjustments to its dynamics.
Step 3: Creating a Dust Particle Photoshop Brush
This process is similar to creating the cloud brush but focuses on generating individual particles.
- Start with a New Document: Create a new, smaller document (e.g., 500x500 pixels).
- Create Particle Shapes:
- Use the Brush Tool (B) with a soft round brush.
- Set the foreground color to white (
#ffffff). - Create small, irregular dots and smudges on the canvas. Vary their size and opacity to simulate individual dust particles. Think about how dust motes appear in light - they are not uniform.
- Refine and Select:
- Once you have a good scattering of particles, use the
Select > Color Rangemethod described previously, adjustingFuzzinessandRangeto capture the white particle shapes. - Apply a
Layer Mask(Layer > Layer Mask > Reveal Selection).
- Once you have a good scattering of particles, use the
- Invert and Define:
- Merge the visible layers (
Control-Alt-Shift-EorCommand-Option-Shift-E). - Invert the colors (
Control-IorCommand-I). - Define this as a new brush preset (
Edit > Define Brush Preset), naming it something like "DustParticleBrush".
- Merge the visible layers (
Step 4: Applying Dust Brushes to Your Photos
Now that you have created your custom dust brushes, you can apply them to enhance your photographs.
- Open Your Photo: Go to
File > Openand select the image you wish to work with. - Create a New Layer: Press
Control + Shift + N(Windows) orCommand + Shift + N(Mac) to create a new, empty layer above your photo. This ensures your dust effect is non-destructive. - Apply Dust Brushes:
- Select the Brush Tool (B).
- Choose one of your newly created dust brushes (e.g.,
Dust_Brush_1orDust_Brush_2as referred to in the source text, assuming these were created in previous steps). - Set the foreground color to white (
#ffffff) for a light dust effect, or black (#000000) for a darker, more shadowed effect. - Brush over your photo to apply the dust particles or clouds. Adjust brush size, opacity, and flow in the Options bar to control the intensity and distribution of the dust.
- Add Color and Blending:
- To add color to your dust, create a new Solid Color Fill Layer (
Layer > New Fill Layer > Solid Color). Name it appropriately (e.g., "Dust1Color"). Choose a color that complements your image, such as a soft grey, a subtle yellow for light-catching dust, or a muted blue. - Set the blending mode of this color fill layer to
Overlay,Soft Light, orScreento allow the dust texture to show through while tinting it. You can also adjust the opacity of this layer. - Repeat these steps to create multiple dust layers with different brushes, colors, and blending modes for a more complex and realistic effect. Experiment with using both
Dust_Brush_1andDust_Brush_2(or whatever you named your custom brushes).
- To add color to your dust, create a new Solid Color Fill Layer (
- Fine-Tuning: Feel free to use different brush settings, varying the size, spacing, and jitter of your brushes in the Brush Settings panel. Experiment with different layer blending modes and opacity levels for both the dust layers and the color fill layers.
Congratulations! You have successfully learned how to create and apply custom dust Photoshop brushes, transforming your images with atmospheric depth and unique textures.

Beyond Dust: Related Photoshop Techniques
While this tutorial focuses on dust brushes, the principles and techniques can be extended to other creative applications.
Enhancing Sparkles and Light Effects
The question of "how do I make my sparkles more sparkly?" is common when working with specialized brush sets. The same approach to brush creation and application can be used to create dazzling light effects. By carefully defining brush tips that mimic starbursts, glints, or bokeh, and then applying them with appropriate colors and blending modes (often Screen or Add), you can dramatically enhance the sparkle in your images. The key lies in understanding how different brush shapes interact with the underlying image and how blending modes can amplify light.
How to Create Sparkle Effect in Photoshop + Bonus Tip !!
Cleaning Up Imperfections: The Dust & Scratches Filter
Photoshop also provides tools for removing unwanted imperfections, such as dust and scratches. The Dust & Scratches filter (Filter > Noise > Dust & Scratches) can be a powerful tool for this purpose.
- Targeted Cleanup: This filter is particularly useful for cleaning up lint, dust, cat hair, or other small debris from clothing or specific areas of a photo. Even if the imperfections might not be noticeable at smaller print sizes, for large files, meticulous cleanup is often desired by photographers.
- Adjusting Settings: The key to using this filter effectively is to adjust its settings carefully. You want to remove the desired areas (dust, scratches) without over-blurring the rest of the image. This often involves using the
RadiusandThresholdsliders. A small radius with a higher threshold can target larger imperfections, while a lower threshold with a slightly higher radius might be needed for finer details. - Versatile Applications: The Dust & Scratches filter isn't limited to just literal dust. It can be applied to studio backgrounds with small wrinkles, or even outdoor settings like sidewalks with dirt or small debris, helping to smooth out unwanted textures.
Experimenting with Grunge and Texture Brushes
The techniques for using dust brushes can also be applied to grunge brushes. Experimenting with different brush sizes and pressures can yield a variety of effects:
- Sized Down: Flat-edged brushes, when sized down, can create the look of fine scratches, rough textures, or even stylized scribbles.
- Sized Up: Larger brush sizes can be used to create broad areas of distressed texture, simulating worn paint, concrete, or weathered surfaces. The exposed grain and blank space within larger brush stamps add to their organic feel.
Resources for Further Exploration
For those looking to expand their Photoshop brush collection or delve deeper into advanced techniques, numerous resources are available.
Pre-made Brush Sets
Many online platforms offer extensive libraries of Photoshop brushes, including specialized dust and grunge sets. These can save you time and provide a wide range of creative options. Some notable collections include:
- Envato Elements: Offers a vast subscription-based library of Photoshop brushes, including many high-quality dust brush options.
- Dedicated Brush Marketplaces: Numerous websites specialize in selling or offering free Photoshop brush packs, often categorized by style (e.g., grunge, texture, fantasy, nature).
When exploring these resources, look for high-resolution brushes that offer a good variety of shapes and densities to ensure maximum creative flexibility. Sets with 30, 60, or even more brushes can provide a comprehensive toolkit for various projects.
Advanced Compositing Techniques
Understanding how to combine different elements seamlessly is a cornerstone of advanced digital art. Resources that offer tutorials on compositing techniques, by experienced Photoshop experts, can provide invaluable insights into integrating brushes, textures, and photographic elements effectively. Learning about layer masks, blending modes, and color correction is essential for achieving professional-looking results.
By mastering the installation and application of Photoshop dust brushes, and by exploring the wealth of creative tools and resources available, you can significantly elevate the quality and artistic impact of your digital projects.