Collages are a powerful form of art and graphic design, allowing for the fusion of diverse elements into a new image that possesses a fresh meaning. Whether you aim to create a striking poster, an evocative record cover, or a deeply personal visual story, Adobe Photoshop offers a robust and flexible platform for bringing your collage visions to life. This tutorial will guide you through the process of creating a photo collage in Photoshop, from initial concept to final arrangement, enabling you to combine multiple images into a cohesive and impactful composite.
The Art and Purpose of Photo Collages
Before diving into the technical aspects, it's beneficial to understand why one might choose to create a collage. Collages are incredibly versatile, capable of enhancing almost any visual display. They can make social media profiles pop, transform personal projects into captivating narratives, and serve as a unique way to document special occasions. Unlike a single photograph, a collage can convey a theme or capture a moment with a depth and nuance that resonates emotionally with the viewer. Think of a wedding album: a collage can beautifully weave together the most cherished moments of the big day into a single, awe-inspiring frame. Similarly, collages make for fantastic holiday gifts and cards, offering a personalized touch that mass-produced items cannot replicate. The beauty of creating a collage in Photoshop lies in its relative speed and ease; it doesn't require hours of fiddling with complicated settings, making it accessible even for those new to the software.

Curating Your Visual Story: Selecting the Right Photos
The foundation of any compelling photo collage lies in the careful selection of images. This initial step, though seemingly straightforward, is critical as the chosen photos will form the very backbone of your project. Whether you're assembling a collage to document a travel adventure, showcase a photography portfolio, or embark on a personal creative endeavor, curating your images is essential for telling a cohesive and engaging visual story.
When selecting your photos, the first consideration should be the overarching theme and purpose of your collage. This will invariably dictate the style and specific images you choose. For instance, if you're creating a travel collage, your images should encapsulate the essence of the destination. Imagine a travel-themed collage based on a visit to Thailand's Muang Mai market. To capture the market's vibrant atmosphere, your selections should represent its multifaceted experience: bustling street scenes, individual stalls, vendors engaging with customers, and close-up shots of unique local products.
Variety within your image selection is another key factor in creating a visually appealing photo collage. A well-rounded collage should offer a range of perspectives, imbuing the overall design with depth and interest. This is best achieved by combining wide-angle shots, which provide a broad, sweeping view and set the context, with medium shots that focus on individual subjects, and close-up shots that highlight textures and details. By mixing these different types of shots, you allow the viewer to perceive the subject from multiple angles, preventing the collage from feeling flat or monotonous. For example, in a collage depicting the Muang Mai market, starting with a few wide-angle photos to establish the bustling marketplace and its scale sets the scene. Then, incorporating medium shots of individual vendors and their wares, followed by close-up details of spices or textiles, adds layers of visual information.
The interplay of colors and textures within your chosen images is also crucial for cohesion. The images should complement each other visually, not clash. Selecting photos that share a similar color palette, or at least harmonious tones, can create a seamless blend. Similarly, consider the textures present in your images. A collage incorporating varied textures - the smoothness of water, the roughness of brick, the softness of fabric - can introduce interesting visual contrast. However, an excess of conflicting textures might disrupt the overall cohesion. For a landscape collage, focusing on images with natural elements like mountains, water, and sky often works well, as these subjects tend to share similar color tones and textures, facilitating a more natural blend.
While the temptation to include as many photos as possible might be strong, remember that quality unequivocally trumps quantity in photo collages. An overabundance of images can clutter your design, create confusion, and detract from the intended visual message. Generally, five to seven photos strike an ideal balance, offering enough content to tell a compelling story without overwhelming the viewer. However, this number is flexible and can be adjusted based on the collage's scale and purpose. For a photography portfolio, for instance, fewer, higher-quality images might be more appropriate. It's vital to critically evaluate each selected image, ensuring it genuinely adds value to the composition. If you find yourself struggling to narrow down your choices, try laying out all your potential photos, either physically or within Photoshop, and assess how they interact. Ask yourself: Does this image enhance the others? Is the overall color scheme coherent?

Preparing Your Canvas: Document Setup and Image Resizing
With your images curated, the next critical step involves preparing your workspace within Photoshop. This includes setting up the new document that will serve as the canvas for your collage and resizing your individual images for optimal performance and output quality.
Setting Up Your Photoshop Document
Every Photoshop collage requires a background file where all your images will eventually be assembled. To create this, navigate to File > New from the top menu bar. This action will open the New Document window, where you can either select a preset document size or define a custom size tailored to your project's needs. Photoshop offers various default preset sizes for different purposes, including web, print, and other mediums.
Crucially, when creating your new document, ensure you adjust the resolution to match the intended use of your collage. Resolution dictates the level of detail your images will possess on various platforms. For web-based projects, a resolution of 72 PPI (pixels per inch) is typically sufficient. This lower resolution helps reduce file sizes, making images easier to upload and share online without compromising visual quality for digital viewing. However, if you plan to print your collage, you must maintain a high resolution to ensure the images appear sharp on physical media. The standard for print is a resolution of 300 PPI, which ensures your images have enough detail to avoid pixelation or blurriness when printed on paper, canvas, or other materials. For instance, if you're creating a horizontal collage for web use, you might opt for a horizontal A4 size (297mm x 210mm) at 72 PPI. However, depending on your project's output requirements, you may need to adjust this size. It's important to remember that the document's dimensions and resolution can always be adjusted later as you refine your design; you can crop, resize, or even change the canvas size.
Optimizing Images: The Importance of Resizing
Working with high-resolution images in Photoshop can significantly slow down your computer, especially when handling multiple large files. Resizing your images before you begin the layout process ensures that your Photoshop project runs smoothly, preventing lag and delays as you work.
Resolution, measured in pixels per inch (PPI), determines how much detail an image holds, directly impacting its sharpness and clarity. For printed works, maintaining a high resolution (300 PPI) is essential. However, for web images, 72 PPI is generally adequate. Before resizing, consider the final output of your collage. If it's for print, ensure your photos have a resolution of 300 PPI and are large enough to be printed without losing quality. It's often advisable to make the photos approximately 30% larger than their final intended size. This buffer provides flexibility for cropping, repositioning, or adjusting the image during the design process. For example, if you aim for a printed collage measuring 12x16 inches, resizing the images so their longest side is around 3600 pixels (300 PPI × 12 inches) ensures sharpness when printed. For a web-based collage, a size of 700 pixels on the longest side is typically sufficient at 72 PPI.
When resizing, it's crucial to maintain the original aspect ratio of your images to prevent distortion. Photoshop offers an easy way to do this by ensuring the "Constrain Proportions" checkbox is enabled in the Image Size dialog box.
To resize an image:
- Open the photo you want to resize in Photoshop.
- Navigate to
Image > Image Sizefrom the top menu. - In the Image Size window, ensure the "Constrain Proportions" box is checked.
- Enter the desired resolution (e.g., 300 PPI for print, 72 PPI for web).
- Adjust the pixel dimensions of the photo as needed.
By resizing your images efficiently, you not only improve Photoshop's performance but also ensure the best possible quality for your final collage.
How to Resize Images in Photoshop and keep the Quality! (2020)
Assembling Your Collage: Importing and Arranging Images
With your document set up and your images optimized, it's time to bring them into Photoshop and begin the creative process of arrangement.
Importing Your Images
Once your new document is created and properly sized, you're ready to import your images. This is an exciting phase where you start to visualize how your chosen photos will interact with each other. Locate the folder containing your resized images on your computer. Then, simply drag and drop these images directly onto the Photoshop canvas. Photoshop will automatically import each photo, creating a separate layer for every image.
By default, when you drag an image into Photoshop, it's converted into a Smart Object. This is a significant advantage as it allows for non-destructive editing. You can adjust, resize, rotate, skew, and transform your images as much as needed without permanently altering the original file. This means you can experiment extensively with the layout of your collage without worrying about losing image quality.
After importing, your images will appear on individual layers in the Layers Panel. To maintain order, it's a good practice to hide the layers of images that you haven't yet positioned on the canvas. If you need to perform pixel-level edits, such as removing an object or retouching a specific area, you will first need to rasterize the Smart Object. To do this, right-click on the image layer in the Layers Panel and select "Rasterize Layer." This converts the Smart Object into a regular layer, enabling you to use pixel-editing tools like the Clone Stamp Tool or Healing Brush Tool.
Arranging Your Images: The Creative Layout
Now that your images are in Photoshop, it's time to arrange them on the canvas. This is where your creative vision truly begins to materialize.
- Select the Move Tool: Choose the Move Tool (V) from the toolbar. This tool allows you to click and drag each image to its desired position on the canvas.
- Consider the Flow: As you arrange your photos, think about the visual flow - how the viewer's eye will naturally travel across the canvas. A well-arranged collage guides the viewer's eye through the images in a cohesive manner.
- Experiment with Placement: The arrangement of images can significantly impact the overall design. Sometimes, slightly overlapping images can create a more dynamic feel, while leaving space between them can result in a clean, organized look. Don't be afraid to experiment with different layouts. You might find that an image that initially seems out of place fits perfectly once you adjust its position or scale.
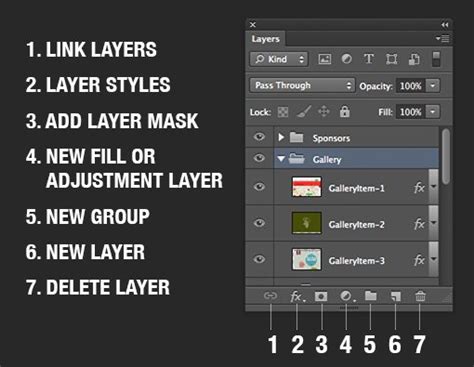
- Utilize Layer Groups: When working with multiple images, using layer groups can be extremely helpful for organization. You can group related image layers by selecting them in the Layers Panel and then clicking the "Create a New Group" icon at the bottom of the panel. This bundles selected layers into a single folder, allowing you to move, adjust, or duplicate them as a unit.
- Transformations: Beyond simple repositioning, you can further manipulate your images using Free Transform. Select a layer, then go to
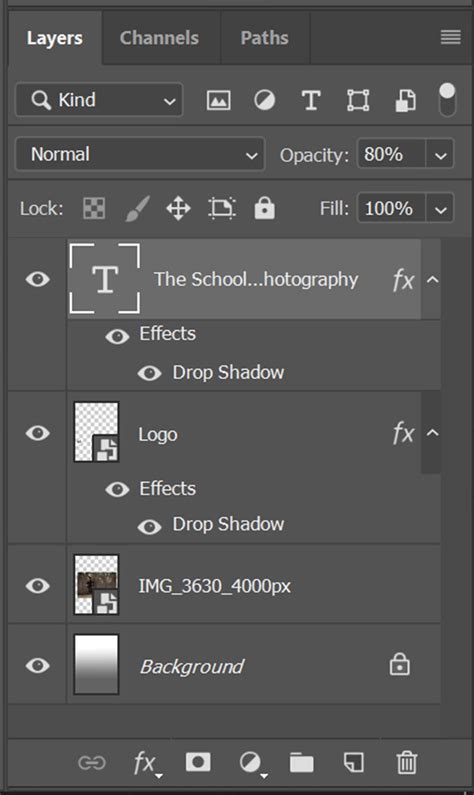
Edit > Free Transform(or use the shortcut Ctrl/Cmd+T). This allows you to resize, rotate, skew, and distort the image. Position your cursor just outside the bounding box to rotate, or drag the corner handles to resize. Remember to commit the transformation by clicking the checkmark in the options bar or pressing Enter/Return. - Adding Borders and Effects: To give your collage a polished look, consider adding borders. You can do this by selecting a photo layer, right-clicking, and choosing "Blending Options." Here, you can add strokes or other effects. If you like a particular border style, you can copy it to other layers by right-clicking the layer with the border and selecting "Copy Layer Style," then right-clicking on the target layers and choosing "Paste Layer Style."
- Seamless Blending: For a more integrated look, you can blend images. If you have a seam between two images, you can use the Gradient Tool. Select a soft, round black brush and, with a layer mask selected, paint over areas where you want to hide texture or create a smooth transition. This allows for a seamless blend between elements.
Enhancing Your Collage: Fine-Tuning and Finishing Touches
Once your primary layout is established, there are several techniques to refine your collage and add those final touches that elevate it from a collection of images to a cohesive piece of art.
Adjustments and Enhancements
- Tweak with Adjustment Layers: Beyond basic transformations, you can enhance individual images or the entire collage using adjustment layers. These are non-destructive and offer a wide range of controls for color balance, brightness, contrast, saturation, and more. Access them via
Layer > New Adjustment Layer. - Masking for Precision: Layer masks are invaluable for selectively revealing or hiding parts of a layer. This is particularly useful for blending images together or isolating specific elements. You can paint on a layer mask with black to hide, white to reveal, and shades of gray for semi-transparency.
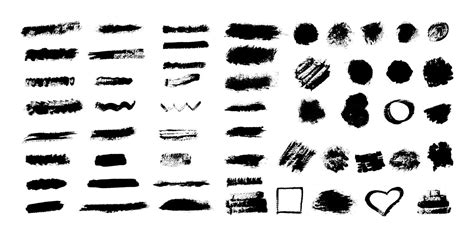
- Brushwork and Textures: For a more artistic approach, consider incorporating digital brushwork or textures. Photoshop offers a vast array of free brushes, from artistic strokes to realistic textures, which can be downloaded and installed. You can use these brushes to paint directly onto layers or layer masks, adding unique visual elements. For example, you might use a soft, round black brush with reduced opacity to subtly blend the edges of two images or to create atmospheric effects.
Adding Text and Other Elements
To further enhance the narrative or aesthetic of your collage, consider adding text or other graphic elements.
- Typography: The Type Tool (T) allows you to add text to your collage. You can choose from a wide range of fonts, adjust their size, color, and spacing, and even apply layer styles to make them stand out. Consider how the typography complements the overall theme and mood of your collage.
- Adobe Stock and Templates: For those seeking inspiration or a head start, Adobe Stock offers a plethora of free templates for collages. You can also find featured templates directly within Photoshop by navigating to
File > New > Photoand browsing the available options. These templates can provide a solid structural foundation upon which you can build your unique creation. - Superimposing and Effects: Superimposing images with overlays and other effects can create startling and unique results. Experiment with different blending modes in the Layers Panel (e.g., Multiply, Screen, Overlay) to see how layers interact. This can create depth, texture, and interesting visual combinations.
Saving Your Masterpiece
Once you are satisfied with your collage, it's time to save your work. The method of saving will depend on your intended use.
- For Print: If your collage is intended for printing, you'll want to save it in a high-resolution format that preserves quality. Select
File > Save a Copyand choose a format like TIFF or high-quality JPEG. Ensure the resolution and dimensions are appropriate for printing requirements. - For Web/Digital Use: For online sharing or digital display, saving as a JPEG or PNG is usually suitable. Select
File > Save a Copyand choose the desired format. For web use, you might also consider "Save for Web (Legacy)" for more control over file size and optimization.
By following these steps, you can transform a collection of individual photographs into a compelling and visually rich photo collage using the powerful tools available in Adobe Photoshop. The process is not only technically rewarding but also offers a deeply creative avenue for storytelling and artistic expression.