DaVinci Resolve is a powerful, all-in-one software solution that empowers video editors to elevate their projects from merely good to truly exceptional. It seamlessly integrates a suite of professional tools, encompassing video editing, intricate color correction, and advanced compositing, each meticulously organized into dedicated pages: Cut, Edit, Color, Fairlight, and Fusion. This tutorial delves into the fundamental DaVinci Resolve effects readily accessible within the Effects Library on the Edit page, guiding you through their application to enhance your video content.
The Effects Library: Your Gateway to Creative Enhancement
Within the Effects Library, users will discover a comprehensive array of tools, including all transitions (both video and audio), titles, generators, and specialized DaVinci Resolve effects. These are broadly categorized into three main sections: the Toolbox, OpenFX, and AudioFX.
Video Transitions: Seamlessly Connecting Your Clips
DaVinci Resolve offers a robust selection of standard video transitions, including essential options like dissolve, push, shapes, and wipes. For users of later Resolve editions, the Fusion transitions provide even greater creative potential, introducing dynamic effects such as camera shake, circles, and crash zoom to imbue your videos with added appeal.
The Cross Dissolve is typically designated as the standard transition, identifiable by a small red bar adjacent to its icon. Should you wish to designate a different transition as your default, the process is straightforward. Simply select your preferred transition, right-click on it, and choose "Set as Standard Transition." Furthermore, clicking the star icon next to any transition allows you to add it to your personal DaVinci effects favorites, providing quick access to your most-used effects.
Applying a transition between clips, or at the beginning or end of a single clip, involves a simple drag-and-drop action onto the desired point on the timeline. The length of the transition can then be precisely adjusted using the on-screen bars. For the efficient application of a transition to multiple clips simultaneously, you can select the relevant clips or edit points. Subsequently, navigate to the menu and choose "Timeline > Add Video Only Transition." Alternatively, the keyboard shortcut Option+T (or Alt+T on Windows) offers a faster method to add a video transition.
Audio Transitions and Effects: Enriching Your Soundscape
Complementing its extensive video effects library, DaVinci Resolve boasts rich audio capabilities. You can effortlessly incorporate sound effects and even stock music into your video projects. Audio manipulation can be handled on the Cut and Edit pages, while the Fairlight page is dedicated to more advanced audio workflows. This dedicated page includes a variety of audio transitions and a substantial collection of audio effects.
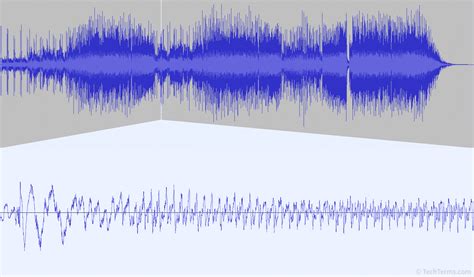
The application of audio effects mirrors that of video transitions and filters. To add an audio transition, drag it to your chosen clip or between two clips. Alternatively, you can select the edit point, right-click on the desired transition, and choose "Add to Selected Edit Points and Clips."
Titles and Text Effects: Bringing Your Words to Life
Adding visual flair to your titles and text is crucial for achieving a cohesive and polished final product. The Effects Library categorizes titles into three distinct groups: Titles, Fusion Titles, and Subtitles. The "Titles" category offers basic, un-animated text options, while "Fusion Titles" unlock the potential for animated text and sophisticated effects. Notably, the "Text+" option, found within the Titles category, provides animated text capabilities with several engaging effects.

A lightning bolt icon signifies a Fusion clip, indicating its support for motion blur, which can add a dynamic and cinematic quality to your text animations. To incorporate a title into your project, simply select the desired title from the library and drag and drop it onto the timeline at the appropriate position. Customization of the title's appearance and animation can be managed within the Inspector panel. For titles created using Text+ or Fusion Titles, any text animations can be further refined by accessing the "Settings" tab.
A critical distinction to remember is that standard titles are placed on a regular video track, whereas subtitles require a dedicated subtitle track for proper rendering and display.
Generators: Foundational Elements for Your Projects
Generators are indispensable utility elements commonly found in video editing software. They provide essential building blocks such as color bars, solid colors, and gradients, which can be used for various purposes, including background elements, color grading references, or placeholders. Working with generators is exceptionally intuitive; they can be dragged and dropped directly onto the timeline, much like other effects.
OpenFX: Advanced Effects and Third-Party Plugins
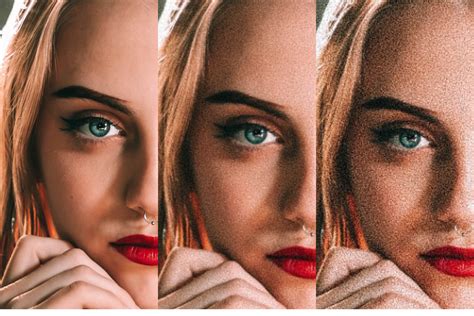
The OpenFX section is the repository for ResolveFX, DaVinci Resolve's proprietary collection of advanced effects, as well as third-party plugins that adhere to the OFX (Open Effects) format. It is important to note that many of the most powerful ResolveFX are exclusively available in the paid version of DaVinci Resolve Studio. Applying these effects in the free version will result in a watermark overlay on your rendered output. For professionals, the Studio version unlocks a wealth of features, including sophisticated retouching tools, realistic film grain, luminous glow effects, and versatile lens flares, all of which can significantly enhance the visual quality of your productions.
Fusion Composition and Adjustment Clips: Powerful Compositing and Layered Effects
Within the DaVinci Resolve effects structure, two particularly potent tools reside: the Adjustment Clip and the Fusion Composition.
Adjustment Clip: This utility allows you to apply a single effect or a series of effects to multiple clips positioned below it on the timeline. Its functionality is analogous to adjustment layers found in Adobe applications like Photoshop, Premiere Pro, and After Effects. To utilize an Adjustment Clip, drag it onto a video track situated above the clips you wish to affect. For instance, if your primary video clips are on Video Track 1, place the Adjustment Clip on Video Track 2. To apply your first effect, simply drag and drop it directly onto the Adjustment Clip. All subsequent adjustments and settings are then managed within the OpenFX Inspector. If an effect's parameters are not immediately visible, a double-click on the corresponding slider will expand them. This layered approach enables the stacking of multiple effects, facilitating the creation of complex and nuanced visual styles. Crucially, both ResolveFX and third-party OFX effects can be applied to an Adjustment Clip, offering immense flexibility.
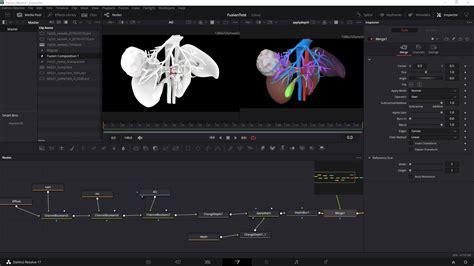
Fusion Composition: This feature provides a gateway to sophisticated motion graphics and compositing, akin to the capabilities of Adobe After Effects. When you select a Fusion Composition from the Effects Library and drag it onto your timeline, an empty Fusion container is created. To illustrate its functionality, consider creating a simple title. Drag a Fusion Composition onto Video Track 2 and ensure its duration matches that of your desired title sequence. The presence of three stars on the Adjustment Clip signifies that it is a Fusion clip. In our example, Video Track 2 is positioned above the main video clips. Navigating to the Fusion page reveals a MediaOut1 node, which serves as the output for your compositing work. To integrate a title, click on the "Title" option in the toolbar and then connect this title node to the MediaOut1 node. This process demonstrates the fundamental node-based workflow within Fusion.
Beyond Built-in Effects: Expanding Your Creative Arsenal
While DaVinci Resolve offers an extensive array of built-in effects, transitions, and titles, your creative possibilities are not limited to these native tools. A vast ecosystem of high-quality DaVinci effects packs exists, offering further avenues for enhancement and customization. Platforms like Motion Array provide vast libraries of effects, titles, and transitions, streamlining the creation of professional-looking videos with remarkable speed and efficiency. This allows creators to focus on their artistic vision rather than getting bogged down in the technical complexities of building every element from scratch.
How To Use Motion Array Templates in DaVinci Resolve | HTR
Streamlining Your Workflow with Third-Party Solutions
For those facing tight deadlines or seeking to accelerate their post-production process, relying solely on manual effect creation can be time-consuming. Third-party solutions are designed to address this by offering pre-made, high-quality assets that can be integrated seamlessly into your workflow.
Platforms such as MotionVFX provide a comprehensive universe of tools and assets directly accessible within your editing environment. Their mExtension software, designed for use with Final Cut Pro, allows users to browse, download, and apply plugins and elements without leaving the application. This integration ensures a fluid workflow, minimizing disruptions and maximizing creative output.
The adoption of these third-party tools is often facilitated by trial periods, allowing users to experience the full functionality before committing to a subscription. For instance, a 14-day free trial, complete with no watermarks and no render limits, enables users to test the compatibility and utility of these plugins within their existing workflow. This risk-free evaluation ensures that users can make informed decisions about enhancing their creative toolkit.
Subscription models typically offer access to a wide array of assets, with daily download limits designed to manage usage. Furthermore, these platforms often provide extensive tutorial collections, showcasing diverse use cases and helping users maximize the potential of their purchased or subscribed assets. The ability to upgrade subscriptions or adjust billing periods provides flexibility, catering to varying project needs and budget considerations.
The availability of free elements even before initiating a trial further demonstrates a commitment to user accessibility. This collection of overlays, effects, transitions, and typography offers a taste of the platform's offerings, ranging from subtle enhancements to bold, pop-culture-inspired designs.
Subscription management, including download history and account details, is typically centralized within a user's account portal or the dedicated extension software. This ensures transparency and control over downloaded assets and subscription status. The process of initiating a trial often requires a payment method upfront, a standard practice to facilitate a smooth transition to a paid subscription should the user choose to continue.
Ultimately, the goal of integrating these advanced effects and streamlined workflows is to empower creators. By removing technical barriers and providing access to a rich library of professional assets, editors can bring their creative visions to the screen with greater ease, speed, and artistic impact. The ability to achieve cinematic, high-quality results in minutes, rather than hours or days, fundamentally transforms the post-production process, allowing creativity to flow unhindered by tedious technicalities.