This comprehensive guide delves into the process of creating dynamic lightning animations within the Procreate app, drawing inspiration from a masterclass led by acclaimed graphic designer, illustrator, and animator Alex Kunchevsky. Designed for beginners, this tutorial will walk you through each stage, from initial concept to the final animated sequence, empowering you to "liven up your art" and expand your creative horizons. Even if you are new to Procreate or animation, the included resources and clear instructions will enable you to "master Procreate animation with ease."
The Power of Procreate Animation
In today's digital art landscape, animation adds a vital layer of dynamism and engagement to static creations. The ability to animate, especially within a user-friendly platform like Procreate, offers artists a powerful tool to express ideas, tell stories, and capture attention. This tutorial focuses on a specific, yet highly impactful, animation technique: the lightning strike. By learning this skill, you will "get a skill of creating Procreate animations to expand your creativity and level up your art." Alex Kunchevsky, an artist who has created artworks for prominent brands such as Google, ClickUp, and Discord, emphasizes the importance of developing an efficient process to "implement any creative idea he has in his head easy and fast." This masterclass aims to impart such a process for lightning animation.
Essential Tools and Resources for Lightning Animation
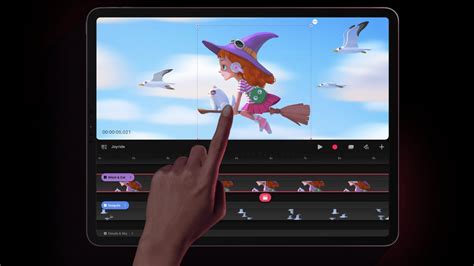
To embark on this creative journey, you will need an iPad and the Procreate app. The masterclass, as described, specifically provides essential assets to facilitate the learning process. These include a curated "Procreate brushset" and a "color palette" specifically designed for creating effective lightning animations. Having these pre-made resources eliminates the guesswork in selecting the right tools and colors, allowing you to focus on the animation techniques themselves. This ensures that even if you have "no prior experience using Procreate," you can still achieve impressive results. The inclusion of these "Procreate assets" is a significant advantage for beginners, streamlining the initial setup and allowing immediate immersion into the creative process.
Step 1: Drawing the Cloud - The Foundation of the Storm
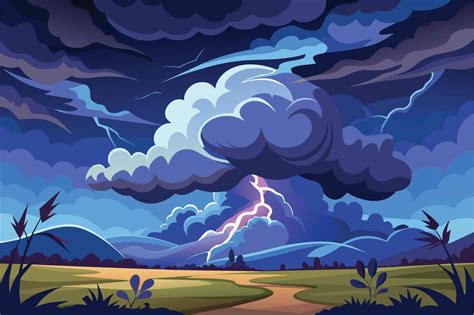
The genesis of any effective lightning animation lies in the creation of a believable stormy cloud. This initial stage is crucial for setting the mood and context for the lightning strike. Alex Kunchevsky's approach, as hinted at in the masterclass structure, begins with "Drawing the Cloud." This involves not just rendering a visual representation of a cloud, but also imbuing it with a sense of atmospheric weight and impending electrical discharge.
When drawing clouds for animation, consider their form, texture, and how they interact with light and shadow. For a stormy cloud, you'll want to use darker, more saturated colors and emphasize volumetric forms. Think about the edges of the cloud - are they soft and wispy, or sharp and turbulent? These details will become more apparent when animated. The provided color palette will be instrumental here, offering hues that evoke the dramatic atmosphere of a storm. Experiment with different Procreate brushes from the included set to achieve varied textures, from soft gradients to rough, energetic strokes that suggest the turbulent nature of storm clouds. The goal is to create a visual element that feels substantial and capable of generating powerful electrical phenomena.
Step 2: Preparing for Animation - Setting the Stage
Once the foundational elements of the cloud are in place, the next critical phase is "Preparing to Animating." This stage involves setting up your Procreate canvas and understanding the animation tools within the app. Procreate's animation assist feature is the engine that drives your animated creations.
To prepare for animation, you'll need to ensure your canvas is set up with an appropriate frame rate and dimensions. For lightning animation, a higher frame rate often leads to a smoother, more impactful visual. Procreate allows you to adjust the frames per second (FPS) within the Animation Assist settings. You'll also need to understand how layers function in animation. Each distinct element or movement in your animation typically resides on its own layer. For lightning, this might mean having separate layers for the cloud, the initial spark, the main strike, and any atmospheric effects like rain or ambient light changes.
The provided brushset will likely contain brushes optimized for creating quick, energetic lines and effects suitable for lightning. Familiarize yourself with these brushes and how they respond to pressure and speed. The "Color Palette" will also be essential in this phase, ensuring consistency and thematic coherence as you build your animation frame by frame. The masterclass emphasizes a "step-by-step" approach, and this preparation phase is where you lay the groundwork for efficient and effective animation. It’s about organizing your digital workspace and understanding the tools at your disposal before diving into the actual movement.
Step 3: Defining the Lightning Strike - The Moment of Impact
This is arguably the most exciting part: "Defining the Lightning Strike." This is where the raw energy of the storm is visually manifested. Creating a convincing lightning strike involves capturing its characteristic form, its rapid progression, and its intense luminosity.
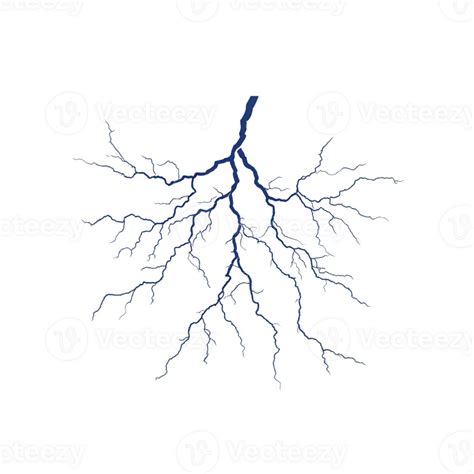
Lightning is not a static line; it's a dynamic, branching event. When defining the strike, think about its path: does it arc, does it fork, does it have a single, powerful core? Use the specialized Procreate brushes to create the initial spark. This might be a small, bright point of light that quickly expands. Then, build the main body of the strike. This often involves using bright, electric colors - blues, whites, and yellows - with sharp, energetic strokes. The included color palette will be invaluable for selecting these high-contrast, vibrant hues.
Consider the speed of the animation. Lightning is incredibly fast. In Procreate, this translates to placing key frames close together and using fewer frames for the actual strike to convey its instantaneous nature. You might also want to animate secondary effects, such as a bright flash that illuminates the cloud or a subtle rumble effect. The "Do it yourself" ethos of the masterclass means you will be actively engaged in defining these strikes, experimenting with different brush strokes and timings to achieve the desired visual impact. The goal is to make the strike feel powerful, sudden, and electrifying.
Step 4: Animating the Sequence - Bringing the Storm to Life
With the visual elements and the core strike defined, the next logical step is to bring the entire sequence to life. This involves animating the cloud's movement, the lightning's appearance and disappearance, and any associated atmospheric effects.
The "masterclass" structure suggests this is where the detailed, frame-by-frame work happens. You'll be using Procreate's Animation Assist to create a series of frames that depict the evolution of the storm. This might involve:
- Cloud Movement: Subtle shifts and rumbling of the cloud to suggest its mass and the energy within. This can be achieved by slightly moving or distorting the cloud layers between frames.
- Lightning Flash: Animating the sudden appearance, intense brightness, and rapid dissipation of the lightning strike. This often involves animating opacity and color intensity on dedicated layers.
- Ambient Light Changes: As the lightning flashes, the surrounding environment would momentarily brighten. You can simulate this by adjusting the overall brightness or color of the background or cloud layers during the strike.
- Secondary Effects: Consider adding elements like rain streaks, wind effects, or even a subtle rumble of thunder through sound design if you were to export this for video.
The "easy-to-follow" nature of the tutorial means breaking down this complex process into manageable steps. You'll learn how to duplicate frames, adjust timing, and refine the overall flow to create a convincing animation. The "lifetime access" to the "3h+ video lessons" implies that each of these sub-steps will be thoroughly explained and demonstrated by Alex Kunchevsky, allowing you to "follow every step of the process to create the animation yourself."
Understanding the Instructor's Expertise
Alex Kunchevsky's credentials lend significant weight to this masterclass. As a "graphic designer, illustrator and animator" with experience working for major brands like "Google, ClickUp and Discord," he brings a professional understanding of visual communication and aesthetic appeal. His development of a "own process in working with Procreate" that "enables him to implement any creative idea he has in his head easy and fast" is precisely what aspiring animators need. Furthermore, his passion for teaching, evidenced by having "already helped over 100,000 students across the world master digital illustration in Procreate," suggests a pedagogical approach that is both effective and engaging. This expertise ensures that the techniques taught are not only visually impressive but also grounded in practical, efficient workflows. The "Pricing" of "$149.00" for "Lifetime access" and "3h+ video lessons" positions this as a valuable investment for anyone serious about improving their Procreate animation skills. The promise of "beginner-friendly" lessons, even for those who have "never used Procreate app before," underscores the accessibility of this learning opportunity.
Advanced Considerations and Creative Exploration
While the masterclass is designed for beginners, the principles learned can be expanded upon for more complex animations. Consider the physics of lightning: the initial leader stroke, the return stroke, and subsequent strokes. Replicating these nuances can add a layer of realism. You could also explore different types of electrical discharges, such as St. Elmo's Fire or ball lightning, using the same foundational techniques.
Furthermore, think about the context of your animation. Is the lightning strike part of a larger narrative? Does it serve to build tension, create a dramatic reveal, or simply add visual flair? The way you animate the cloud, the intensity of the lightning, and any accompanying sound or atmospheric effects will all contribute to the overall mood and storytelling.
Experimentation with the provided brushset is key. Beyond the specific brushes for lightning, explore how other brushes can be used to create atmospheric effects like rain, wind, or even subtle light refractions. The color palette can be a starting point; don't be afraid to deviate slightly to match the specific mood you are trying to achieve, while maintaining thematic consistency.
The concept of "thinking step by step" and "thinking from first principles" is crucial here. Understand why certain techniques work. For instance, why are bright, high-contrast colors effective for lightning? Because they mimic the intense luminosity of real electrical discharges. Why is rapid frame progression important? Because it conveys the fleeting nature of the event. By understanding these underlying principles, you can adapt and innovate beyond the tutorial's specific instructions.
Lateral thinking can also be applied. What if the lightning strike was not from a cloud to the ground, but between two clouds? Or what if it was an artificial electrical discharge? These variations can lead to unique and interesting animations. Thinking about "second and third order implications" might involve considering how the animation will be used - will it be part of a short film, a looping GIF, or an interactive piece? This will influence your decisions regarding resolution, frame rate, and overall style.
Ultimately, the goal is to "liven up your art." The skills acquired in this masterclass are a stepping stone. By diligently following the steps, practicing with the provided assets, and engaging in creative exploration, you can transform your static illustrations into dynamic, captivating visual experiences. The knowledge gained from Alex Kunchevsky's structured approach, combined with your own creative input, will undoubtedly elevate your capabilities within Procreate and animation.