Photoshop actions are powerful tools that allow users to automate repetitive tasks, streamline editing processes, and apply complex sequences of commands with a single click. Whether you're a seasoned professional or an aspiring designer, understanding how to manage, export, and import these actions is crucial for maximizing efficiency and sharing your creative workflows across different machines or with collaborators. This guide delves into the intricacies of exporting Photoshop actions, ensuring your custom edits and automated processes are readily available wherever your creative journey takes you.
Understanding Photoshop Presets and Actions
Before diving into the export process, it's essential to grasp what Photoshop actions represent within the broader context of the software. Photoshop utilizes "presets" as a general term for collections of items and values that can be applied to artwork. This encompasses a wide range of customizable elements, including actions, brushes, keyboard shortcuts, and more. Settings, on the other hand, refer to the actual values currently loaded within Photoshop.
Actions, specifically, are defined as a series of tasks that can be played back on a single file or a batch of files. These tasks can include menu commands, panel options, tool actions, and virtually any step performed within Photoshop. The ability to save and load these presets, including actions, is fundamental to personalized workflow customization.
The Importance of Saving and Exporting Actions
The necessity of saving and exporting Photoshop actions stems from several key factors. Firstly, as mentioned, actions are a form of preset. While Photoshop's Creative Cloud desktop app often handles the migration of presets, settings, and preferences automatically when updating to a new version on the same computer, this process isn't always foolproof. Issues can arise, leading to the loss of custom actions. Furthermore, when transitioning to a new computer or working with an offline machine, manual export and import become indispensable.
The user community has frequently encountered situations where actions are not automatically migrated during version updates or when resetting preferences. This underscores the importance of a proactive approach to saving and backing up your valuable action sets. Losing meticulously crafted actions can represent a significant setback in productivity, especially for tasks that have been automated through these sequences.
Methods for Exporting Photoshop Actions
Photoshop offers several avenues for exporting and managing your actions. The most direct and recommended method involves utilizing the Actions panel's built-in functionality.
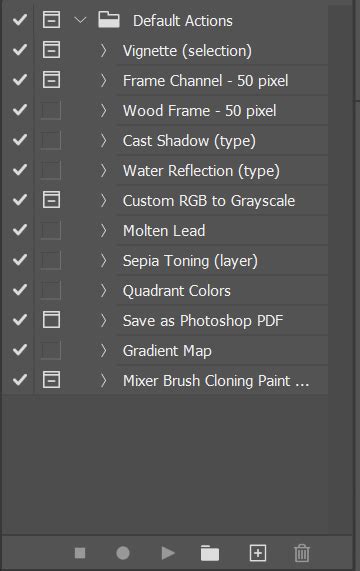
Method 1: Saving Action Sets from the Actions Panel
This is the primary and most straightforward way to export your custom actions. The key principle here is that Photoshop allows you to save individual actions only as part of an "action set," which is essentially a folder containing one or more actions.
Organize Your Actions: If you have individual actions that are not yet part of a set, it's highly recommended to create a new action set. Click the folder icon at the bottom of the Actions panel to create a new set. Give it a descriptive name, such as "My Custom Actions" or "Project Workflow Actions." Then, drag and drop the individual actions you wish to export into this newly created set. This ensures that all related actions are bundled together for easy management.
Select the Action Set: In the Actions panel, ensure that the action set you want to export is selected.
Access the Menu: Click on the menu icon, typically located in the top-right corner of the Actions panel. For older versions of Photoshop (CS2 and earlier), this might appear as a small right-pointing arrow.
Save Actions: From the dropdown menu, choose the "Save Actions" option.
Choose a Save Location: A "Save" dialog box will appear. Navigate to a location on your computer where you can easily find the saved file. Creating a dedicated folder, perhaps on your Desktop or in a cloud storage service, is a good practice. Name your action set file descriptively.
File Extension: Photoshop will automatically save the action set with a ".atn" file extension. This is the standard format for Photoshop action files and is compatible across both Windows and macOS. Ensure that this extension is present when saving.
Confirmation: Once saved, your action set is exported as a single ".atn" file. This file can now be transferred to another computer via a USB drive, network sharing, or cloud storage.
Method 2: Using the Presets Manager (Less Direct for Actions)
While the Presets Manager is a powerful tool for managing various Photoshop presets, its direct application for exporting individual actions is less common. However, it's worth noting its existence for managing broader preset collections.
Access Presets Manager: Navigate to
Edit > Presets > Presets Manager.Select Preset Type: From the "Preset Type" dropdown menu, you can select different categories of presets, such as Brushes, Gradients, Styles, etc. While "Actions" is not directly listed as a selectable type for bulk export in the same way as other presets, this dialog is crucial for managing other types of assets that might complement your actions.
Saving Sets: Within the Presets Manager, you can select specific presets (e.g., a set of brushes) and click "Save Set" to export them in their respective formats (e.g.,
.abrfor brushes). This reinforces the concept that actions are typically managed as sets.
Method 3: Manual File Location (Troubleshooting and Advanced Users)
In some instances, users might attempt to locate and copy action files directly from Photoshop's installation directories. While this can be a viable troubleshooting step, it's often less straightforward than using the built-in export functions, and the exact file paths can vary between Photoshop versions and operating systems.
Typical Locations:
- macOS: Applications/Adobe Photoshop [version]/Presets/Actions
- Windows: C:/Users/[Username]/AppData/Roaming/Adobe/Adobe Photoshop [version]/Presets/Actions
It's important to note that the
AppDatafolder on Windows is hidden by default. You may need to enable "Show hidden files, folders, and drives" in your File Explorer options to access it. Similarly, on macOS, the User Library folder is hidden, and you can access it by holding down the "Option" key while clicking the "Go" menu in Finder.However, as noted in user feedback, sometimes the actions might not appear in these default locations, especially if they are part of custom sets that were not saved in a manner that registers them here. This is why the direct "Save Actions" method from the panel is generally preferred.
Importing Photoshop Actions to Another Computer
Once you have successfully exported your action set as a .atn file, importing it onto another computer is a reciprocal process.
Open Photoshop: Launch Photoshop on the destination computer.
Open the Actions Panel: Navigate to
Window > Actionsto open the Actions panel.Access the Menu: Click on the menu icon in the top-right corner of the Actions panel.
Load Actions: Select the "Load Actions" option from the dropdown menu.
Locate and Select: A "Load" dialog box will appear. Navigate to the location where you saved your
.atnfile (e.g., on the USB drive or a shared folder). Select the.atnfile and click "Load."Confirmation: Your imported action set will appear in the Actions panel, often appearing as a folder with an arrow pointing down, indicating it's open. The individual actions within the set will be available for use.
Considerations and Best Practices
Always Save in Sets: As reiterated, Photoshop only allows saving actions in sets. This is a fundamental aspect of action management. Avoid placing your custom actions within Photoshop's default action sets, as this can lead to confusion and potential overwrites. Create and maintain your own distinct action sets.
Backup Regularly: Treat your custom actions as valuable assets. Regularly back them up to external storage devices (like external hard drives or cloud storage) in addition to exporting them for transfer. This safeguards against hardware failures, software corruption, or accidental deletions.
Test Your Actions: Before relying heavily on an action, especially after transferring it, it's prudent to run a test. Play back the action on a sample file to ensure it functions as expected and produces the desired results.
Understand Version Compatibility: While
.atnfiles are generally backward and forward compatible across many Photoshop versions, it's good practice to be aware of potential minor differences if you're working with very old or very new versions. However, for most common scenarios, compatibility is not an issue.Troubleshooting Empty Export/Import Windows: If the "Export/Import Presets" window appears empty, it often indicates that no compatible presets are currently selected or available for that operation. Reverting to the "Save Actions" and "Load Actions" methods from the Actions panel is usually the most reliable approach.
Adobe Support: While user communities are invaluable, direct Adobe support for Photoshop can be accessed through their official support channels, which may include forums, knowledge bases, and direct contact options depending on your Creative Cloud subscription. However, for common workflow tasks like exporting actions, community-driven solutions are often the most immediate and comprehensive.
How to create actions in photoshop
By diligently following these steps and adopting best practices, you can ensure that your hard-earned Photoshop actions are securely saved, easily transferable, and readily available to enhance your creative workflow across any machine. This empowers you to maintain consistency and efficiency in your design and editing processes, no matter where or how you work.