DaVinci Resolve 18 is a powerful video editing software that offers a comprehensive suite of tools for video enhancement, color correction, visual effects, and audio refinement. Among its many capabilities, the ability to export videos in various formats and configurations is of paramount importance for any creative professional or aspiring filmmaker. This article serves as an in-depth guide, walking you through the essential steps and considerations for exporting your projects from DaVinci Resolve 18, ensuring you achieve the highest quality output for your specific needs.
Understanding the Fundamentals of Video Exporting
Before diving into the specific steps within DaVinci Resolve, it's crucial to grasp the core concepts of video exporting. At its heart, exporting a video is the process of converting your edited project file into a standalone video file that can be played on various devices and shared across different platforms. The quality of this final output is significantly influenced by the settings you choose during the export process. Therefore, familiarizing yourself with the options available in DaVinci Resolve is indispensable for achieving professional results.
Video Formats and Codecs: The Building Blocks of Your Export
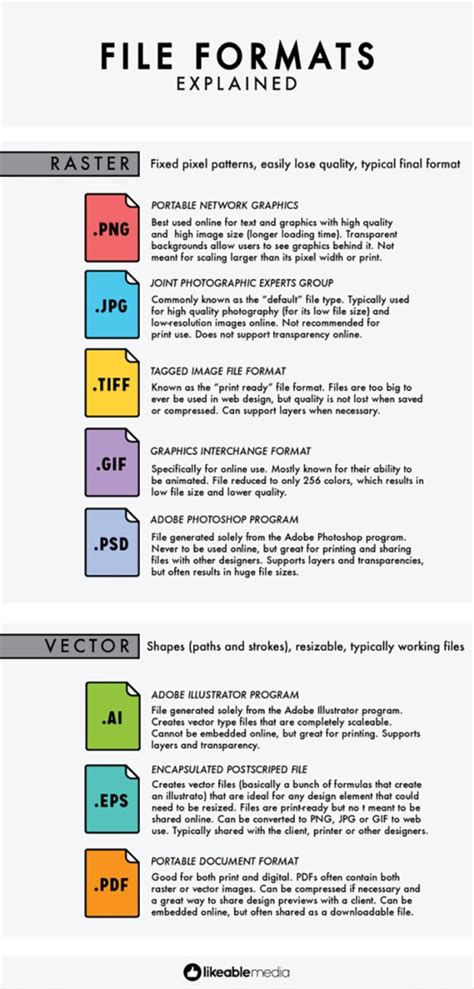
When you export a video, you'll encounter two primary choices: the file format and the codec. The file format dictates the container for your video data, determining the type of file that will be generated. Common examples include MP4, MOV, and AVI. Each format has its own characteristics regarding compatibility and features.
The codec, on the other hand, refers to the software or algorithm used for compressing and decompressing the video data. Codecs play a vital role in managing file size while striving to maintain visual integrity. Certain codecs are designed to achieve a significant reduction in file size without a noticeable compromise in video quality, making them ideal for efficient exporting.
Resolution and Frame Rate: Defining Your Video's Visual Fidelity
Two critical parameters that directly impact your video's visual quality and playback experience are resolution and frame rate.
Resolution refers to the total number of pixels that make up the image on your screen. Higher resolutions, such as 4K (3840 x 2160 pixels) or even 8K, contain more pixels, resulting in a sharper and more detailed image. Conversely, lower resolutions like 1080p (1920 x 1080 pixels) or 720p have fewer pixels. When exporting, it's generally best to match the resolution to your project's source footage or your intended delivery platform to avoid unnecessary scaling that can degrade quality.
Frame rate, measured in frames per second (fps), determines the smoothness of motion in your video. A higher frame rate, such as 60 fps, will result in smoother playback, particularly for fast-moving action or sports footage. Standard cinematic frame rates are often 24 fps, while many online platforms support 25, 30, 48, 50, and 60 fps. Choosing a frame rate that aligns with your project's needs and your target platform is essential. Be aware that higher frame rates can also lead to larger file sizes.
Exporting Your Project in DaVinci Resolve 18: A Step-by-Step Walkthrough
With a foundational understanding of video exporting principles, let's navigate the process within DaVinci Resolve 18.
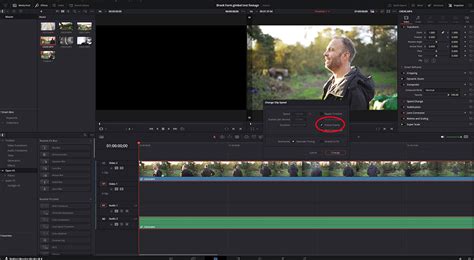
1. Accessing the Deliver Module
The first step is to navigate to the Deliver module. This module is visually represented by an icon depicting a rocket at the bottom of the DaVinci Resolve interface. This dedicated page is where all export operations are managed.

Upon entering the Deliver module, you'll notice a range of export presets conveniently located at the top. These presets are pre-configured for popular platforms like YouTube, and common formats such as H.264 and H.265. There are also options to export your project for seamless integration with other editing software like Final Cut Pro or Adobe Premiere Pro. For quick exports, utilizing these presets can be highly efficient.

2. Customizing Your Export Settings
For greater control over the final output, clicking the Custom export icon allows you to manually adjust all export parameters. This is where you'll define the specifics of your video file.
The initial steps involve assigning a clear and descriptive filename to your video and selecting the destination location on your computer where the exported file will be saved.

3. Defining the Export Range
You need to specify which portion of your project you wish to export. This is managed using In and Out markers on the timeline. You can set the start point by pressing the 'I' key and the end point by pressing the 'O' key. It's crucial to ensure these markers accurately encompass the desired segment, as any frames outside this range will not be included in the export. Zooming in on the timeline can help you precisely set these points.

4. Configuring Render Settings
Within the Render Settings panel, you have the option to export either an individual clip or multiple selected clips.
For the Format, the MP4 format is highly recommended for its broad compatibility and good balance between quality and file size, making it ideal for online distribution.
Regarding Resolution, it's imperative to ensure that the selected resolution matches the resolution of your project's timeline. Exporting at a lower resolution than your project will result in a loss of detail, while attempting to export at a higher resolution than your source material will not magically add detail and can sometimes lead to rendering errors or unexpected results. For most projects, sticking to the native resolution of your footage or a common standard like 4K or 1080p is advisable.
The frame rate should also ideally match the frame rate you've been using throughout your project to ensure smooth playback without dropped or duplicated frames.
When it comes to Codecs, H.264 is the most widely used and recognized codec, offering excellent compatibility across devices and platforms. H.265 (HEVC) is a more advanced codec that offers better compression efficiency, resulting in smaller file sizes for comparable quality, but it may have slightly less universal compatibility than H.264.

5. Exploring Advanced Settings
The Advanced Settings section offers further fine-tuning options. Activating the "Force Sizing to Highest Quality" option can sometimes help preserve detail during scaling processes, although its impact can vary.
For Audio Quality, selecting the AAC or PCM codec is generally recommended. The Sample Rate should typically be set to its maximum available value (e.g., 48 kHz) to ensure optimal audio fidelity.
6. Adding to the Render Queue
Once all your desired export settings have been configured, click "Add to Render Queue." This action places your project, with its specific settings, into a queue of tasks to be rendered.

If you require the absolute highest fidelity for archival purposes or professional workflows, consider using the MXF OP1A format with the DNxHR codec. Within DNxHR, you can choose between 444 12-bit or 444 10-bit types, offering uncompressed or near-uncompressed video data.
If you need to export multiple different versions of your video (e.g., different aspect ratios, resolutions, or with/without certain elements), you can modify the filename and settings and add each variation as a separate job to the render queue.
Understanding Video Compression and Bitrate
When preparing a video for export, a grasp of how video compression functions is essential. Video compression is the process of reducing the file size of a video without significantly compromising its quality. There are two primary methods:
- Lossless Compression: This method preserves the original video quality perfectly. However, the reduction in file size is typically not very significant.
- Lossy Compression: This method achieves a considerable reduction in file size by discarding some data that is deemed less perceptible to the human eye. This is the most common type of compression used for everyday video delivery.
In DaVinci Resolve 18, when exporting, you have the ability to choose your level of compression based on your requirements. For critical applications like film festivals or broadcast, opting for less aggressive compression might be advisable to preserve the highest possible quality.
Another vital aspect to consider is bitrate. Bitrate refers to the amount of data processed per unit of time in a video file, usually measured in kilobits per second (Kbps) or megabits per second (Mbps). The bitrate directly influences both the video quality and the file size. A higher bitrate generally results in better video quality because more data is used to represent each second of video, but it also leads to larger file sizes.
In DaVinci Resolve 18, you can adjust bitrate settings to strike a balance between video quality and file size. For instance, if you're exporting a video for streaming purposes, it may be preferable to decrease the bitrate so that the video loads and streams smoothly without excessive buffering.
Platform-Specific Export Settings
Different platforms and distribution channels often have specific requirements for video formats, resolution, and bitrate. For example, YouTube recommends using the MP4 format with H.264 or H.265 codecs and specific frame rates (24, 25, 30, 48, 50, or 60 fps). When exporting videos in DaVinci Resolve 18, you can customize your export settings to meet the exact specifications of your target platform.
Troubleshooting Common Export Issues
While DaVinci Resolve offers robust export capabilities, you might occasionally encounter issues. Here are some common problems and their potential solutions:
- Exported Video Has Poor Quality: This is often due to low export settings, such as a low resolution, frame rate, or bitrate. Double-check your settings in the Deliver module to ensure they are appropriate for your project.
- Exported Video is Too Large: Conversely, excessively high export settings (resolution, frame rate, or bitrate) can lead to very large file sizes. Try reducing these parameters if file size is a concern.
- Exported Video Doesn't Play Correctly or Shows Artifacts: This can be caused by an incompatible format or codec, corrupt media, outdated graphics drivers, or issues with the render cache. Try exporting in a different format or codec (e.g., from H.265 to H.264). Ensure your graphics card drivers are up to date. You might also consider generating optimized media for your timeline clips or disabling the render cache.
- Render Fails or Stops Halfway: This can occur due to corrupted media files within your timeline, complex effects that your system struggles to process, or insufficient disk space on your export drive. Identify the point where the render fails, check the media at that location, or simplify/disable effects temporarily. Ensure you have ample free space on your storage drive.
- Audio and Video are Out of Sync: This can be caused by corrupt audio clips, variable frame rate (VFR) footage (which DaVinci Resolve prefers to avoid), or outdated software. Re-import audio, convert VFR footage to a constant frame rate (CFR) using external tools, or ensure DaVinci Resolve is updated.
- No Sound in the Exported File: Verify that "Export Audio" is enabled in the Deliver settings. Check that your audio tracks are correctly configured and that you are using a supported audio codec. Ensure your project's audio settings align with your export choices.
Solving Render Issues in DaVinci Resolve | Tips & Methods for Smooth Rendering
Leveraging DaVinci Resolve's Advanced Export Features
DaVinci Resolve provides several advanced features to cater to specific export needs.
Project Archiving (.dra)
For collaboration or long-term storage, you might need to archive your entire project, including the project file and all associated media. This is achieved by going to File > Project Manager and selecting the option to archive the project. This will create a .dra file, which is a self-contained archive of your project.
Exporting Individual Clips
In some scenarios, you might need to export each clip on your timeline as a separate video file. This is particularly useful for delivering graded footage to clients or for specific VFX workflows. On the Deliver page, under the Render settings, select "Individual Clips." You can then choose to have the filename use the source name of the clip.
Exporting with Alpha Channels (Transparency)
To export videos with transparency (for use as overlays in other projects), you'll typically need to use the QuickTime format with codecs like DNxHR or ProRes, and ensure the alpha channel option is enabled within the advanced settings. This preserves the transparency information, allowing elements to be placed over other footage without a solid background.
Creating Custom Export Presets
DaVinci Resolve allows you to create and save your own custom export presets. After configuring your desired settings in the Deliver module, click the three-dot icon in the top-right corner of the settings tab and select "Save as New Preset." This allows you to quickly recall your preferred export configurations for future projects.
Enhancing Your Workflow with External Resources
While DaVinci Resolve is incredibly powerful, sometimes integrating with other resources can further streamline your workflow. For instance, platforms like Envato Elements offer a vast library of digital assets, including video templates, music, and sound effects, which can be invaluable for enriching your projects.
Conclusion
Exporting videos in DaVinci Resolve 18 is a multifaceted process that offers a high degree of control and flexibility. By understanding the fundamental concepts of video formats, codecs, resolution, and bitrate, and by carefully navigating the settings within the Deliver module, you can ensure your projects are exported with the desired quality and compatibility. Whether you're rendering for social media, professional broadcast, or archival purposes, mastering these export capabilities is a crucial step in the video production workflow. Practice and experimentation with the various settings will undoubtedly lead to enhanced video editing abilities and more polished final outputs.