Dealing with a photo where the color cast is so severe it appears unrecoverable can be a disheartening experience for any photographer. These unpleasant color shifts, often caused by specific lighting conditions, aging photographic materials, or incorrect camera white balance settings, can significantly detract from an otherwise compelling image. While many color casts are relatively straightforward to correct using Photoshop's built-in tools, those with an extreme intensity can present a unique challenge, often leading to unexpected and undesirable results when standard adjustment methods are pushed too far. This comprehensive guide delves into understanding and rectifying even the most stubborn color casts, employing a range of Photoshop techniques to restore your images to their intended brilliance.
Understanding the Nature of Color Casts
A color cast is essentially an unwanted color tint that overlays an image. This phenomenon can stem from various sources. For instance, shooting under the warm glow of incandescent lamps can introduce a yellow or orange cast, while certain LED lighting might impart a greenish hue. In the realm of digital photography, an incorrect white balance setting on the camera is a frequent culprit. Even different camera and lens combinations can subtly influence the inherent color rendition, leading to distinct casts in images. Historically, aging printed photographs are prone to developing yellow or orange discoloration due to the degradation of chemical components.
The user's journey highlights a common realization among photographers: the subtle, and sometimes not-so-subtle, differences in color casts introduced by various camera and lens pairings. What might appear as a minor green tint in surfing photography, for example, could be traced back to a specific piece of equipment. Recognizing these nuances is the first step towards effective color correction.
Initial Approaches: Levels and Curves
Photoshop offers fundamental tools like "Levels" and "Curves" that are often the first line of defense against color casts. The "Levels" adjustment allows for precise control over the tonal range and color balance of an image. By opening an existing "Levels" adjustment layer or creating a new one, users can directly manipulate the red, green, and blue channels. Adding red or cyan to the image affects the red channel, green or magenta influences the green channel, and blue or yellow impacts the blue channel.
A particularly useful feature within the "Levels" dialog box is the gray color picker. By double-clicking this picker and ensuring that the RGB values are equal, you can quickly sample a neutral gray area in your image. Photoshop will then attempt to neutralize the color cast based on this reference point.
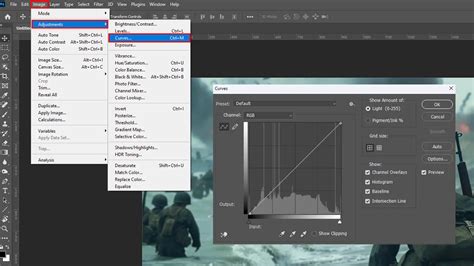
The "Adjust Color Curves" command offers a more sophisticated method for refining color tones. It empowers users to adjust highlights, midtones, and shadows independently within each color channel. The dialog box provides various tonal presets, allowing you to compare and select different styles from a list. The selection tools within "Adjust Color Curves" can be used to target specific areas for adjustment, and clicking "OK" applies the changes. For those who wish to revert, the "Reset" button is available.
However, when faced with extreme color casts, these standard adjustments can sometimes fall short or produce undesirable artifacts. Making drastic changes to a photo using "Levels" can lead to unexpected results, particularly in areas of smooth gradients or fine detail.
Advanced Techniques for Extreme Color Casts
When basic adjustments prove insufficient, more advanced strategies come into play. One such method involves duplicating the image layer and applying a "Blur" > "Average" filter. This effectively creates a uniform color layer representing the overall cast. Inverting this averaged layer and then changing its blending mode to "Color" with an adjusted opacity can help neutralize the dominant hue. This technique works by applying an overlay of the opposite color, effectively canceling out the unwanted cast.
Another powerful, albeit sometimes overlooked, tool is "Match Color" found under Image > Adjustments > Match Color. This command is especially useful when you have a reference image with accurate colors or when dealing with specific lighting scenarios. For instance, if you've captured a long exposure shot with an ND filter and also have a corresponding image without the filter, "Match Color" can help align their color profiles. When using "Match Color" without pressing the "Neutralize" option, it can leverage the color information from a source to adjust the target image.
A particularly innovative approach involves leveraging known neutral or white points within an image. If an object is known to be white, such as a white sock, you can use Photoshop's tools to force that specific pixel to become pure white. This often involves sampling the brightest pixel on the sock, adjusting its color saturation to zero to make it neutral gray, and then re-sampling the same pixel to set it as the new white point. This drastic change can significantly correct the overall color balance. This method is particularly effective when dealing with severely damaged or faded old photos where the original colors are obscured by strong yellow-orange casts. By identifying known colors like grass or sky, or neutral elements like white socks, you can use them as anchors for color correction.
The "Camera RAW Filter" also offers a simplified yet effective method. By navigating to Filter > Camera RAW Filter and selecting "Auto" from the "White Balance" dropdown menu, Photoshop can often intelligently correct the color cast. This is a quick way to get a good starting point, especially for images with a strong, uniform cast.
Leveraging Photoshop's Smart Tools and Actions
Photoshop continues to evolve, offering increasingly intelligent tools that can assist in complex editing tasks. For severe color casts, it's always advisable to explore these smarter tools to see how they can contribute to the restoration process. While Photoshop might not be able to completely fix an image with an extremely severe color cast on its own, these tools can make significant improvements and provide a much better foundation for further manual adjustments.
For those who frequently encounter color cast issues, creating or utilizing pre-made actions can be a significant time-saver. A free color correction action, for example, can streamline the process of applying a series of adjustments designed to tackle common color cast problems. These actions can be particularly helpful for beginners or for quickly processing batches of images with similar cast issues.
A Case Study: Restoring a Damaged Old Photo
The restoration of an old, severely damaged photograph serves as a prime example of tackling extreme color casts. Such images are often characterized by yellowing, fading, and a general lack of color, making it difficult to discern the original hues. The presence of a strong yellow-orange cast can be particularly deceptive.

The key to correcting such an image lies in identifying known colors and neutral elements. Looking for areas of grass, sky, or objects that should be white, like socks, provides crucial reference points. By using the white point adjustment technique described earlier - forcing a known white area to become pure white - significant progress can be made. This involves selecting the brightest pixel on an object like a white sock, making it neutral gray by dragging the saturation slider down, and then re-sampling that same pixel to set it as the new white point. This single action can dramatically alter the image's color balance, revealing details that were previously hidden by the cast.
The Unmesh Dinda Method: A Powerful Solution
The video by Unmesh Dinda from PiXimperfect offers a particularly insightful approach to fixing extreme color casts. Dinda addresses common techniques, explaining why they might falter when faced with severe casts, before introducing a remarkably simple yet effective Photoshop technique. His example of an image with an incredibly strong blue color cast demonstrates the power of this method, showing how it can rescue images that appear beyond repair. While the specifics of his preferred technique are best learned from his tutorial, the core principle often involves a nuanced application of color balancing tools that goes beyond simple sliders and presets.
Beyond Basic Corrections: Fine-Tuning and Nuance
It's important to remember that even with advanced techniques, achieving a perfect color balance might require further fine-tuning. After applying initial corrections, a critical review of the image is essential. Zoom in to examine different areas, paying attention to skin tones, skies, and other critical elements. Minor adjustments to color balance, saturation, and vibrance might be needed to achieve a natural and pleasing result.
The journey of mastering color correction in Photoshop is an ongoing one. Each image presents its own unique set of challenges, and the most effective approach often involves a combination of techniques. By understanding the underlying causes of color casts, familiarizing yourself with Photoshop's diverse toolkit, and practicing various methods, you can confidently tackle even the most extreme color casts and bring your photographs back to life.