Fabric textures are a fundamental element in visual design, offering depth, realism, and a tactile quality to digital creations and physical garments alike. This tutorial explores various methods for generating and applying fabric textures, focusing on creating realistic linen and cotton textures from scratch within Photoshop, and then delves into the art of overlaying fabrics for unique aesthetic effects in garment design. Whether you're a digital artist looking to enhance backgrounds or a fashion designer seeking innovative techniques, understanding these principles will significantly elevate your design capabilities.
Crafting Base Linen and Cotton Textures in Photoshop
Creating realistic fabric textures digitally can be achieved with surprising ease, even for complex patterns like linen and cotton. These techniques are invaluable for designers working on graphics related to craft, sewing, DIY, fashion, and home decorating.
The Subtle Weave of Linen Fabric
A base linen fabric texture is characterized by its simple yet effective crosshatch pattern. To create this in Photoshop, begin with a new document set to 3000 pixels by 3000 pixels at 72 resolution in RGB mode, eight-bit. Ensure your background layer is unlocked.
Set your foreground color to a warm, light beige, specifically F5D294. Press X to make this your background color, and then fill your layer with this color using Command + Delete (Mac) or Control + Backspace (PC).
Next, navigate to Filter > Blur > Motion Blur. Set the distance to 90 pixels. This value can be adjusted; a higher number creates a stronger blur, while a lower number results in a less pronounced effect. This step establishes the initial horizontal or vertical lines that will form the weave.
To introduce the perpendicular weave, duplicate your current layer. With the top layer selected, go to Edit > Transform > Rotate 90°. This will orient the motion blur lines vertically. To see how the textures interact, reduce the opacity of the top layer to approximately 50%. This layering creates the characteristic woven effect of linen. For a more pronounced texture, you can add noise to the layers. The variation in the crosshatching can be further controlled by adjusting the length of the motion blur for one or both layers.
The Textured Depth of Tweed or Knit Cotton
A more complex texture, akin to tweed or knit cotton, can be achieved with a few additional steps. Start by setting a base color for your fabric. For instance, a red hue can serve as the foundation. Fill your layer with this chosen color.
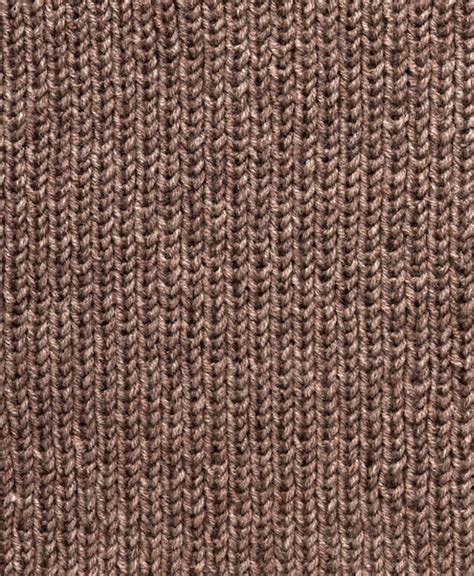
Next, set a darker shade for your secondary color. This darker tone will act as a shadow, adding depth. It should be dark but not pure black. Fill a new layer with this darker color using the same fill command.
Now, apply a Filter > Sketch > Halftone Pattern. For a subtle jersey knit, a size of one or two is recommended. However, for a thicker knit or tweed effect as demonstrated here, increase the size to four, keeping the contrast at five and the pattern type set to Line. Ensure Monochromatic is selected.
With the halftone pattern applied, you now have a textured layer. To create the woven effect, duplicate this layer. On one copy, go to Edit > Transform > Rotate 90° to create a vertical pattern, mimicking yarn. The second copy will remain horizontal.
Custom Halftone Tutorial in Adobe Photoshop and Illustrator | Graphic Design / OpArt
For the horizontal layer, apply a Motion Blur with a distance of five pixels. You can increase this to ten pixels if desired, but be careful not to lose the distinct yarn fiber effect. Once both layers are prepared, turn on the visibility of the top layer (the one with the halftone pattern). Select this top layer and reduce its opacity to 50%. This blending of the horizontal and vertical elements creates the knit texture, with the darker base color providing depth.
These textures can be further refined. For a finer jersey knit, use smaller settings in the Halftone Pattern filter. For a rougher tweed, you might adjust the motion blur distances or introduce additional noise filters.
Enhancing Designs with Fabric Texture Overlays
Beyond creating textures from scratch, layering different fabrics, both in digital design and physical textiles, offers a sophisticated way to add dimension and visual interest. This technique is reminiscent of vintage fashion and can transform simple prints into something truly captivating.
The Art of Sheer Overlays in Fashion
In physical garment design, the concept of overlaying fabrics, particularly sheer materials over bolder prints, creates a dreamy and multi-dimensional aesthetic. This was a popular technique in 1950s and early 1960s cocktail dresses.
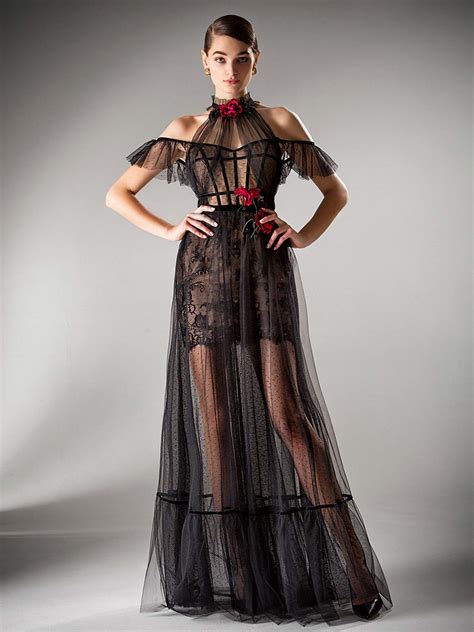
When layering a sheer fabric over a print, consider how the colors and textures will interact. A large, bold floral print works well as a base, as it can withstand the subtle muting effect of an overlay. Bright colors can be softened, while darker overlays can create a shadowed, more intense look. Suitable sheer fabrics include chiffon, light voiles, and organza. For knit garments, a fine mesh can serve a similar purpose.
The primary challenge in working with sheer fabrics lies in their handling during cutting and sewing. To mitigate this, applying a spray stabilizer before cutting can give the fabric more crispness and reduce shifting. When sewing, use a sharp needle (size 60/8 to 70/10) and high-quality polyester or silk thread. The goal is to create nearly invisible seams, with narrow French seams being an ideal choice.
Hems on sheer fabrics also require careful consideration. Wide hems can detract from the delicate nature of the fabric and obscure the print beneath. Narrow hem techniques, such as using a rolled hem presser foot or a serger's rolled hem feature, are highly recommended.
Digital Application of Texture Overlays
In digital design, the principles of layering can be emulated to achieve similar visual effects. After creating your base fabric textures in Photoshop, you can apply them to various elements. For instance, a linen texture can be applied to a background to give it a more tactile feel.
To apply a texture as a seamless pattern, you would typically define it as a pattern preset within Photoshop. This involves creating a tileable version of your texture and adding it to the Pattern panel. When applying this pattern to a layer, you can utilize blending modes such as Soft Light or Overlay to integrate it naturally with the underlying design. Adjusting the opacity of the texture layer allows for fine-tuning its intensity, ensuring it enhances rather than overwhelms the artwork.
Advanced Techniques for Fabric Textures
The creation and application of fabric textures extend to more complex patterns like plaid, and also involve sophisticated methods for ensuring seamless repetition and realistic rendering.
Crafting Plaid Fabric Textures
Plaid patterns offer a versatile aesthetic, ranging from rugged, masculine designs suitable for outdoor themes to light, airy patterns ideal for cooking or Americana styles. Creating a plaid texture in Photoshop can be achieved using gradients and filters.
Begin by creating a new document. Set your gradient tool to Noise with a Roughness of 75 percent. You can randomize colors or set specific hues for your gradient. Apply this gradient from left to right on one layer, and then from top to bottom on another layer.
To combine these into a single repeating pattern, duplicate and merge the layers (Shift+Option+Command+E on Mac, Shift+Alt+Ctrl+E on PC). Group the original layers and hide them. On the new flattened layer, access Blending Options and select Pattern Overlay. Adjust the scale of the pattern to achieve the desired look. This method allows for the creation of plaid patterns with unique color combinations and line weights.
Ensuring Seamless and Realistic Textures
For any texture to be effectively used in digital design, especially for backgrounds or repeating elements, it must be seamless. A seamless texture tiles without visible edges, creating an unbroken surface.
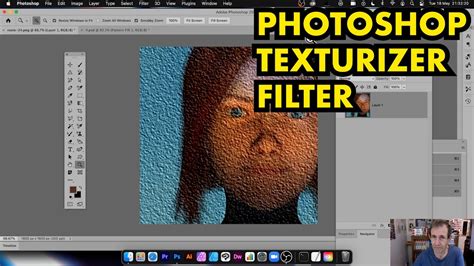
One method to create a realistic seamless fabric texture in Photoshop involves a straightforward three-step process. Start with a new file, for example, a 450x450 pixel canvas with a black background. Apply Filter > Texture > Texturizer. This filter allows you to apply a variety of textures to your image, which can then be further manipulated.
To ensure seamlessness, after applying filters and adjustments, you can use Photoshop's Offset filter (Filter > Other > Offset). This filter shifts the image by a specified number of pixels horizontally and vertically. By offsetting the image by half its width and height, any visible seams will appear in the center. You can then use tools like the Clone Stamp or Healing Brush to blend these seams, making the texture tileable.
Experimenting with Hue/Saturation adjustments can also alter the color of your fabric texture, allowing you to create variations for different design needs. The key is to combine filters, blending modes, and transformation tools to build up layers of detail that mimic the complexity of real-world fabrics. By mastering these techniques, designers can generate a rich library of custom fabric textures for any project.