The allure of the fisheye lens lies in its dramatic, expansive perspective, often characterized by a strong barrel distortion that spherizes the content and creates a distinctive circular blackout around the edges of the image. While dedicated fisheye lenses can be quite expensive, thankfully, Photoshop offers several powerful tools to convincingly replicate this unique visual style without requiring specialized hardware. This tutorial delves into various methods, from straightforward filter applications to more nuanced transformations, allowing you to achieve the iconic fisheye look with precision and creative control.
Understanding the Fisheye Aesthetic
The fisheye effect, fundamentally, is a form of extreme wide-angle photography. It captures an incredibly broad field of view, often exceeding 180 degrees. This expansive capture inherently leads to significant barrel distortion, where straight lines near the edges of the frame appear to curve outwards, creating a bulging, spherical appearance. This distortion is not merely a flaw; it's the defining characteristic that lends fisheye images their unique, often surreal, aesthetic. This effect was particularly prevalent and revered in album art from the mid to late 1960s, where the massive barrel distortion spherized the content and a large circular blackout framed the image.
Method 1: The Spherize Filter for a Direct Approach
One of the most direct ways to mimic the fisheye appearance in Photoshop is by utilizing the Spherize filter. This filter is designed to create a spherical distortion, making it a natural choice for this effect. However, it's important to note that the standard Spherize filter primarily affects a central, circular portion of the image.
Step-by-Step Guide to Using the Spherize Filter:
Open Your Image: Begin by opening the image you wish to transform in Photoshop. For this tutorial, we'll be using a sample image named
fisheye_before.jpg.Isolate the Main Area: To ensure the most interesting part of your image is centered and properly distorted, it's crucial to define the area that will be affected. Select the Crop tool. Holding down the Shift key while dragging will constrain your selection to a perfect square. Position this square selection over the main area of interest in your image. You can fine-tune the position of the selection by clicking inside it and using the arrow keys on your keyboard.
Duplicate the Layer: It's always good practice to work non-destructively. Go to Layer > Duplicate Layer to create a copy of your current layer. Make sure this duplicated layer is selected in the Layers palette.
Apply the Spherize Filter: With the duplicated layer selected, navigate to Filter > Distort > Spherize. In the Spherize dialog box, set the Amount slider to 100%. Ensure the Mode is set to Normal. Click OK. You will immediately see the spherical distortion applied to your image.
Expand the Canvas: To accommodate the curvature of the distortion and to create space for the characteristic black border, you'll need to enlarge the canvas. Go to Image > Resize > Canvas Size. In the Canvas Size dialog box, change the units to Percentage and increase both the Width and Height values from 100% to 140%. Set the Canvas Extension Color to Black and click OK.
Create the Circular Vignette: The next step is to create the soft black edge that frames the distorted image.
- Select the Elliptical Marquee tool (you might need to click and hold the Marquee tool to find it).
- With the duplicated layer still visible, click and drag from the top-left corner of your image down to the bottom-right corner, holding down the Shift key to ensure a perfect circle.
- Now, you need to invert this selection to affect the area outside the circle. Go to Select > Inverse.
- To create a softer edge for the vignette, expand the selection slightly. Go to Select > Modify > Expand and enter a value of 10 pixels.
- Create a new layer by going to Layer > New > Layer.
- With the new layer active and the expanded selection in place, go to Edit > Fill. In the Fill dialog box, choose Black as the fill color under Contents and click OK.
- Deselect everything by going to Select > Deselect.
Add Text (Optional): If you wish to add text, such as a band name, select the Text tool. Click on the image where you want the text to appear, type your desired text, and then use the cursor to select it. Adjust the font, size, and other text options as needed before confirming the change by clicking the green tick.
This method provides a quick and effective way to achieve a convincing fisheye effect, particularly useful for recreating the aesthetic of vintage album art.
How To Create Y2K Fisheye Effect In Photoshop
Method 2: The Warp Transformation for Greater Control
While the Spherize filter is effective, Photoshop's Warp transformation offers a more nuanced and controllable approach to achieving the fisheye effect. This method allows for greater flexibility in how the distortion is applied, enabling you to fine-tune the curvature and overall look.
Step-by-Step Guide to Using Warp Transformation:
Open and Select All: Open your image in Photoshop. Select the entire image by going to Select > All (or pressing Ctrl+A on Windows or Cmd+A on Mac).
Initiate Free Transform: Press Ctrl+T (Windows) or Cmd+T (Mac) to activate the Free Transform tool.
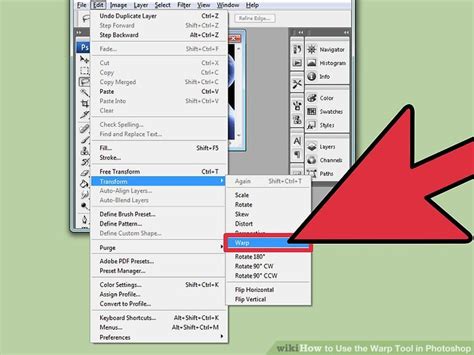
Apply Warp: Right-click within the bounding box of the Free Transform selection and choose Warp from the context menu.
Adjust the Warp Grid: You will now see a grid overlaying your image. You can manipulate this grid to create the distortion.
- Dragging Handles: Click and drag on the individual points or segments of the grid to bend and shape the image.
- Holding Shift: Holding the Shift key while dragging can help create more symmetrical distortions.
- Preset Warps: At the top of the Photoshop interface, you'll find a dropdown menu for Warp Presets. While there isn't a direct "Fisheye" preset, options like "Arc," "Bulge," or "Fish Eye" (if available in your version) can be a starting point. Experiment with these presets and then further refine the distortion by manipulating the grid.
Refining the Fisheye Look: To specifically mimic a fisheye lens:
- Focus on pulling the edges of the grid inwards and downwards, creating a convex curvature in the center.
- The goal is to simulate the outward bulge characteristic of a fisheye lens.
- You can add more grid points by right-clicking on the grid and selecting "Divide Warp Grid" to gain finer control over specific areas.
Commit the Transformation: Once you're satisfied with the distortion, press Enter (Windows) or Return (Mac) to commit the Warp transformation.
Adding the Black Border and Cropping: After applying the Warp, you'll likely need to add a black background and crop the image to achieve the full fisheye effect.
- You can then follow steps 5 and 6 from the Spherize filter method to expand the canvas and add a black vignette.
- Alternatively, you can create a new black layer beneath your distorted image layer and then use the Elliptical Marquee tool to create a circular selection on your image layer, feather it, and delete the outer areas to create the blackout.
The Warp transformation offers a more artistic and precise way to control the distortion, allowing for subtle variations and more customized results.
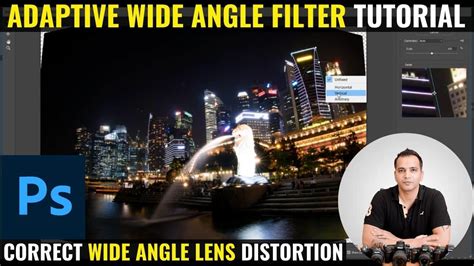
Method 3: The Adaptive Wide Angle Filter for Lens Correction and Distortion
While primarily designed for correcting lens distortions, Photoshop's Adaptive Wide Angle filter can also be leveraged to introduce or enhance wide-angle and fisheye effects, especially when dealing with images that already have some inherent distortion or when you want to simulate specific lens characteristics. This filter is particularly useful if you're working with panoramas or images taken with actual wide-angle lenses.
Understanding the Adaptive Wide Angle Filter:
This powerful filter intelligently detects the camera and lens model used to capture an image and applies lens characteristics to straighten distorted lines. It's excellent for correcting curved horizons or architectural lines that appear warped due to wide-angle lenses. However, by manipulating its settings, you can also achieve the opposite effect.
Key Settings and Their Application to Fisheye Effects:
- Camera and Lens Detection: The filter attempts to identify the camera and lens used. If it successfully detects them, it can automatically apply corrections based on known lens profiles. For simulating a fisheye, you might choose to override this automatic detection or manually input parameters.
- Focal Length: Manually specifying the focal length of the lens is crucial. To simulate a wide-angle or fisheye lens, you would input a very short focal length (e.g., values below 35mm for full-frame cameras, with fisheye lenses often in the 8-15mm range).
- Constraints: You can add multiple constraints by drawing lines on your image to indicate where straight lines should be. The filter then warps the image to make these lines straight. To introduce fisheye distortion, you would use constraints to guide the warping in a way that creates a bulging effect. For example, drawing a straight line near the edge and then warping it into a curve can contribute to the fisheye look. Holding Shift while dragging helps constrain lines vertically or horizontally.
- Cropping: The filter allows you to specify a value to determine how the final image is cropped. This is important because wide-angle corrections often leave blank areas. You can use this setting to crop these areas out or to maintain a specific aspect ratio.
- Scaling: The scale image option allows you to adjust the overall size of the image after the distortion is applied.
- 360-Degree Panoramas: This filter has specific capabilities for correcting 360-degree panoramas, which inherently involve extreme wide-angle perspectives.
Workflow with Adaptive Wide Angle:
- Convert to Smart Object: To allow for later editing of the filter settings, convert your image layer to a Smart Object (Layer > Smart Objects > Convert to Smart Object).
- Apply the Filter: Go to Filter > Adaptive Wide Angle.
- Adjust Settings:
- Manually set a very short Focal Length.
- Use the Constraint tools to guide the warping, focusing on creating outward curves. You might draw a horizontal line across the middle of the image and then warp it slightly upwards, and similarly for vertical lines.
- Experiment with the Aspect Ratio and Field of View sliders to further refine the distortion.
- Adjust the Cropping and Scaling to manage the resulting image dimensions.
- Evaluate and Refine: After applying the filter, examine the image. You may need to go back into the filter settings (since it's a Smart Object) to make further adjustments. You might also combine this with other methods, such as the Spherize filter or Warp, for a more pronounced effect.
The Adaptive Wide Angle filter is particularly useful when you want to achieve a more technically accurate simulation of lens distortion or when you are starting with an image that already exhibits some wide-angle characteristics.
Considerations for Realistic Fisheye Effects
Achieving a truly convincing fisheye effect involves more than just applying a filter. Several factors contribute to the realism and impact of the final image.
- Chromatic Aberration: Fisheye lenses, like many wide-angle lenses, can exhibit chromatic aberration â color fringing, particularly around high-contrast edges. If you're working with RAW images, using a RAW editor like Adobe Camera Raw before applying the fisheye effect is highly recommended. Camera Raw has excellent tools to reduce chromatic aberration. Even with JPEGs, you can often find tools within Photoshop to mitigate this.
- Center Focus: The most pronounced distortion typically occurs at the edges of the image, while the center remains relatively less distorted. Ensure your subject is placed strategically, often near the center, to take advantage of this.
- Blackout Area: The characteristic circular blackout around the edges is a key component. Ensure this area is sufficiently large and soft-edged to look natural. The canvas expansion and vignette steps in the Spherize method are crucial for this.
- Edge Detail: Pay attention to how details at the very edges of the image are stretched and distorted. Sometimes, elements that are too sharp or defined at the extreme edges can look artificial. Feathering or slightly blurring these areas can enhance realism.
- Image Content: Certain types of images lend themselves better to the fisheye effect. Landscapes, architectural shots (where the distortion can create dramatic perspectives), and abstract or surreal compositions often benefit greatly from this effect.
Conclusion: Creative Freedom in Distortion
While dedicated fisheye lenses offer a direct path to their unique perspective, Photoshop provides a versatile toolkit for replicating this effect. Whether you opt for the straightforward Spherize filter, the more controllable Warp transformation, or leverage the advanced capabilities of the Adaptive Wide Angle filter, you can achieve compelling fisheye looks. By understanding the principles of fisheye distortion and employing these Photoshop techniques with careful attention to detail, you can unlock a world of creative possibilities, transforming ordinary images into visually striking compositions. The ability to simulate such a specialized lens effect within a general-purpose image editor underscores the power and flexibility of modern digital photography tools.