Overlaying textures onto an image is a powerful technique that can imbue your visuals with a tangible, physical quality. Whether your goal is to evoke the passage of time with a worn grunge texture or to replicate the intricate, patterned appearance of a painter’s canvas, Photoshop offers a versatile toolkit to achieve these effects. This guide delves into various methods for applying and creating textures, from simple overlay techniques to sophisticated custom brush creation, providing insights for both novice and experienced users.
Finding and Applying Textures from Adobe Stock
A fantastic starting point for acquiring high-quality textures is Adobe Stock. You can browse their extensive selection of free, high-resolution texture images to find the perfect element for your project. Once you've selected a texture, the process of applying it to your Photoshop project is straightforward.
Begin by opening the Photoshop project you wish to enhance, or initiate a new one by adding your desired image as a background layer. Next, access the Libraries panel. Select the texture overlay you downloaded from Adobe Stock. To integrate it into your project, create a new layer and ensure it is positioned directly above your background layer in the Layers panel. At this stage, the texture layer might completely obscure your background image. However, this is a temporary situation that will be resolved by selecting an appropriate blending mode.
The Art of Blending Modes for Texture Application
The true magic of texture application in Photoshop lies in the judicious use of Blending Modes. With your texture layer selected, navigate to the Blending Modes drop-down menu. A highly effective mode for many texture applications is "Overlay." This mode interacts with the underlying layers to create a more integrated and visually rich result.
The "Overlay" blend mode works by increasing or decreasing the saturation and contrast of the underlying image, depending on the blend color. If the blend color (in this case, your texture) is lighter than 50% gray, the image is lightened, akin to a dodging effect. Conversely, if the blend color is darker than 50% gray, the image is darkened, similar to a burning effect. In simpler terms, it intelligently blends the light and dark areas of your texture onto your background image, even harmonizing with existing lighting on your subject.
While "Overlay" is a popular choice, other blending modes can yield different, yet equally compelling, results. For instance, the "Soft Light" blend mode offers a gentler, more subtle tonal blending, while "Multiply" can be used to darken and add depth. Experimentation with various blend modes is key to discovering the most suitable effect for your specific image and desired outcome.

Crafting Vintage Paper Textures from Scratch
Beyond using pre-made assets, Photoshop empowers you to create your own unique textures. A classic example is crafting a vintage paper texture. Start by creating a new PSD file and defining your preferred dimensions.
To establish the base for your vintage paper, you'll use the "Fill" command. Navigate to Edit › Fill. Within the Fill dialog box, select the "Use" option and choose "Color." When the color picker appears, select a yellowish or brownish hue that evokes the look of aged paper.
Next, to add depth and variation, create a new layer by clicking the New Layer icon in the Layers panel. With this new layer active, you can begin to introduce textural elements. One effective method is to apply filters. Choose a filter from the top menu bar, such as Filter › Noise › Add Noise. Adjust the sliders to control the amount of grain, giving your paper texture a more realistic feel.
To further refine the appearance and simulate the subtle variations in tone found in aged paper, you can apply a gradient effect. Select your layer, then click the icon to create a new fill or adjustment layer, and choose "Gradient." This allows you to add subtle shifts in color and luminosity, enhancing the vintage aesthetic. There are countless ways to achieve the look of paper; the key is to experiment with different filters, adjustments, and layer combinations.
How to Create Realistic Printed Type in Adobe Photoshop
Advanced Texture Application: Leveraging Selections and Masks
For more intricate control over how textures are applied, especially when integrating them with subjects within an image, understanding selections and layer masks is crucial. This technique is particularly useful when you want a texture to interact with the lighting of your scene.
A prerequisite for this method is shooting your image with a gray background. Interesting lighting is also paramount; a flatly lit subject will likely result in a less engaging image. Aim for dramatic lighting that creates highlights and shadows, as this will interact beautifully with the texture.
The process begins with making a quick, rough selection around your subject. The Magic Wand tool is often suitable for this, with a tolerance typically set around 10-13. This tolerance value determines how similar in tone and color a pixel can be to the selected pixel. A lower tolerance of 13 means Photoshop will select pixels that are the same color, plus or minus 13 shades darker or lighter. You can adjust this tolerance as needed, but a lower setting often offers easier control.
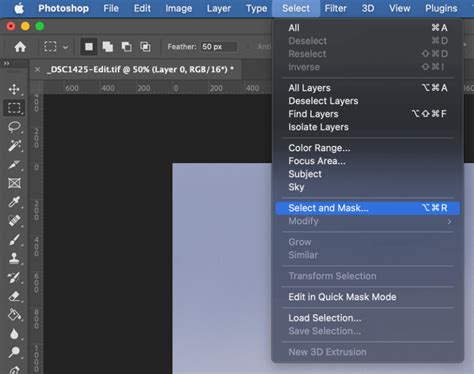
Once your selection is made, it’s essential to save it for later use. Go to "Select" in the top bar and choose "Save Selection." In the dialog box, give your selection a descriptive name, such as "Subject Mask." After saving, press CTRL+D (or Cmd+D on Mac) to deselect.
Next, open your chosen texture image in Photoshop. To apply the saved selection to this texture, go back to the "Select" menu and choose "Load Selection." In the Load Selection box, select your saved mask from the channel drop-down menu. This action will load the selection, isolating your subject area on the texture layer.
Initially, the masked texture might appear rough, and the texture and subject may not blend seamlessly. This is where the magic of blending modes, specifically "Soft Light" or "Overlay," comes into play. Applying the "Soft Light" blend mode to the texture layer, when aligned with your loaded selection, will cause the texture to blend with the lighting on the gray background. It will even integrate with the light on your model layer, creating a cohesive and natural look. The masking around the subject will also appear significantly improved, though minor cleanup with a brush tool might still be necessary.
If you find the "Soft Light" blend mode too subtle, the "Overlay" blend mode can be used for a more contrasty effect. This technique is also effective for blending the finer details of a subject, such as hair. To refine the edges, select the brush tool, set it to white with a very soft setting and a flow of around 15-25%, and gently brush over the areas that need blending.
Exploring the Power of Filters for Texture Creation
Photoshop filters are often underestimated, yet they are incredibly powerful tools for generating unique and complex textures. Instead of viewing them as mere gimmicks, embrace them as essential components of your texturing workflow.
One fundamental technique is to apply multiple filters in sequence. You can achieve this by going to Filter › Filter Gallery, which allows you to preview how various filters interact. For example, applying the "Reticulation" filter followed by the "Craquelure" filter can create a much more interesting and nuanced texture than either filter would produce on its own.
The order in which you apply filters is crucial, as they operate by manipulating the pixels on a layer. A common workflow for creating a simple texture involves starting with a blank canvas, applying the "Add Noise" filter to introduce randomness, and then following up with a filter like "Emboss" (Filter › Stylize › Emboss) to create depth and form. Experimenting with different filter combinations will allow you to predict their interactions and achieve specific textural outcomes.
Some filters are particularly effective when applied multiple times. For instance, the "Spherize" filter (Filter › Distort › Spherize) might produce only a mild effect on the first application, but applying it a second time can yield a more pronounced and believable spherical distortion.
For non-destructive editing, a best practice is to convert your layer to a Smart Object before applying filters. This enables "Smart Filters," which can be re-edited at any time, offering immense flexibility.
Filters That Naturally Tile
Creating seamless, tileable textures can be a time-consuming process. However, certain filters, such as "Clouds" and "Noise," possess an inherent ability to tile when your document dimensions are set to powers of 2 (e.g., 256x256, 512x512, 1024x1024 pixels). Starting with one of these filters as a base and building upon it can significantly expedite the creation of complex, tileable textures.
For example, a wood grain texture can be initiated with the "Clouds" filter applied to a 1024x1024 pixel document. After applying the "Clouds" filter (Filter › Render › Clouds), you can adjust the image dimensions without compromising its tileability. Subsequently, applying the "Posterize" effect (Image › Adjustment › Posterize) can break the texture into distinct gray shades with sharper edges. Following this with the "Find Edges" filter (Filter › Stylize › Find Edges) will isolate these edges, forming the initial pattern of wood grain.
Harnessing Layer Styles for Textured Effects
Layer styles provide a sophisticated method for adding texture and embellishment to your layers. Each setting within the Layer Styles panel offers unique possibilities for manipulating the appearance of your content.
Advanced Blending and "Blend If" Options
A powerful, yet often overlooked, feature within the Layer Styles panel is the "Advanced Blending" section, particularly the "Blend If" sliders. These sliders offer granular control over how a layer interacts with the layers beneath it, enabling the creation of complex blending effects with minimal effort.
The "Blend If" sliders allow you to define the range of tones in the underlying layers that will be affected by the current layer’s style. For instance, when creating a glossy texture on a painted surface, the "Blend If" sliders can be used to make the paint appear to have a sheen by controlling where highlights and shadows are rendered.
To utilize these sliders effectively, you can adjust them by holding down the Option (Mac) or Alt (Windows) key. This action separates the sliders, creating a smoother transition and a more refined blend.
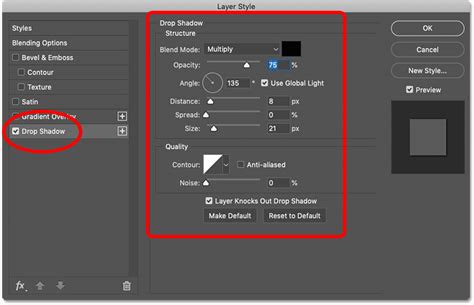
Duplicating Layer Styles for Depth
For more intricate effects, you can apply the same layer style multiple times to a single layer, each with different settings. This technique, especially when combined with Smart Objects, allows for complex textural depth. For instance, creating a realistic liquid effect for a wine bottle might involve applying "Inner Shadow" and "Gradient Overlay" styles twice, each with unique parameters, to achieve the desired dimensionality and light interaction.
Texturing with Brushes: Manual Application and Custom Shapes
Brushes offer a direct and intuitive way to apply textures manually. While proficiency in digital painting can enhance this process, it's not a prerequisite for effective brush-based texturing.
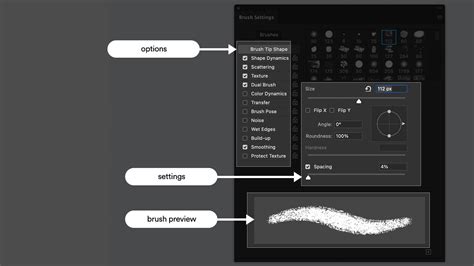
Mastering the Brushes Panel
The Brushes panel (Window › Brush) is a treasure trove of customization options that extend far beyond basic size and hardness adjustments. Fine-tuning settings like "Shape Dynamics" and "Scattering" can introduce randomness and natural variation to your brush strokes, making them appear more organic.
For example, creating realistic highlights on a sketched object can be achieved by adjusting these brush settings. Modifying the size and dynamics allows for a variety of fragmented and natural-looking strokes that mimic the imperfections of real-world highlights. The Brushes panel also includes a live preview, enabling you to test and refine your brush settings in real-time.
Custom Brush Shapes for Unique Textures
When standard brushes don't suffice, creating custom brush shapes (Edit › Define Brush Preset) opens up a world of possibilities. These custom brushes don't need to be complex; simple shapes, when combined with the advanced settings in the Brushes panel, can produce highly effective and natural-looking textures.
Consider the example of creating scratches on a wooden surface. You can draw a simple scratch shape, define it as a brush preset, and then use the "Shape Dynamics" and "Scattering" settings to distribute these scratches realistically across your canvas.
Painting with Layer Styles Using Brushes
A particularly innovative technique combines the Brush tool with layer styles to "paint" with texture. This involves creating a new layer, applying a layer style (such as "Bevel and Emboss"), and then setting the layer's "Fill" opacity to 0%. This hides the actual brush strokes but retains the effect of the layer style. When you then paint on this layer, you are essentially applying the layer style's effect in real-time, allowing you to create textured details like dents or imperfections directly onto your artwork.
This method works best with brushes that have inherent variation, such as custom brushes or certain preset brushes like "Charcoal." Adjusting the "Shape Dynamics" and "Scattering" of these brushes will further enhance the textural quality of your painted effects.
How to Create Realistic Printed Type in Adobe Photoshop
Creating and Importing Your Own Textures
Beyond the in-built tools, you can create or find textures through various means. Whether through painting, drawing, photographing, or scanning, the approach you choose will depend on the desired outcome.
Scanning or Photographing Textures
Found objects, paper, fabric, or even natural elements can be transformed into digital textures. If you opt for scanning, ensure your scanner settings are optimized for resolution and color accuracy. When photographing, experiment with different angles and lighting to capture the most detail. Once you have your image, import it into Photoshop for further manipulation.
For instance, taking photographs at the beach can yield organic textures like water, sand, or rock. Similarly, photographing concrete or brickwork can provide gritty, non-organic textures. The resolution of your source image is important, especially if you intend to use the texture in larger projects.
Importing Textures into Photoshop
To import a texture into your Photoshop file, use the "File > Place Linked" command. This imports the image as a separate layer while keeping it linked to the original file, allowing for non-destructive edits. You can then resize, rotate, adjust opacity, and move the texture layer until it integrates seamlessly with your base image.
Digital Backgrounds, Overlays, and Textures: Expanding Creative Possibilities
Digital assets offer photographers and designers immense creative flexibility without the logistical challenges of physical backdrops. They allow for post-shoot adjustments to mood, color, and environment, adding elements like skies, light effects, painterly textures, or even complete environmental scenes that were not captured during the initial shoot.
Why Use Digital Assets?
The advantages of using digital backgrounds, overlays, and textures are numerous:
- Visual Interest: Create compelling visuals without investing in physical backdrops.
- Space and Location Flexibility: Ideal for small studios or on-location shoots where control is limited.
- Mood and Color Control: Alter color tones and atmosphere without the need for reshoots.
- Artistic Enhancement: Add painterly or fine art elements to portraits.
- Consistency: Maintain uniform results across multiple sessions, crucial for professional headshots.
These assets are particularly beneficial for photographers seeking a repeatable workflow that balances creativity with efficiency.
Integrating Digital Assets into Your Workflow
Organizing your digital assets before editing is key. Open your base image in Photoshop, then import your chosen digital background, overlay, or texture. You can add these assets by dragging and dropping them onto your base image, using "Edit > Paste" after copying, or employing "File > Place Embedded" to maintain full resolution. The imported asset will appear as a new layer above your base image.
Blending Digital Assets Naturally
Once placed, the next step is to blend the digital asset seamlessly with your image. Two primary methods are employed:
Adjusting Opacity and Using Layer Masks: Reducing the opacity of the background, overlay, or texture allows for subtle integration. For more precise control, add a layer mask to the digital asset. Using a soft brush, you can then remove the asset from specific areas like skin, clothing, or facial features. Layer masks are non-destructive, meaning adjustments can be refined or reversed at any time. To create a mask, ensure the digital background layer is active, then go to "Layer > Layer Mask > Reveal All" or click the layer mask icon at the bottom of the Layers panel. With the mask active, use a black brush to hide areas of the digital asset. If you make a mistake, switch to a white brush to reveal those areas again.
Changing the Blend Mode: Blend modes dictate how a layer interacts with the layers beneath it. Commonly used blend modes for digital backgrounds and textures include:
- Multiply: For darkening and adding depth.
- Screen: For lightening effects.
- Overlay: For increased contrast and richness.
- Soft Light: For subtle tonal blending.
Experimenting with blend modes is often the quickest way to find an effect that complements your image. Often, combining a blend mode with reduced opacity yields the most natural results.
Layering Multiple Assets
Digital backgrounds, overlays, and textures can be used independently or layered together for more complex effects. For instance, a digital background can establish the environment, a texture overlay can unify color and add depth, and a subtle light overlay can enhance the mood. These techniques are widely adopted in fine art portraiture, maternity photography, and painterly editing styles.
Knowing When to Use Each Tool
- Digital backgrounds are ideal for replacing or simulating environments.
- Texture overlays are best for adding depth, mood, or artistic character without fundamentally altering the scene.
- Light overlays (like light leaks or atmospheric effects) help enhance storytelling and visual flow.
Understanding the purpose of each tool ensures your edits remain intentional and professional.
Conclusion: Unleashing Creative Potential with Photoshop Textures
Digital backgrounds, overlays, and textures empower photographers and designers with creative freedom without sacrificing efficiency. By mastering simple placement, blending, and masking techniques, you can transform portraits, fine art images, and creative composites while maintaining full control over your visual style. These tools are not intended to replace fundamental photography skills but rather to extend the creative possibilities available after the shutter clicks, allowing for a richer and more expressive final image.
tags: #photoshop #background #texture