Adobe InDesign empowers designers to create sophisticated layouts, and a cornerstone of efficient workflow within the software is the effective management of linked files. Understanding how to link, embed, and update external assets is crucial for maintaining design integrity, optimizing file sizes, and ensuring seamless collaboration. This guide delves into the intricacies of file linking in InDesign, providing practical insights for users of all levels.
The Fundamental Difference: Linked vs. Embedded Files
At its core, the distinction between linked and embedded files in InDesign revolves around how the external asset is incorporated into your document and how changes to that asset are handled.
When you link a file, InDesign essentially creates a reference or a "pointer" to the original source file. This means the actual image, text document, or graphic remains in its original location on your computer or network. The InDesign document only stores a low-resolution preview for display purposes and information on where to find the full-resolution original. The primary advantage of linking is that it keeps your InDesign document size manageable, as it doesn't contain the full data of every placed asset. Furthermore, the updates you incorporate in the file available in your Illustrator document are reflected automatically in the source file for a linked file. This automatic update mechanism is a powerful feature for maintaining consistency across multiple projects or when working with assets that are frequently revised.
Conversely, when you embed a file, you are essentially copying and pasting its content directly into your InDesign document. The InDesign document then becomes self-sufficient, containing all the necessary data for the embedded asset. While this eliminates the risk of broken links if the original file is moved or deleted, it significantly increases the overall size of your InDesign project. There is no link between the file and the source file when you embed a file in an Illustrator document. Consequently, the Links panel does not notify you about any changes made in the original.
Navigating the Links Panel: Your Central Command Center
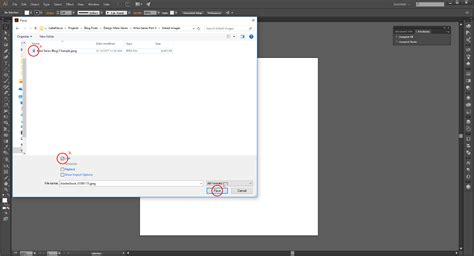
The Links panel is the indispensable tool for managing all external assets within your InDesign document. To access it, navigate to Window > Links. This panel lists every file that has been placed, whether linked or embedded, providing a comprehensive overview of your document's dependencies.
Understanding Link Status Icons
The Links panel employs a system of icons to provide at-a-glance information about the status of each linked file:
- Update Available (A): This icon signifies that the source file has been modified since it was last linked into your InDesign document. The original file has a more recent version than the version in your document. When this icon appears, it's a prompt to update the link to incorporate the latest changes.
- Missing Link (B): This critical icon indicates that InDesign can no longer locate the original source file at its designated path. This can occur if the file has been moved, renamed, or deleted from its original location. A missing file is up to date until its original is located. If your file shows Missing Link, it indicates that the source file is missing from its original location.
- Linked: This status confirms that the file is successfully linked and InDesign can locate its source.
- Modified Icon (C, D, E): Various modified icons might appear, generally indicating that the original file has been updated. The modified icon indicates that the source file has been modified.
Managing Links: Actions and Options
The Links panel offers a robust set of tools for managing your linked assets:
- Update Available (A): If your file shows Update Available, it indicates that the source file has been modified. You can choose
Update Linkfrom the Links panel menu or click the Update Link button. (Windows) or Option-click (Mac OS) the Update Link button. This action updates the selected link(s) with the modified graphic. - Missing Link (B): To resolve a missing link, you can use the
RelinkorRelink from CC Librariesoptions.Relinkallows you to navigate your computer to find the relocated source file.Relink from CC Librariesis used if the asset resides within your Creative Cloud Libraries. Link it back using Relink if it is on your computer or using Relink from CC Libraries if it is in Creative Cloud Libraries. - Go To Link (D): This command highlights the selected graphic on your InDesign page, allowing you to quickly locate it within your layout.
- Update Link (E): Similar to the "Update Available" prompt, this option manually updates the selected link with the latest version of the source file. Choose Update Link from the Links panel menu.
- Edit Original (F): This powerful feature allows you to open the linked file directly in its native application (e.g., Photoshop for an image, Illustrator for a vector graphic). After making your edits and saving the original file, InDesign will prompt you to update the link, reflecting your changes in the layout. To modify your original file in Photoshop, select Edit in Photoshop. You can modify them as necessary. In the Links panel, click the Edit Original button. Choose Edit > Edit Original.
- Show Link Info (B): This option provides detailed metadata about the selected link, including its file path, dimensions, color space, and more.
- Copy Info: In the Links panel menu, select Copy Info to copy the name of a linked file.
Sorting and Organizing the Links Panel
The Links panel can become quite extensive in complex documents. To maintain order, you can sort the listed files by various criteria:
- Sort by Name, Sort by Kind, Sort by Status, or Sort by Size: These options allow you to arrange the links alphabetically, by file type, by their current status (e.g., updated, missing), or by their file size. Select Sort by Name at the top of the Links panel to sort by that category. Click the same category again to reverse the order.
- Category Columns: You can customize the visible columns in the Links panel to display specific information, such as Name, Status, Page, or Size. Dragging column headers allows you to change the column width.
Preserving Links: The Importance of Relative Paths
One common pitfall when working with linked files is inadvertently breaking the links by moving the InDesign document without also moving its associated assets. InDesign offers a robust solution to this problem through the concept of relative pathing.
When you move an Illustrator document and its linked files from one folder or system to another keeping their relative location intact, the links won't break. For example, suppose you have your Illustrator document inside folder A, its linked files inside folder B, and both these folders inside parent folder C on your computer's local drive. If you move the entire parent folder C to a new location, InDesign will still be able to find the linked files because their relationship to the InDesign document remains consistent. This is a crucial workflow for collaboration and for archiving projects.
Embedding vs. Linking: When to Choose Which
The decision to link or embed a file depends on your specific project needs and workflow considerations:
Linking is generally preferred when:
- File Size Optimization: You want to keep your InDesign document size as small as possible, especially for documents with many high-resolution images. Linking avoids embedding large amounts of data.
- Asset Reusability: The same asset is used in multiple InDesign documents or across different projects. Linking ensures that a single master file is updated everywhere it's used.
- Collaboration: Working with a team where different individuals might be responsible for creating and updating source assets.
- Frequent Updates: The source file is expected to undergo frequent revisions. Linking allows for seamless updates without re-placing the file each time.
- Maintaining Original Resolution: You need the final output from the full resolution of the originals.
Embedding is considered when:
- Self-Sufficiency: Your document needs to be completely self-contained, with no external dependencies. This is useful for final delivery or when sending files to printers who may not have access to the original source files. Embedding the contents of a linked file suspends management operations for that link.
- Preventing Accidental Modification: You want to ensure that the embedded asset cannot be accidentally altered by someone else modifying the original source file.
- Simplicity for Small Projects: For very small projects with only a few assets, the overhead of managing links might outweigh the benefits, and embedding can simplify the process. However, this results in a larger document.
Embedding Specific Instances
While you can embed an entire linked file, InDesign also allows you to embed only a single instance of a linked graphic. To embed only one instance, select it on the page and choose Embed Link from the Links panel menu. This can be useful if you've made specific local modifications to one instance of a graphic and want to ensure it remains independent.
Advanced Linking Workflows: Content Collector and Placer
InDesign's Content Collector and Content Placer tools offer advanced capabilities for managing and replicating content across multiple pages and even across different documents. This feature is particularly useful for complex layouts or when designing for responsive experiences.
Using the Content Collector
The Content Collector tool (found in the Tools panel, or press B to toggle between Content Collector and Content Placer tool) allows you to gather various page items â including graphics, text frames, and even entire threaded stories â from your document. As content is collected, it is displayed in the Content Conveyor at the bottom of your screen.
Utilizing the Content Placer
The Content Placer tool works in conjunction with the Content Conveyor. Once items are collected, you can use the Content Placer to place them onto other pages or into different InDesign documents. Crucially, when using the Content Placer, you have the option to Create Link. Enabling this option ensures that the placed item remains linked to its original location, allowing for centralized updates.
Style Mapping for Consistency
When placing linked content, maintaining consistent styling can be a challenge, especially when transferring content between documents with different style definitions. The Content Collector and Placer tools offer style mapping capabilities:
- Map Styles: This feature allows you to map paragraph, character, table, or cell styles between the original and placed items. By default, style names are used for mapping.
- Edit Custom Style Mapping: For more granular control, you can define custom style mapping. This is incredibly useful when you need to apply different font families or styling conventions for different output mediums (e.g., sans-serif for digital, serif for print). Select a source document and Style type. Press Alt (Windows) or Option (Mac OS) to change the Cancel button to Reset. The mapped styles are automatically applied to the linked content, instead of the original styles applied to the parent.
Collecting Threaded Frames
A powerful option within the Content Collector is to Collect All Threaded Frames. When enabled, the story and all associated frames are collected as a single unit, preserving the flow of text across multiple frames.
Troubleshooting Common Linking Issues
Despite the robust nature of InDesign's linking features, issues can arise. Understanding common problems and their solutions is key to a smooth workflow.
Identifying Missing or Outdated Links
When you open a document, InDesign will alert you if it encounters any missing or out-of-date links. These are typically flagged with icons in the Links panel. If the Opening Document options are selected, InDesign will attempt to resolve missing links automatically if the "Automatically check for missing links" option is enabled.
- Missing File Icons: A question mark (?) icon usually indicates a missing file.
- Modified Link Icons: An exclamation mark (!) icon often signifies that the link is out-of-date and requires updating.
Relinking Files Efficiently
When faced with missing links, the Relink command is your primary tool.
- Select the missing link in the Links panel.
- Choose
Relinkfrom the Links panel menu. - Navigate to the correct location of the original file on your computer.
- Click
Open.
InDesign offers a "Relink Preserved Dimensions" option in the File Handling preferences, which attempts to maintain the original scaling and positioning of the linked item.
Updating Multiple Links
If you have multiple links marked with the modified-link icon, you can update them all simultaneously. Select the desired links in the Links panel and choose Update Link from the Links panel menu.
The "Edit in Place" Operation
If a selected link is currently in an "edit in place" operation (meaning it's open for editing in its original application), the "Embed Link" option will not be enabled. This prevents accidental data loss or corruption during an active editing session.
Beyond Basic Linking: Advanced Considerations
OPI Links
InDesign supports OPI (Open Prepress Interface) links. These are typically used in high-end print workflows where low-resolution proxies are used during the design phase, and the high-resolution originals are substituted at the printing stage. OPI links appear in the Links panel and allow you to display the incoming file in its actual dimensions or as a proxy.
Replacing Images Based on File Extensions
For workflows involving automated image processing or batch updates, InDesign can be configured to replace images based on file extensions. This is particularly useful when working with dynamic content or when managing large libraries of assets.
Selecting All Linked Graphics
To select all instances of a linked graphic on the artboard, you can use the Select All command after selecting the graphic. This is helpful for applying global changes or for quickly identifying all occurrences of a particular asset.
Conclusion: The Power of Managed Links
Mastering file linking in Adobe InDesign is not just about placing images; it's about adopting a systematic approach to asset management that enhances efficiency, reduces errors, and streamlines collaborative workflows. By understanding the nuances between linking and embedding, leveraging the power of the Links panel, and exploring advanced tools like the Content Collector, designers can unlock a new level of control and flexibility in their creative process. The ability to manage multiple versions of content and ensure that updates are reflected seamlessly across a project is fundamental to producing professional and polished designs.